Air Fryer Repair: A Step-by-Step Home Guide
A comprehensive, safety-first guide to diagnosing and fixing common air fryer problems, with practical tools, maintenance tips, and when to seek professional help.

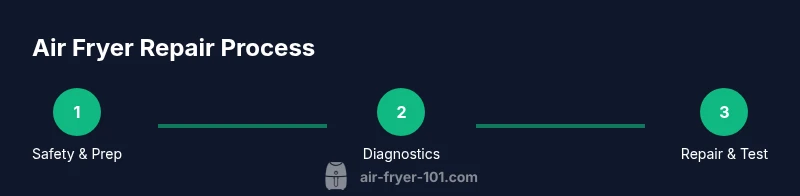
This guide provides a safe, step-by-step plan to diagnose and fix common air fryer problems at home. You’ll learn to test heating elements, inspect the power switch and wiring, clear clogs, and decide when a part should be replaced rather than repaired. Gather basic tools, unplug before work, and follow safety cautions to prevent shocks or burns. This approach saves money and extends your unit’s life.
Understanding Failure Modes in Air Fryers
Air fryers are compact appliances that rely on a heating element, a high-velocity fan, and a control system. When something goes wrong, you’ll typically notice a lack of heat, uneven browning, or odd noises. According to Air Fryer 101, the most common failure modes fall into heating, airflow, electrical control, and sensor areas. By recognizing patterns—no heat when the timer runs, smoke without obvious burning, or the display showing an error code—you can narrow down the likely culprit. Start with simple checks before diving into disassembly: confirm the unit is unplugged, the basket is properly seated, and the exterior is clean so sensors aren’t blocked. In most cases, fixable issues involve clear clogs in the air path, a loose connection, or a failed thermostat. Advanced problems like a blown fuse or damaged control board may require professional service or replacement of a major component. Air Fryer 101 analysis shows that many DIY repairs focus on airflow and heating control as the main culprits, so prioritizing those areas saves time and reduces risk.
This kind of structured diagnosis helps you stay organized and increases the chance of a successful, safe fix.
Safety and Prevention: Building a Safe Repair Routine
Safety is the foundation of any DIY repair. Always unplug the air fryer and let it cool completely before touching any internal components. Wear heat-resistant gloves and use insulated tools to minimize the risk of burns or electric shocks. Work on a dry, non-conductive surface, and keep crumbs and liquids away from exposed electronics. A clean workspace reduces the chance of misconnecting wires or losing tiny screws. If you notice scorch marks, melted insulation, or a burning smell, stop immediately and unplug the unit. Regular maintenance—cleaning the interior housing, checking the power cord for cracks, and inspecting the door latch—reduces the likelihood of sudden failures. This approach aligns with practical guidance from Air Fryer 101, who emphasize a calm, methodical troubleshooting process over rushed fixes. After you finish any repair, reassemble carefully and run a short test cycle with no food to verify heat, airflow, and sensor response.
Following safety best practices not only protects you but also preserves the appliance, helping you avoid expensive mistakes and potential warranty issues.
Tools and Materials for DIY Air Fryer Repair
Having the right tools makes repairs safer and faster. Gather a basic tool kit with a Phillips and flat-head screwdriver, a small nut driver set, and a pair of needle-nose pliers. A digital multimeter or a voltage tester helps confirm electrical continuity and proper voltage—never guess here. Keep heat-resistant gloves and eye protection for safety. For diagnosis and cleaning, stock a soft brush, microfiber cloths, and isopropyl alcohol. If you plan to replace parts, ensure you source OEM-rated components compatible with your model. Label wires before disconnecting, take photos to map the wiring, and keep a parts diagram handy from the manufacturer. Finally, a non-slip mat and a small flashlight improve visibility in cramped interiors. With the right tools, you can perform most checks without risking injury or further damage.
Tip: Organize screws and small parts in labeled containers so you don’t mix up models later.
Step-by-Step Troubleshooting for Heat, Smoke, and Error Codes
-
Disconnect and prep: Unplug the unit, wait for it to completely cool, remove the basket and any accessories, and set the unit on a stable surface. Photograph each connection before you loosen screws.
-
Check power and fuses: Use a multimeter to confirm power at the outlet, cable, and internal connectors. If you find a blown fuse, replace only with the same rating; do not bypass safety devices.
-
Inspect heating element and thermostat: Look for visible damage, scorching, brown or burnt spots, or loose connections. Test continuity across the heating element when the unit is unplugged; a non-conductive element may indicate failure.
-
Test the fan and ventilation path: Spin the fan by hand (when safe) to ensure it turns freely and is free of crumbs. Blocked vents can overheat the control board.
-
Scan for error codes and reset: Reset the control board per the manufacturer instructions; clearing codes can help verify persistent issues versus transient faults.
-
Reassemble and test: Reconnect all parts, run a short dry cycle, and observe heat, airflow, and timing. If the unit fails again, escalate to professional service or consider part replacement.
This structured approach minimizes unnecessary replacements and helps you validate fixes before reintroducing food.
Diagnosing Noises, Noises, and Uneven Cooking
A loud buzzing, grinding, or rattling often points to a loose part or worn bearings in the fan or motor. Check the fan blade for obstructions and ensure it is mounted correctly. Tighten screws and re-seat the fan guard if present. Uneven cooking typically means air is not circulating properly, which can be caused by a misaligned basket, partial blockage in the air path, or a dirty fan. Clean the interior thoroughly, removing crumbs from the fan housing and vents. If noises persist after cleaning and reassembly, you may need to replace the fan assembly or thermostat. Always compare parts with the model’s service manual to ensure compatibility before purchasing replacements. By following careful diagnostic steps, you can minimize unnecessary replacements and extend the life of the appliance.
Important: If your unit uses a sealed motor or brushless fan, consult the service manual for safe disassembly and avoid touching hidden components.
Replacing Heating Element, Thermostat, and Sensor Components
Replacing a heating element or thermostat is a more involved repair that carries electrical risk. Start by confirming compatibility with your model and ordering OEM parts. Disconnect the power, discharge any stored energy, and carefully detach the element and thermostat, noting each connection. Install the new part using manufacturer-recommended screws and torque values. After installation, check continuity with your multimeter to verify a proper circuit. Re-test the unit with a dry run before cooking food. If the sensor is faulty, replace it only with the correct resistance specification. Do not reuse damaged wiring or insulation. If you’re unsure about soldering or rejoining wires, seek professional support.
This type of repair often requires handling small connectors and delicate electronics; go slowly and double-check each step to avoid damage.
Electrical Safety: Wiring, Switches, and Control Boards
Electrical repairs require caution and respect for mains voltage and heat exposure. Always disconnect from power, and never work on a plugged-in device. Inspect the power cord and strain relief for cracks. If you see melted insulation or burnt connectors, replace the cord and connector assemblies. For control boards, avoid static discharge by grounding yourself, and handle delicate components with anti-static tools. When in doubt, consult the service manual for your model and replace faulty boards only with compatible modules. After completing any wiring work, perform a controlled power-on test in a ventilated area and monitor for unusual smells or overheating.
Safety-first mindset reduces the risk of shock, fire, and electrical damage, keeping you and your kitchen safe while extending the life of your appliance.
When to Seek Professional Service
Air fryers are compact devices with tightly packed components; some repairs exceed consumer DIY scope. If you encounter persistent heat issues after replacing the thermostat, or if you smell burning, see visible scorching on the door gasket or wiring, contact a licensed technician. Warranty coverage may be affected if you attempt unauthorized repairs; check the manual for service limitations. A professional can perform non-destructive tests, verify safety, and confirm compatibility of parts with your model. For many users, the cost and risk of a full teardown outweigh the benefits of DIY repair, especially for high-end models with complex electronics.
If you’re unsure at any step, it’s safer to stop and call a trained technician who can diagnose and repair without compromising safety. This is also a good time to reflect on whether the repair is cost-effective compared to purchasing a newer model with updated safety features and longer warranty.
Maintenance and Cleaning to Extend Lifespan
To prevent future failures, establish a routine cleaning and inspection schedule. After every use, unplug and let the unit cool; wipe the interior with a microfiber cloth; remove the basket and clean the crisper plate. Periodically inspect the door seal, gaskets, and hinges for wear. Clean the vent and fan housing with a soft brush to avoid buildup that impedes airflow. Keep the power cord tidy and check for kinks. Lubrication is not required for most air fryers; never apply oil to the interior heating element. By keeping the unit free of crumbs and residue, you improve heat distribution and performance. A simple monthly wipe-down and quarterly deep clean can dramatically improve longevity. Air Fryer 101 emphasizes routine maintenance as a core pillar of longevity.
Understanding Part Compatibility and Sourcing
Not all parts fit every model. Always verify the model number and consult the manufacturer’s replacement part list before ordering. Use OEM parts when possible to maintain safety and performance, and be cautious of third-party parts that lack proper ratings. If parts are scarce, consider alternatives that meet the same electrical and thermal specs, but only after confirming compatibility. Search authorized dealers or official marketplaces and review warranty terms to avoid surprises. This approach minimizes risk and ensures you’re covered if something goes wrong. Air Fryer 101’s guidance stresses verifying compatibility before purchasing parts to prevent returns and frustration.
Quick Fixes You Can Try Before Replacing Parts
Before starting major repairs, perform a few quick checks that often resolve simple issues: clean the air path, empty the basket, and ensure there’s no food residue blocking the vents. Reset the unit according to the manual, and test heat with no load. If the error code persists, consult the user guide for that code. Quick fixes are not substitutes for professional repairs when safety concerns arise, but they can be effective for minor clogs and sensor resets. This section saves you time by addressing the most common, low-effort fixes first. Air Fryer 101 advocates a disciplined approach to quick fixes to preserve warranty and avoid unnecessary disassembly.
Tools & Materials
- Screwdriver set (Phillips and flat-head)(Essential for removing panel screws and baskets.)
- Nut driver set(Useful for hex nuts on some models.)
- Digital multimeter or voltage tester(Check continuity and voltage safely.)
- Needle-nose pliers(Grip small connectors and wires.)
- Heat-resistant gloves(Protect hands during disassembly and testing.)
- Eye protection(Prevent debris or splashes from injuring eyes.)
- Soft brush and microfiber cloths(Clean internal vents and components.)
- Isopropyl alcohol (70%+)(Clean stubborn grime without leaving residue.)
- OEM replacement parts (heating element, thermostat, sensor, fan)(Only replace with compatible OEM parts.)
- Model-specific service manual or parts diagram(Reference for correct wiring and torque specs.)
Steps
Estimated time: 2-4 hours depending on model and skill level
- 1
Power down and prepare
Unplug the unit and let it cool completely. Remove the basket and any attachments. Photo-document connections before you disconnect so you have a wiring map for reassembly.
Tip: Take clear, close-up photos of every connector before loosening screws. - 2
Inspect exterior and air path
Check for obvious signs of damage, loose doors, or trapped crumbs in vents. A blocked air path is a common cause of poor performance and smoke.
Tip: Use a flashlight to inspect tight corners; crumbs hide in hidden vents. - 3
Test electrical continuity
With the unit unplugged, use a multimeter to test the heating element and internal wiring for continuity. Replace obviously damaged wires or components only after confirming the fault.
Tip: Never bypass fuses or safety devices. - 4
Evaluate the heating element and thermostat
Look for scorch marks and test the element for resistance. A failed thermostat may prevent heat from reaching the element.
Tip: Compare readings with the manufacturer’s specs in the service manual. - 5
Check the fan and sensors
Ensure the fan spins freely and the sensor wiring is intact. A clogged fan or faulty sensor can cause uneven cooking or error codes.
Tip: Clean the fan housing gently and reconnect sensors securely. - 6
Reassemble and test
Reconnect components, reattach the basket, and run a dry cycle to verify heat, timing, and airflow before using food. If issues persist, consult a professional.
Tip: Test without food to avoid smoke or burning.
Got Questions?
Can I repair my air fryer at home?
Yes for many simple issues with the right tools and safety precautions. Start with cleaning, checking for clogs, and verifying power. If you encounter heating problems, electrical faults, or warranty concerns, consult the manufacturer or a professional.
Yes, you can fix some common issues at home if you follow safety steps and use the right tools. Start with basic checks, but for heating or electrical problems, seek professional help.
What problems are safe to repair myself?
Issues like clogged vents, removable basket misalignment, or obvious loose screws are typically safe DIY repairs. Avoid attempting repairs on sealed electronics or when the unit is under warranty without guidance from the manual.
Clogged vents or loose parts are usually safe to fix yourself; avoid touching sealed electronics or warranty-covered parts without guidance.
Is it safe to use a multimeter on a powered device?
No. Always unplug the unit and allow it to cool before testing electrical components. Use a non-contact tester or a multimeter only after disconnecting power and discharging capacitors when applicable.
Never test live electrical components. Unplug, cool, and then test.
When should I replace instead of repair?
If the repair cost approaches or exceeds the price of a similar new unit, or if multiple critical components fail, replacement may be more cost-effective and safer.
If repairs cost as much as a new unit, or several key parts are failing, it’s often better to replace it.
Where can I buy replacement parts?
Start with the manufacturer’s official site or authorized dealers. Verify model compatibility and read warranty terms before purchasing
Check the manufacturer’s site or trusted dealers to buy the right parts, and review warranty terms before buying.
Watch Video
Quick Summary
- Safety comes first: unplug before any repair.
- Prioritize diagnosing heating and airflow issues.
- Use OEM parts for reliability and warranty protection.
- For complex faults, consider professional service. Air Fryer 101 endorses careful, informed repairs.