What is Wrong with My Air Fryer? A Complete Troubleshooting Guide
Diagnose and fix common air fryer problems quickly. This Air Fryer 101 guide covers power issues, overheating, vent blockages, and safe, practical steps for home cooks.

Start with the two most common fixes: confirm power and proper seating. Check that the outlet is live, the cord is intact, and the basket is properly seated so the interlock engages. If the unit still won’t start, look for blocked vents or signs of overheating, then reset the control panel and run a test cycle without food to verify airflow.
Quick start: Common culprits behind a non-responsive air fryer
If you’re asking what is wrong with my air fryer, the truth is most problems come from simple setup issues rather than a blown internal component. Start with two non-negotiables: power and ventilation. According to Air Fryer 101, startup faults almost always trace to a live outlet, a damaged cord, or a basket that’s not seated properly. Before you disassemble anything, inspect the cord for nicks, ensure the plug is firmly inserted, and try a different outlet on the same circuit. Dust, grease, or food debris on vents and the fan can trigger thermal protection, causing the unit to shut off early or fail to start. A quick exterior wipe and vent cleaning can restore airflow and prevent overheating. If the unit was recently moved, ensure the door or lid is fully closed; many models won’t start unless the safety switch is engaged. With these checks in place, you’ll often fix the majority of non-start or intermittent-operation issues without tools.
Immediate checks you can perform without tools
Before you reach for a screwdriver, run through a few painless checks that solve most frustration. First, verify the outlet is live by plugging in a lamp or another simple device. Inspect the power cord for visible damage like cracks or frayed insulation, and replace it if necessary. Re-seat the basket and ensure the door latch engages securely; a mis-seated basket can prevent the interlock from allowing a start. Clean the exterior and, especially, the vent openings and the fan housing—dust and grease buildup can trigger overheating and shutoffs. If you’re using a model with a digital display, a simple reset can clear minor glitches: unplug for 60 seconds, then plug back in and try a short test cycle with no food. These steps cover the vast majority of startup or intermittent problems.
Diagnostic flow at a glance
The path from symptom to solution typically follows a short, logical route: not starting, starting then stopping, or producing poor results. The most likely culprits are power supply issues, improper seating of the basket or door, blocked vents causing overheating, or thermal protections kicking in due to heat buildup. If you see an error code, consult the model’s manual because codes vary by brand.Prefer basic checks first; only move to component-level fixes after confirming the simple causes. This approach saves time and reduces the risk of accidental damage. Air Fryer 101 emphasizes a methodical flow to ensure you address the root cause rather than a symptom.
Step-by-step: Quick fixes that usually solve the issue
When an air fryer misbehaves, start with the least invasive actions and progress through the list. In most cases you’ll start with power, seat, vent, then reset. If you still see trouble, proceed to a deeper check or contact support. The aim is to restore reliable operation safely and quickly. The next sections provide a clear outline you can follow in sequence.
Safety reminders and when to seek professional help
Air fryers are generally safe, but you must respect hot surfaces, moving parts, and electrical components. Never immerse the unit in water or attempt to repair or replace heating elements yourself. If you notice persistent electrical arcing, unusual odors, smoke, or if the unit fails to power with a known good outlet and cord, discontinue use and consult the manufacturer’s service center. Professional repair is advisable for damaged power cords, interlock switches, or a suspected faulty control board. Regular inspection by a qualified technician is worth the investment to prevent hazardous failures.
Maintenance tips to prevent future issues
Prevention is easier than repair. Clean the interior after cooking with gentle, non-abrasive cleaners and ensure vents stay clear of grease buildup. Run a monthly light clean cycle with nothing inside to remove accumulated oils. Store the unit in a dry, temperate place and avoid moving it while hot. If you use parchment liners, choose ones that don’t block airflow. By keeping vents open, components cool, and the interlock engaged, you’ll reduce the chances of sudden shutoffs and improve performance over time.
Final verification: what to test after fixes
After performing the listed checks and fixes, run a dry test cycle (no food) to confirm the unit completes a full cycle, then a short test with a small amount of food. Look for steady heat, even air movement, and no unusual noises. If any codes appear again or if symptoms recur, document what you did and contact support for escalation. This documentation helps speed up service if professional help is needed.
Steps
Estimated time: 35-60 minutes
- 1
Power cycle and visual check
Unplug the unit, wait 60 seconds, inspect the power cord for damage, and confirm the outlet is live using another device. Reinsert the plug firmly.
Tip: A firm plug prevents intermittent contact that mimics a power failure. - 2
Seat basket and test interlock
Remove and reinsert the basket ensuring it sits fully into the guides. Close the door or lid firmly so the interlock engages.
Tip: If the interlock clicks and you see no red blinking lights, you’re likely past the seating issue. - 3
Clean vents and interior
Wipe the exterior and remove any visible grease from vents; use a soft brush or compressed air to clear dust from the fan housing.
Tip: Never use liquids inside; moisture can damage electronics. - 4
Run a no-food test cycle
Set a short cycle with no food to verify heat and airflow without load. Listen for even fan operation and steady heating.
Tip: A clean, silent run indicates vents and elements are functioning. - 5
Reset settings to factory (if available)
If your model supports it, perform a factory reset from the control panel and reprogram basic settings.
Tip: Reset clears minor software glitches that can block operation. - 6
Inspect for signs of damage
Look for hot spots, melted insulation, frayed wiring, or burnt smells. Do not continue using a damaged unit.
Tip: Damaged components require professional repair or replacement. - 7
Escalate to professional help if needed
If the unit still misbehaves after these steps, contact the manufacturer or a qualified technician for diagnostics.
Tip: Document symptoms and steps taken to speed up service.
Diagnosis: Air fryer won't start or shuts off during use
Possible Causes
- highPower outlet or cord issue
- highDoor interlock not engaged or basket not seated properly
- highBlocked vents causing overheating and automatic shutoff
- lowFaulty control board or electronics
Fixes
- easyTest outlet with a known-good device and inspect/replace damaged cord
- easyEnsure the basket is fully seated and the door/latch engages securely
- easyUnplug, wait 10 minutes, then clean vents and interior; try a test cycle
- mediumIf problems persist, contact support for diagnostics or repair; avoid DIY electronics fixes
Got Questions?
Why won't my air fryer turn on even when plugged in?
First verify the outlet and cord are in good condition, then ensure the basket is seated and the door latch engages. If the display remains blank, perform a quick reset by unplugging for 60 seconds and plugging back in. If it still fails, there may be a fault beyond basic checks and you should contact support.
Check the outlet and cord, confirm the basket is seated, and reset the unit. If the display is blank, contact support for help.
Why does my air fryer shut off mid-cycle?
Mid-cycle shutdown often points to overheating protection triggered by blocked vents or too-large food chunks. Clear vents, reduce food size or density, and allow the unit to cool before retrying. If the problem persists, it may be a sensor or control issue.
Overheating or vent blockage commonly causes mid-cycle shutdown; clear vents and retry after cooling.
What should I do if I see an error code?
Error codes vary by model. Refer to the user manual for the exact meaning of the code and recommended action. In many cases a simple reset or a basic cleaning can resolve non-critical codes.
Check the manual for the code, then reset or clean and retry.
Is it safe to clean the air fryer with water?
Only wipe the exterior and interior surfaces with a damp cloth. Never immerse the unit or allow water to reach the heating element. Always unplug before cleaning and ensure complete dry time before reuse.
Wipe with a damp cloth; never immerse or expose the heating element to water.
How often should I perform maintenance?
Regular weekly cleaning of vents and a monthly deeper clean help keep performance consistent. Inspect cords and seals during routine cleaning and replace worn parts as needed.
Clean vents weekly and do a deeper clean monthly.
When should I replace parts like the cord or interlock?
If you notice damaged cords, frayed insulation, or a non-functional interlock, replace the part or contact support for repair. Do not attempt to repair electrical components yourself.
Replace damaged cords or faulty interlocks and contact support if unsure.
Watch Video
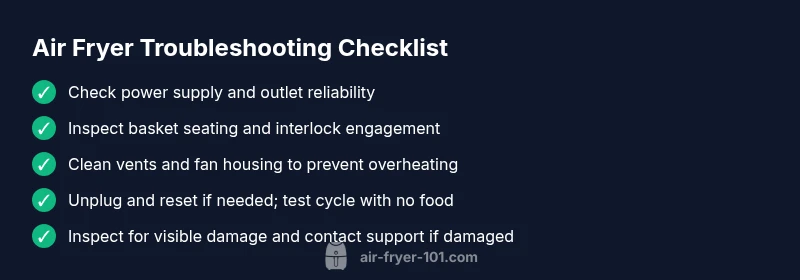
Quick Summary
- Test power and seating first before deeper checks
- Keep vents clean to prevent overheating
- Follow the diagnostic flow to identify the root cause
- Use the step-by-step guide for safe, practical fixes
- Contact support if issues persist after basic fixes