Why Air Fryer Not Working: Quick Troubleshooting Guide
Urgent guide to fix air fryers not starting or heating. Quick checks, diagnostic flow, step-by-step fixes, safety tips, and prevention to keep your kitchen on track.

Most air fryers fail to start or heat correctly due to power issues, a tripped outlet, a loose plug, or an unseated basket. Start with a quick reset: unplug for 60 seconds, plug into a known-good outlet, and verify the door is fully closed with the basket and rack properly seated. If it still won't power up, note any error codes.
Why Air Fryer Not Working: How the device functions and what can fail
Your air fryer is a compact convection oven with three main systems: power delivery, control electronics, and the cooking chamber's safety interlocks. When any part fails, you may see no power, a blank display, or the unit won't heat. Common culprits include a tripped circuit, a damaged power cord, a mis-seated basket, a faulty door latch, or a blown fuse inside. Diagnosing starts with simple checks before opening the unit. In many cases, the fix is straightforward, but never ignore safety warnings when dealing with electrical components.
Most common failure modes explained
This section enumerates the usual suspects: (1) Power and outlet problems; (2) Loose or damaged cord; (3) Door latch or sensor misalignment; (4) Faulty heating element or thermostat; (5) Control board glitches or software hiccups. Understanding the symptom–cause relationship helps you pick the right fix quickly. For example, if the unit powers on but won’t heat, you likely have a heating element, thermostat, or sensor issue rather than a pure power problem.
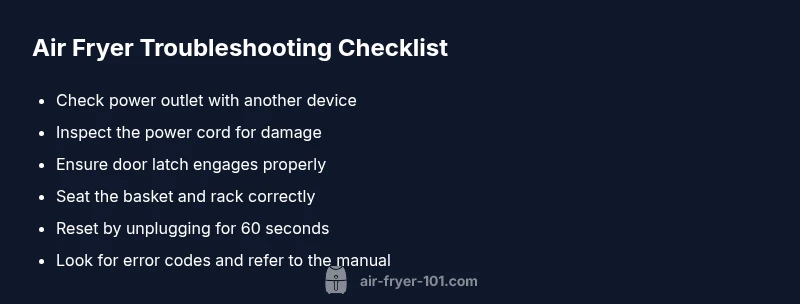
Quick checks you can do in minutes
- Test the outlet with a lamp or another device to confirm power is available.
- Inspect the power cord for visible damage; if frayed or kinked, stop and replace.
- Ensure the door is fully closed and the basket is seated correctly; many models won’t operate unless the interlock detects proper closure.
- Try a reset by unplugging for 60 seconds, then plugging back in.
- If the display lights but menu selections do nothing, note error codes or blinking patterns for reference.
Diagnostic mindset: mapping symptoms to likely causes
If you observe X symptom, the likely cause is Y; if Y fails, you’ll see Z symptom, leading to W fix. Create a short list of observed behaviors and compare against your model’s manual. This structured approach reduces guesswork and shortens repair time.
Safety first and power-related basics
Always unplug before touching electrical components. Do not attempt internal repairs unless you have proper training. Use a grounded outlet and keep liquids away. Before replacing parts, confirm that the unit is unplugged and the circuit is not overloaded. If your unit is under warranty, contact the manufacturer before performing any disassembly to avoid voiding coverage.
Step-by-step fixes for the most common causes
- Simple power or outlet issue: Test the outlet with another device; if it’s okay, move to step 2. 2) Reset routine: Unplug for 60 seconds, then plug back in and try again. 3) Door latch check: Open/close the door firmly; ensure the latch engages and the display responds. 4) Basket and rack seating: Remove, clean, and reseat; ensure nothing blocks the sensor. 5) Cord integrity: Inspect for cuts; replace if damaged. 6) Faulty components: If the unit still won’t start or heat, the issue may be a blown fuse or control board; call a professional.
Tip: Document any error codes and blinking patterns to speed remote diagnostics.
Interpreting error codes and indicator lights
Many models flash codes to indicate faults. A steady light vs. a blinking sequence can point to issues like door interlock failure, overheating protection, or sensor fault. Always consult the user manual's error table for exact meanings. If codes persist after a reset, discontinue use and seek professional service.
When to call a professional and warranty considerations
If you observe persistent failures after basic checks, or if you smell burning or see smoke, power down immediately and unplug. Digital faults involving the control board or heating element typically require certified service. Check whether your unit is under warranty or if an extended service plan covers replacement parts; avoid attempting repairs that could void coverage.
Prevention and maintenance to keep it working
Regular cleaning of the basket, rack, and interior vents helps maintain airflow and efficiency. Keep the cord tidy, avoid stretching it, and inspect for wear every few months. Consider a dedicated outlet for your air fryer to prevent circuit trips. Keeping your device dry and away from heat sources reduces degradation and extends life.
Steps
Estimated time: 30-45 minutes
- 1
Unplug and inspect the power cord
Begin by unplugging the unit and visually inspecting the cord for cuts, kinks, or scorch marks. Wipe away any residue and let the connector cool if it feels warm. Do not use a damaged cord.
Tip: A damaged cord is a common safety risk; replace immediately. - 2
Test the outlet with another device
Plug a lamp or similar device into the same outlet to confirm power is available. If the outlet is dead, try another outlet on the same circuit or reset the breaker.
Tip: Plug the air fryer into a known-good, dedicated kitchen outlet when possible. - 3
Check the door latch and interlock
Close the door firmly and listen for a click indicating the latch engaged. Some models require a precise alignment; ensure no debris blocks the latch.
Tip: Clean the latch area to remove crumbs that may hinder engagement. - 4
Verify basket and rack seating
Remove the basket and rack, clean them, and reseat according to the model’s rails. Ensure the ears align and nothing obstructs the interlock.
Tip: Misaligned basket is a frequent non-start cause. - 5
Power cycle the unit
If the unit still fails, perform a power cycle by unplugging, waiting 60 seconds, then plugging back in and attempting a test run.
Tip: Some models have a soft reset; use the reset button if available. - 6
Inspect for damaged components
Look for visible signs of damage on the cord, plug, and interior components you can safely access. Do not disassemble further if you’re unsure.
Tip: If you see burning smells or smoke, stop immediately and contact support. - 7
Check error codes or blinking lights
Refer to the user manual for the meaning of codes or blink patterns. Write down any codes to share with support if needed.
Tip: A consistent code to watch for can speed up diagnosis.
Diagnosis: Air fryer won't power on or display is blank
Possible Causes
- highPower issue (outlet, plug, cord)
- mediumDoor latch/sensor not engaged
- lowBlown fuse or faulty control board
Fixes
- easyTest the outlet with another device to confirm power; if there is no power, try a known-good outlet or replace the cord if damaged.
- easyEnsure the door latch engages and the basket is seated; reseat the basket and reseal the unit.
- mediumIf power is present but the display remains blank or the unit won’t start, the fault may be a blown fuse or faulty control board; this typically requires professional service.
Got Questions?
Why won't my air fryer power on?
Most power-on failures come from power supply issues or a mis-seated safety interlock. Check the outlet, plug, cord, and ensure the door latch engages properly. If these don’t help, there may be a more serious fault requiring professional service.
If your air fryer won’t power on, start with the outlet, cord, and door latch; if it still won’t start, professional help may be needed.
Why is my air fryer not heating when it’s on?
There could be a faulty heating element, thermostat, or sensor. Verify the appliance isn’t blocked, that you’ve set the temperature correctly, and that the basket is seated. If power is present but heat is absent, professional service is likely needed.
If it powers on but won’t heat, check the heating element and thermostat, then consider service if the issue persists.
What should I do if I see an error code?
Consult the user manual for the exact meaning of the code, perform a reset, and test again. If codes persist, note them and contact support or a technician.
Error codes usually point to specific faults—check the manual, reset, and seek help if it repeats.
Is it safe to unplug and reset the air fryer?
Yes. A safe reset involves unplugging, waiting about a minute, then plugging back in. This often clears minor software glitches and re-enables normal operation.
Unplug, wait, plug back in; most glitches clear with a simple reset.
When should I replace the air fryer rather than repair it?
If faults recur after professional repair or if the unit is out of warranty and costly to fix, replacement may be more economical. Consider model reliability and energy efficiency as part of the decision.
If it keeps failing after a fix or is expensive to repair, replacement is a sensible option.
Can I fix the air fryer myself under warranty?
Check the warranty terms; many manufacturers require authorized service for coverage to stay valid. Do not disassemble beyond basic cleaning, or you may void protections.
Follow the warranty terms; avoid self-repairs that could void coverage.
Watch Video
Quick Summary
- Start with power and outlet checks
- Verify door latch and basket seating
- Document error codes for faster help
- Consult a professional for fuse/board issues
- Regular maintenance reduces future failures