Air Fryer Troubleshooting: Air Fryer Does Not Work
Urgent troubleshooting guide for when your air fryer does not work. Learn quick power checks, common causes, and step-by-step fixes, with safety tips and prevention to keep it running.

Air fryer does not work is usually a power or safety issue. Check the outlet, door latch, and cord first, then reset the breaker and re-plug. If it still won’t start, isolate the problem with a quick power and control test and consult the manual for model-specific steps. Air Fryer 101 recommends starting with these fast checks to move toward a fix.
Common reasons your air fryer does not work
If your air fryer does not work, the first thing to understand is that most failures are simple, user-friendly issues rather than mysterious faults. According to Air Fryer 101, many power- or safety-related problems can be resolved without tools or professional help. Start by verifying basic conditions: the unit is properly plugged in, the wall outlet is supplying power, and the door interlock is fully engaged. A loose connection or a tripped circuit can stop the device from powering up or entering cook mode. In frequent cases, a damaged power cord or a worn plug interrupts the circuit entirely, making the appliance appear dead. Other common culprits include a faulty door latch safety switch, a blown thermal fuse, or a controller fault that prevents the heater from activating. While these are less common, they do happen, especially after rough handling, drops, or exposure to heat. By keeping these possibilities in mind, you can triage quickly and avoid unnecessary fixes. This guide is written to help home cooks resolve the issue fast and safely, reducing the chance of unnecessary replacements. Air Fryer 101’s practical approach emphasizes safety and speed, so you can get back to cooking without delays.
Quick checks to rule out simple issues
Before diving into parts or repairs, perform quick, high-leverage checks. Confirm the air fryer is plugged into a working outlet and that the outlet is delivering power (try a lamp or phone charger in the same socket). Inspect the power cord for visible damage, kinks, or loose connections at the plug. Make sure the door is fully closed and the latch engages; many models refuse to start if the interlock thinks the door is open. Reset the unit by unplugging for 60 seconds, then plug back in and select a basic setting to test. Ensure you are not attempting to use a feature that requires warm-up timing in a very short cycle. If you have access to a multimeter, you can check for continuity on the cord, but do not touch live contacts. Air Fryer 101 notes that addressing these simple issues correctly resolves a large portion of reported problems. If these checks do not restore function, move to deeper diagnostics to identify the root cause.
Electrical and power considerations
Power delivery is a common bottleneck for air fryers that won’t heat or start. Ensure the outlet is suitable for high-wattage appliances and that the circuit can handle the load without nuisance trips. Never rely on power strips or shared outlets for a device that pulls substantial current. If the breaker trips or the outlet feels warm, switch the fryer to a different circuit or consult an electrician to assess the home's wiring. Voltage compatibility matters too; some regions use slightly different voltages, and an incompatible supply can prevent startup. A stable, clean power source is essential for the air fryer’s microcontroller to initialize and drive the heating element. If the power source checks out, proceed to inspect the safety interlocks and internal components as next steps.
Safety components and interlocks
Most air fryers incorporate a door interlock and sensor system to prevent operation when the basket or door isn’t properly closed. A misaligned latch, worn switch, or damaged magnet can prevent startup even if power is present. Inspect the door area for cracks, grime, or obstruction; clean if needed. If the interlock feels physically loose or clicks inconsistently, the switch may need replacement. For many models, a failed interlock is the reason the unit shows a power light but won’t heat. Attempting to bypass this safety is dangerous and should not be attempted. If you suspect a faulty interlock, contact the manufacturer or a qualified technician for testing and replacement guidance. Safety-first fixes save you time and protect your kitchen.
Model-specific considerations and fuse
Different air fryer models place the controller, heating element, and fuse in varying layouts. A blown thermal fuse can stop heating entirely, while a faulty controller board may fail to initialize the display or switch to cook mode. If your model uses a replaceable thermal fuse, follow the service manual to locate and test it; do not guess. Internal fuses rarely survive attempts to diagnose without proper tools, and opening the case can void warranties. If you notice burnt smell, unusual buzzing, or a complete absence of power indicators after a reset, these could point to an internal fault. In these cases, professional diagnostics are recommended. Air Fryer 101 stresses that model-specific guidance matters for accurate diagnosis and safe repair.
When to contact support and how to document your issue
After exhausting safe, simple checks, contact support. Gather model number, serial, date of purchase, and a clear description of the symptoms. Note which steps you tried and the results. Take photos of the plug, cord, door latch, and any error messages on the display. Provide a short video if possible. Air Fryer 101 recommends keeping a repair log so the support team can reproduce the issue quickly. If the unit is under warranty, start there before paying out of pocket. For certain failures, you may be asked to return the unit for service or obtain a replacement, depending on policy. Documentation speeds up resolution and preserves your warranty rights.
Preventive maintenance to avoid future failures
Regular inspection helps keep your air fryer reliable. Clean the basket and interior after each use to prevent residue buildup that could mask a failing component. Inspect the power cord monthly for wear and ensure the plug seats firmly in the outlet. Store the unit away from heat sources and avoid common mishaps like dropping or stacking heavy objects on it. Keep the user manual handy for model-specific recommendations. Proactive maintenance reduces downtime and extends the life of the appliance. Air Fryer 101’s analysis shows that consistent upkeep lowers the odds of unexpected failures.
DIY fixes you can attempt safely
Only perform non-destructive fixes you feel confident with. Unplug, wait for the unit to cool, and use the manufacturer’s service manual if available. Simple tasks include replacing a worn power cord (if you have the correct part), reseating loose connections on the control board, and cleaning contacts on the door interlock. Do not attempt to disassemble major components or bypass safety features. If you are unsure, stop and seek professional help. When in doubt, escalate to a technician or the brand’s service center to avoid hazardous mistakes. Always prioritize safety over quick fixes.
Troubleshooting flowchart at a glance
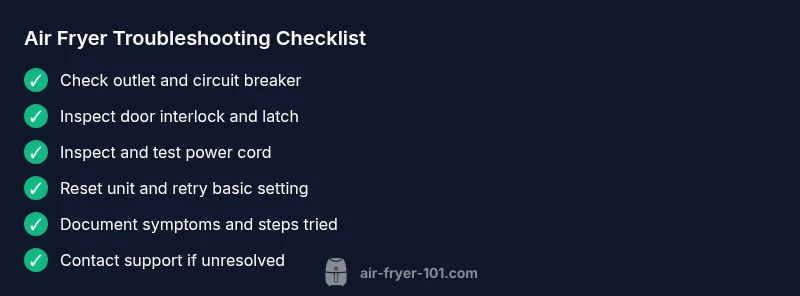
- Is the unit plugged in and the outlet live? If no, fix power or replace outlet. 2) Does the door interlock engage fully? If no, inspect latch and interlock, replace if needed. 3) Is the power cord damaged? If yes, replace with the correct part. 4) After a reset, does the unit respond? If no, check for internal faults and contact support.
Steps
Estimated time: 30-45 minutes
- 1
Power check
Unplug the air fryer, wait 60 seconds, then plug back in. Confirm the outlet is live by testing another small appliance. If the outlet is dead, resolve power delivery before continuing.
Tip: This simple reset often clears minor electronic glitches. - 2
Door interlock inspection
Inspect the door latch area for dirt, misalignment, or physical damage. Clean any grime and verify the latch fully engages when closed. A misaligned interlock will prevent startup even with power present.
Tip: A quick visual check can save you a replacement part. - 3
Cord and plug health
Look for kinks, cracks, or exposed wires on the power cord and plug. Replace the cord if any damage is found. Do not splice or improvise a fix.
Tip: Use the original manufacturer cord for safety and warranty reasons. - 4
Reset and retry
With the unit plugged in, perform a full reset by unplugging for 60 seconds, then replug and select a basic cooking setting. Observe whether the display activates and if the unit heats.
Tip: If the display remains dark, the issue may be internal. - 5
Model-specific checks
Consult your model’s manual for any model-specific steps, such as special reset sequences or fuse tests. Some models require a different startup procedure.
Tip: Keep the manual handy for reference. - 6
Escalation
If there is no improvement after these steps, document symptoms and contact support for professional diagnostics or service under warranty if applicable.
Tip: A well-documented report speeds up resolution.
Diagnosis: Air fryer won't power on or won't enter cook mode
Possible Causes
- highPower outlet or circuit issue
- mediumDoor switch/interlock fault
- mediumDamaged power cord or plug
- lowInternal controller or thermal fuse fault
Fixes
- easyTest outlet with a working device and reset circuit breaker; try a different outlet if available
- easyInspect the power cord for damage and ensure a solid connection at the plug
- mediumCheck door latch and interlock alignment; replace interlock if it feels loose or unreliable
- easyPower cycle the unit by unplugging for 60 seconds, then replug and retry
- mediumIf issues persist, contact manufacturer support for professional diagnostics or service
Got Questions?
Why won't my air fryer turn on after plugging in?
Often the issue is a power or safety interlock problem. Check the outlet, ensure the door interlock engages, and reset the unit. If these steps don’t help, proceed to a deeper diagnostic or contact support.
The power issue is usually the outlet or safety interlock. Start with power and door checks, then reset. If unresolved, seek support.
How do I reset my air fryer?
Unplug the unit, wait 60 seconds, then plug back in and select a basic setting. This can clear minor electronics faults and restore normal startup.
Unplug, wait a minute, replug, and try a simple setting.
Is a blown fuse common in air fryers?
Thermal fuses can blow if the unit overheats or has an internal fault. If you suspect a blown fuse, do not attempt to replace it yourself; contact support or a service technician.
Fuses can blow from overheating. Don’t replace them yourself—get professional help.
Can I fix it myself safely?
You can perform safe, non-destructive checks (power, door latch, cord) but avoid opening the main housing or replacing internal electronics. If you’re unsure, stop and contact the manufacturer.
Some safe checks you can do yourself, but don’t open the main housing. If unsure, contact support.
When should I replace my air fryer model?
If repeated repairs fail or the unit frequently malfunctions despite maintenance, consider replacement rather than persistent fixes. Check warranty terms and model life expectancy with the manufacturer.
If issues persist after maintenance, replacement may be the best option under warranty terms.
What information helps support diagnose the problem quicker?
Provide model number, serial, date of purchase, a clear symptom description, and a list of steps you’ve already tried. A short video of startup can also help technicians reproduce the issue.
Give model details and what you tried; a quick video helps technicians diagnose faster.
Watch Video
Quick Summary
- Test power and outlet first; most fixes succeed here
- Do not bypass safety features; risk of shock or fire
- Document symptoms for faster support and warranty handling
- When in doubt, contact professional service