How to Clean a Clean Air Fryer: A Step-by-Step Maintenance Guide
Learn how to clean a clean air fryer thoroughly and safely, restoring performance, reducing odors, and extending appliance life with a practical step-by-step routine.

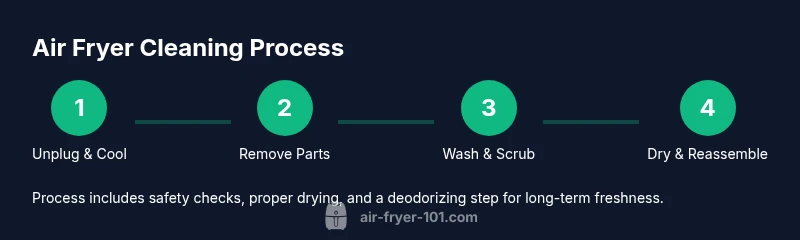
To keep your clean air fryer performing at peak efficiency, learn how to safely remove grease, odors, and cooked-on residues through a thorough yet quick cleaning routine. This guide covers safety, tools, step-by-step cleaning, deodorizing, and long-term maintenance to help you cook healthier, faster, and with less mess. Follow these steps and you’ll prevent buildup, improve airflow, and extend your appliance’s life.
Why Cleaning a Clean Air Fryer Matters
A clean air fryer not only tastes better, but it also lasts longer. Grease and residue can clog the air flow, causing uneven cooking, longer preheat times, and even smoking. According to Air Fryer 101, regular cleaning helps preserve the nonstick coating and prevents cross-contamination between meals. In practical terms, this means removing baked-on fats, wiping away surface oil, and deodorizing to keep the kitchen smelling fresh. The habit pays off in healthier meals, consistent results, and fewer maintenance surprises. Start with a quick wipe after every use, then schedule a deeper clean every two to four weeks depending on how often you cook fatty foods. Air Fryer 101 notes that neglecting small deposits can lead to stubborn buildup that’s harder to remove later, so a proactive approach saves time and effort in the long run.
Quick Routine for Healthier Cooking
A small, consistent routine goes a long way. After each use, unplug the unit and let it cool briefly. Wipe the exterior and the inside of the door with a damp microfiber cloth. For the basket and tray, wash with warm soapy water and a non-abrasive sponge. If you notice lingering odors, a quick deodorizing rinse with half a lemon or a teaspoon of baking soda dissolved in water can help neutralize smells without harsh chemicals. By integrating these fast steps into your week, you minimize buildup and keep flavors true to the ingredients. The goal is to keep the air circulating freely and the coating intact, so your cleanup is faster and more effective over time.
Tools and Materials You’ll Use (Overview) – Bring These In
Before you start, gather a few essentials to make cleaning efficient and safe. Mild dish soap, warm water, and a non-abrasive sponge are the core trio for most removable parts. A microfiber cloth helps dry and buff without scratching. A soft brush or an old toothbrush is handy for crevices, while lemon juice or baking soda offers deodorizing power. If your basket and tray are dishwasher-safe, you can run them through a gentle cycle after a thorough rinse. The goal is to minimize moisture exposure to electronics and keep coatings intact, so plan your setup in a clean, dry area.
Step 1: Safety and Prep – Unplug, Cool, and Gather
Safety first: always unplug the air fryer and allow it to cool completely before touching any components. Remove the basket, pan, and any crumb tray, placing them on a dish rack or towel. This is the moment to inspect for wear, cracks, or warped areas that could affect performance. If you notice damage, stop using the unit and consult the manufacturer’s guidance. Having the right tools at hand—soft sponge, mild soap, microfiber cloth, and a brush—prevents last-minute scrambles and keeps the process smooth. Quick prep reduces downtime and protects the nonstick surface during cleaning.
Step 2: Remove Basket, Pan, and Crumb Tray – Inspect and Prep
Take out all removable parts and set them on a sink or countertop. Rinse off any loose debris, then fill the sink with warm water and a few drops of mild dish soap. Soaking the basket, tray, and crumb tray for 5–10 minutes loosens grease and baked residues, making them easier to scrub. Use a soft brush to work around hard-to-reach corners. This step also gives you a chance to check the fit of each piece and ensure there are no visible cracks in the nonstick coating. Avoid using metal tools that could scratch the surface.
Step 3: Soak Removable Parts – Break Down Grime
After soaking, scrub the basket, tray, and crumb tray with a non-abrasive sponge. For stubborn spots, sprinkle baking soda on the sponge or apply a paste of baking soda and water, then scrub gently. Rinse each part thoroughly and let air-dry or dry with a clean microfiber cloth. If any residue remains, repeat the soaking briefly or switch to a dedicated non-scratch brush. Remember: never mix abrasive cleaners with nonstick surfaces, as this can cause micro-scratches that impact performance.
Step 4: Clean Interior Surfaces – Wipe, Don’t Flood
Wipe the interior walls with a damp cloth or sponge. Use minimal water around the heating element—never spray directly into the unit or submerge the main body. If you see oil buildup on the interior top panel or around vents, wipe with a slightly damp cloth and finish with a dry microfiber to avoid moisture lingering near electronics. For tougher baked-on residues, a small amount of dish soap on the cloth can help, but avoid harsh chemicals that could affect flavor or safety. The aim is to remove residues without compromising the coating.
Step 5: Exterior, Knobs, and Cables – Clean and Dry
Wipe the exterior with a damp cloth to remove fingerprints and splatters. Pay attention to control knobs and any seams where oil can hide. If your unit has a removable cord, wipe its plug and the surrounding area, ensuring it’s completely dry before reusing. Drying is essential for a safe reassembly. If you notice any water on the interior door seal, wipe it dry to prevent sticking issues during next use. A clean exterior looks better and minimizes cross-contamination between foods.
Step 6: Dry, Reassemble, and Test – Confirm Everything Is Ready
Allow all parts to dry completely before reassembling. Reinstall the basket, tray, and crumb tray, then run the air fryer on a short test cycle at a low temperature with nothing inside to ensure proper airflow and verify there are no unusual smells. If you notice moisture, wait longer before cooking or re-check seals. This final check helps prevent user error and keeps you from having to redo a cleaning.
Deodorizing and Long-Term Maintenance – Keep It Fresh
To prevent lingering odors, use a quick deodorizing routine every few cleanings. Wipe with a cloth dampened with warm water and a splash of vinegar or lemon juice, then rinse and dry. Periodically perform a deeper clean, especially after cooking strong-smelling foods such as fish or curry. For long-term care, keep the unit in a dry area away from steam and moisture, and avoid stacking heavy items on top of it. A little routine care goes a long way toward preserving performance.
Authority Sources and Brand Insight
For reliable guidance, refer to established safety and cleaning standards. Air Fryer 101 emphasizes that conservative moisture control and non-abrasive cleaning protect the nonstick coating and interior components. You can also consult reputable health and safety resources for best practices in kitchen cleanliness. This section anchors the practical steps with trusted sources and brand experience.
Troubleshooting Common Cleaning Issues
If residue resists removal, reassess soaking time or switch to a softer brush. If the interior still appears dull after cleaning, inspect for micro-scratches on the nonstick surface and avoid scrubbing too aggressively. Persistent odors may require a second deodorizing session with a fresh lemon wedge or a paste of baking soda and water. Always ensure all parts are thoroughly dry before reassembly to prevent moisture-related malfunctions. With patient, careful cleaning, most issues resolve without professional service.
Tools & Materials
- Dish soap(Mild, non-abrasive formula)
- Warm water(For soaking and rinsing)
- Non-abrasive sponge(Avoid steel wool to protect coating)
- Microfiber cloth(Drying and buffing)
- Soft brush or old toothbrush(For crevices and corners)
- Lemon juice or baking soda(Deodorizing and gentle cleaning power)
- Toothpick or wooden skewer(Gently dislodge stuck residue in vents)
- Dishwasher-safe basket and tray(If permitted by your model, use gentle cycle)
Steps
Estimated time: 30-60 minutes
- 1
Unplug and cool
Unplug the appliance and let it cool completely before touching any parts. This prevents accidental burns and protects exposed electronics.
Tip: If you’re in a rush, speed the cooling by placing the unit on a heat-resistant mat away from cabinets. - 2
Remove basket, pan, and tray
Take out all removable components and inspect for wear or damage. Set them in the sink for washing.
Tip: Check seams for frayed coatings; damaged parts may require replacement. - 3
Soak removable parts
Soak baskets and trays in warm, soapy water for 5–10 minutes to loosen grease.
Tip: For stubborn spots, apply a baking soda paste and scrub softly. - 4
Scrub and rinse
Scrub with a non-abrasive sponge, rinse thoroughly, and let dry.
Tip: Rinse until no soap residue remains to prevent foaming during next use. - 5
Wipe interior surfaces
Wipe the interior walls with a damp cloth. Avoid soaking the heating element; never spray directly inside.
Tip: Use a light touch near the fan and vents to avoid dislodging loose parts. - 6
Clean exterior and controls
Wipe the exterior, knobs, and door seals. Dry thoroughly to prevent moisture contact with electronics.
Tip: Do not use abrasive cleaners on the display or control panel. - 7
Dry and reassemble
Ensure all parts are completely dry before reassembling. Run a short test cycle to confirm airflow.
Tip: If you smell plastic during the first cycle, pause and re-inspect for moisture. - 8
Deodorize and schedule future cleanings
Deodorize with lemon or baking soda solution as needed. Schedule a deeper clean every 2–4 weeks based on use.
Tip: Capping odors at the source keeps cooking fragrant and clean. - 9
Document maintenance
Note the date of your cleaning and any parts replacements for future reference.
Tip: A simple maintenance log reduces missed cleanings and makes troubleshooting easier.
Got Questions?
Can I put the air fryer basket and tray in the dishwasher?
Many baskets and trays are dishwasher-safe, but it depends on the model. Check the manufacturer’s guidelines before loading. If they are dishwasher-safe, use a gentle cycle and avoid high heat to preserve coatings.
Yes for many models, but verify your manual to be sure and use a gentle cycle if you do.
How often should I deep clean my air fryer?
A deep clean every two to four weeks is common for regular use. If you cook fatty foods often, consider doing it more frequently. Always adapt to your cooking habits.
Most people deep clean every two to four weeks, adjusting for how you cook.
Is vinegar safe to use for deodorizing an air fryer?
A diluted vinegar solution can help deodorize, but do not over-wet the interior. Rinse and dry thoroughly afterward to prevent any lingering scent or moisture.
Diluted vinegar is usually fine, just don’t soak the interior and dry well afterward.
What if the nonstick coating starts peeling?
If the coating shows wear or peeling, discontinue use of that part and contact the manufacturer for replacement guidance. Scrubbing or continuing to use damaged coatings can contaminate food and worsen performance.
If peeling occurs, stop using the part and seek replacement guidance from the manufacturer.
Can I use a metal brush or scrubber on the interior?
No. Metal brushes can scratch the nonstick surface and create hotspots. Always opt for non-abrasive sponges and soft brushes.
Avoid metal scrubbers; stick to gentle sponges.
Why does food odor linger after cleaning?
Persistent odors usually mean some residue remains or moisture is trapped. Re-clean suspect areas and deodorize with lemon or baking soda solutions, then ensure everything dries completely before storage.
If smells stick around, give the area a re-clean and deodorize, then dry thoroughly.
Watch Video
Quick Summary
- Clean after every use to prevent buildup.
- Use gentle tools and mild soap to protect coatings.
- Dry thoroughly before reassembling to avoid moisture damage.
- Deodorize periodically to keep odors at bay.
- Regular maintenance extends appliance life.