How to Clean Air Fryer: A Step-by-Step Guide
Learn how to clean your air fryer safely and effectively with Air Fryer 101. This step-by-step guide covers tools, techniques, and maintenance tips to keep your appliance performing at its best.

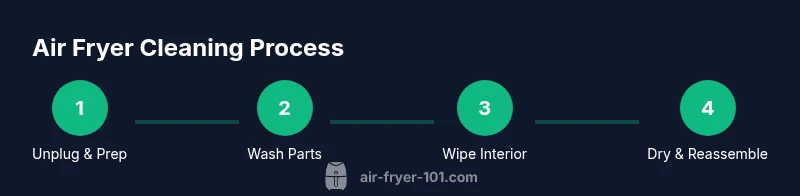
By following these steps you will clean your air fryer safely and effectively. Start by unplugging the unit and removing the basket and pan. Wash the basket and pan with warm, soapy water, or place compatible parts in the dishwasher if allowed. Wipe the interior, heating element, and door with a damp cloth—avoiding submersion of the main unit. Dry thoroughly before reuse. According to Air Fryer 101, routine cleaning keeps performance and taste fresh.
Why Cleaning an Air Fryer Matters
Regular cleaning keeps your appliance performing at its best, prevents odors, and helps extend the life of non-stick coatings. Filmy grease, burnt bits, and oil residue can degrade airflow and cooking results over time. According to Air Fryer 101, routine cleaning supports consistent browning and reduces the risk of smoke. A clean unit also creates a safer cooking environment by eliminating buildup that could catch fire at high temperatures. Start with a quick wipe-down after each use, then schedule a deeper clean weekly or biweekly depending on usage. The goal is to remove food particles and oil before they become baked-on layers. This proactive approach not only improves taste and texture but also minimizes lingering smells in your kitchen. Different models might have specific cleaning recommendations, so consult your manual for model-specific guidance.
What You'll Need Before You Start
Before you begin, gather a few simple tools and materials. You’ll typically need mild dish soap, warm water, a non-abrasive sponge, a soft brush for crevices, and a microfiber cloth for drying and buffing. If your basket and tray are dishwasher-safe, you may use the dishwasher for those parts. Keep a towel handy to dry surfaces after washing. Always confirm compatibility with your specific air fryer model before submerging any electrical components. A quick check of the user manual can save you from accidentally damaging coatings or seals during cleaning.
Cleaning Frequency and Best Practices
Most cooks find that a quick wipe-down after each use, followed by a deeper clean once every one to two weeks, works well for daily home cooking. Frequent, light cleanings prevent grease buildup and make the deep clean quicker and less labor-intensive. Use a mild degreasing soap to avoid harsh chemical residues, and avoid abrasive pads that can scratch non-stick coatings. Air Fryer 101 recommends dry thoroughly after washing to prevent moisture from lingering near electrical contacts. If you notice strong odors or smoked flavors, increase the cleaning frequency temporarily until residues are fully removed.
Deep Cleaning vs Quick Wipe-Downs
A quick wipe-down targets the basket, tray, and exterior after cooking. A deep clean involves soaking removable parts, cleaning the interior surfaces, and inspecting the heating element area for baked-on residue. Deep cleaning is especially important after cooking oily or saucy foods, or after roasting heavily seasoned items that leave residues. Remember to unplug the unit and let it cool before starting any deep clean. For stubborn grease, rewash the basket and tray and use a soft-bristled brush in tight corners.
Step-by-Step Cleaning Overview
Think of cleaning as a cycle: prep, wash, soak if needed, wipe, dry, and reassemble. This overview helps you organize the task without rushing and minimizes the risk of missing spots. Start with the detachable components, then address the interior surfaces. If your model has a non-removable inner chamber, use a damp cloth to wipe down accessible areas. Avoid soaking the main unit and never submerge the electrical components in water. Always air dry or pat dry to prevent rust or mildew.
Common Mistakes to Avoid
Avoid using abrasive cleaners or metal scrapers that can scratch the coating. Never submerge the main air fryer body in water. Don’t rush the drying process; moisture can cause electrical issues or odor. If the basket is dishwasher-safe, confirm dishwasher settings do not exceed manufacturer recommendations. Finally, don’t ignore the heating element; a quick brush can remove particles that would burn during the next use.
Maintaining Your Air Fryer Post-Clean
After cleaning, dry all components completely before reassembling. Store the unit with the door slightly ajar or in a dry location to prevent odor buildup. Periodically inspect gaskets and seals for wear and replace as needed. Keeping a regular cleaning schedule helps you enjoy consistent results and extends the life of non-stick coatings. Air Fryer 101 notes that responsible maintenance also supports healthier cooking by preserving airflow and even heat distribution.
Tools & Materials
- Dish soap(Mild, non-abrasive; use a small amount for grease removal)
- Warm water(Assemble in a basin or sink; not hot enough to warp plastics)
- Non-abrasive sponge(Soft sponge or microfiber cloth; avoid steel wool)
- Soft-bristled brush(For crevices and around the heating element area)
- Microfiber cloth(For drying and buffing surfaces)
- Dishwasher-safe basket/tray (optional)(Check model manual to confirm compatibility)
- Vinegar or mild cleaner (optional)(Use sparingly for stubborn grease; avoid harsh chemicals)
Steps
Estimated time: Total time: 30-45 minutes
- 1
Unplug and prepare
Ensure the air fryer is turned off, unplugged, and completely cool before you begin. Remove the basket and pan, placing them on a towel or in the sink to prevent splashes on the electrical unit.
Tip: Accidentally touching a hot surface can cause burns; wait at least 10 minutes after use before starting. - 2
Wash removable parts
Wash the basket and tray with warm, soapy water. If your parts are dishwasher-safe, you may run them on a standard cycle. Use a soft brush to loosen stuck-on residue.
Tip: Soaking for 5–10 minutes can help loosen grease without bending or warping the parts. - 3
Clean interior surfaces
Wipe the interior walls and the heating element area with a damp, non-abrasive cloth. Do not submerge the main unit in water. For stubborn spots, apply a little dish soap to the cloth and gently scrub.
Tip: Never spray or soak liquid directly onto the heating element. - 4
Rinse and wipe dry
Rinse the basket and tray well to remove all soap residue. Wipe the interior with a clean damp cloth, then dry all surfaces with a microfiber towel.
Tip: Dry thoroughly to prevent moisture from lingering near electronics. - 5
Reassemble and test
Once all parts are completely dry, reassemble the air fryer. Plug in, run a quick 2-3 minute test cycle with no food to verify it's functioning cleanly.
Tip: If you notice unusual smells, run an empty cycle with a small amount of water in the basket to purge odors. - 6
Store and maintain
Store the unit in a dry place and consider a light wipe-down after heavy cooking days. Schedule a deeper clean every 1–2 weeks based on usage.
Tip: Keep a cleaning schedule to maintain performance and hygiene.
Got Questions?
Is it safe to submerge the air fryer in water?
No. Submerging the main unit can damage electrical components. Remove water from the interior by wiping with a damp cloth and avoid soaking.
No, you should not submerge the air fryer. Use a damp cloth to wipe the interior instead.
How often should I deep-clean my air fryer?
Aim for a thorough clean every 1–2 weeks if you cook frequently; more often if you notice buildup or odors.
Deep-clean about every one to two weeks, or sooner if you smell odors.
Can I put the basket in the dishwasher?
If your basket and tray are labeled dishwasher-safe, you can use the dishwasher; otherwise wash by hand.
Only if your parts are dishwasher-safe; otherwise wash by hand.
What should I do about stubborn grease on the heating element?
Use a soft brush and gentle soap; avoid harsh abrasives near the element. Wipe with a damp cloth after brushing.
Gently brush with a soft tool and wipe clean; avoid harsh scouring near the heating element.
Are non-toxic cleaners recommended?
Yes. Use mild dish soap or a non-toxic cleaner. Avoid strong chemicals that could leave residues.
Yes—stick to mild soaps and non-toxic cleaners to avoid residues.
What if the air fryer still smells after cleaning?
Run an empty cycle with water or a small amount of vinegar in the basket to purge odors. Ensure parts are completely dry first.
If odors linger, run a short empty cycle with water or vinegar and dry thoroughly.
Watch Video
Quick Summary
- Unplug before cleaning and remove all removable parts.
- Use mild soap and non-abrasive tools to protect coatings.
- Dry completely before reusing to prevent moisture damage.
- Check model guidance on dishwasher-safe parts.
- Maintain a regular cleaning schedule for best performance.