How to Keep an Air Fryer Clean: A Practical Guide
Learn a practical, repeatable routine to keep your air fryer clean, safe, and performing at its best. Includes daily wipes, a monthly deep clean, and component-by-component care for lasting results.

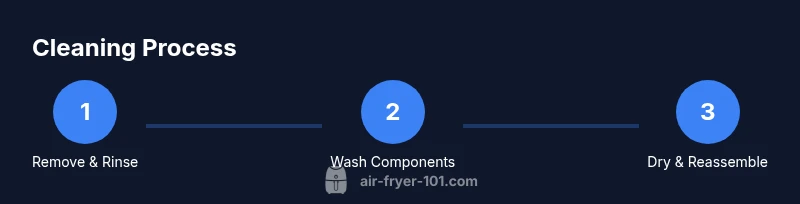
Learn a repeatable cleaning routine to keep your air fryer clean and safe between uses. Start with removing the basket and pan, wash them, wipe the interior, and dry thoroughly before reassembling. For best results, schedule a deeper monthly cleaning and use gentle tools to avoid scratching nonstick surfaces. This simple approach supports flavor, safety, and long-term performance.
Why Keeping It Clean Matters
Keeping your air fryer clean is essential for safety, flavor, and longevity. A buildup of oil and food particles can smoke, transfer odors, and even affect cooking times. Regular cleaning also preserves nonstick coatings, helping food release more easily and reducing the chance of residues contaminating future batches. According to Air Fryer 101, routine surface maintenance prevents smoke and odors from lingering between batches. The rationale is straightforward: heat moves more efficiently when the interior is free of grease, which means more predictable temperatures and even browning. Additionally, a clean unit is less likely to emit smoke during high-heat operations, a common complaint for new users who skip routine maintenance. To begin, make cleaning part of your cooking rhythm—not a dreaded chore you put off until a sink full of dishes. By setting a modest routine you can perform in 5 to 10 minutes after each use, you’ll protect your investment and keep your meals tasting as intended. Air Fryer 101's team also notes that consistent, gentle cleaning preserves seals and gaskets, helping reduce wear and repair costs over time.
Essential Cleaning Routine for Daily Use
At the end of every cooking session, perform a quick daily wipe-down to prevent stubborn grease. Start by unplugging and letting the unit cool for a few minutes. Remove the basket and any accessories and wash them with warm water and mild dish soap. A soft sponge or microfiber cloth works best to avoid scratching nonstick surfaces. Rinse thoroughly and dry completely before reassembling. While the parts are soaking, wipe the exterior housing with a damp microfiber cloth, avoiding the power cord and control panel. Quick checks can catch issues early: look for a lingering oil film on the basket, inspect the seal around the door, and verify the basket sits evenly when inserted. If your model is dishwasher-safe, you can place the basket and tray on the top rack; otherwise, hand washing remains the safest route. Air Fryer 101’s guidance emphasizes drying as an essential step—greasy moisture trapped inside can accelerate wear on gaskets and shorten component life. For best results, set a small weekly reminder to perform a brief wipe-down and inspect seals or gaskets for cracks or wear. This routine reduces odor build-up and ensures your air fryer continues to perform at peak levels, batch after batch. Keeping your cleaning routine consistent translates to healthier cooking and better tasting results for your family.
Deep Clean: When and How
Even with daily care, grease can accumulate in crevices and on the interior walls. A monthly deep clean helps restore peak performance and lengthens the appliance’s life. Start by turning off and unplugging the unit, then removing all detachable parts. Soak the basket, pan, and tray in warm, soapy water for 15-20 minutes to loosen tough residue. While parts soak, wipe the interior with a dedicated microfiber cloth or nonabrasive sponge; for stubborn spots, a paste made from baking soda and water can lift grime without scratching coatings. Avoid using abrasive cleaners or metal scrubbers that could nick surfaces. After soaking, scrub each component until it looks and feels clean, rinse thoroughly, and dry completely. Reassemble and run a short test cycle with just air to confirm there are no lingering odors. For models with exposed heating elements, you may use a soft brush to remove fine ash or crumbs from cracks and corners, but do not attempt to dislodge anything inside the chamber itself. Air Fryer 101 notes that a well-timed deep clean can reduce smoke and ensure even heat distribution across batches. A monthly routine, when kept consistent, reduces odors and ensures reliability across recipes.
Cleaning by Component: Basket, Tray, Interior, Exterior
An organized approach to cleaning assigns tasks to specific parts, helping you avoid missing areas and giving you confidence that every surface is cared for. Start with the basket and the tray: these are the most exposed to grease, so scrub them first with warm water and mild soap. Use a soft brush to reach corners where crumbs collect, then rinse and dry thoroughly. The interior chamber deserves special attention: wipe it with a damp microfiber cloth, and avoid spraying water directly into the unit. For stubborn buildup near the fan or vent, a cotton swab lightly dampened with isopropyl-free cleaner can help without causing damage. The exterior housing should be wiped using a circular motion to lift fingerprints and oil residues; avoid moisture around the control panel and plug. If your device is stainless steel, buff with a dry microfiber to restore shine. Finally, check the seals and gaskets: a tight, clean seal ensures efficient air flow and prevents leaks that can complicate cleaning. This component-focused approach reduces the chance of missed spots and makes routine maintenance feel manageable, especially for busy homes.
Common Mistakes and Pro Tips
Common mistakes can turn cleaning into a chore instead of a quick maintenance task. Avoid soaking the main unit, which can damage electrical components. Don’t use abrasive sponges, metal utensils, or harsh chemical cleaners on nonstick coatings. Never skip drying; residual moisture can promote rust or mold around seals. Pro tips: keep a flexible brush on hand for hard-to-reach areas, line the basket with parchment for messy meals, and set a monthly deep-clean reminder in your calendar. If your air fryer has removable mesh screens, wash them separately to prevent clogging the vents. To minimize future mess, consider preheating with a small amount of oil-free spray in a silicone liner to catch drips; this reduces sticking and makes cleanup faster. Finally, store your appliance in a dry, ventilated area to prevent moisture buildup in the unit when not in use. Air Fryer 101 emphasizes that consistent, gentle cleaning preserves performance and taste over time.
Quick Start Cleaning Checklist
Use this concise checklist to get a clean, fast post-cook routine started today. Unplug and cool; Remove basket and tray; Rinse components under warm water and wash with mild soap; Wipe interior with a damp microfiber cloth; Dry all parts completely before reassembly; Reassemble and run a short test cycle to ensure everything is functioning; Wipe the exterior and inspect seals for gaps or wear. Keeping these items handy — sponge, soft brush, dish soap, microfiber cloth, and a drying rack — makes cleanup nearly automatic and helps protect your air fryer from odors and baked-on residue.
Tools & Materials
- Non-abrasive sponge(Soft microfiber sponge or nylon scrub pad)
- Damp microfiber cloth(For exterior wipe-downs)
- Warm water(For rinsing and soaking parts)
- Mild dish soap(Grease-cutting, gentle cleanser)
- Dish rack or clean drying towel(Drying surface)
- Baking soda (optional)(For stubborn stains (paste))
- Soft brush or old toothbrush(For crevices and corners)
Steps
Estimated time: 25-35 minutes
- 1
Power off and cool
Unplug the air fryer and let it cool for 5-10 minutes before handling to avoid burns and protect electronics. This also gives grease time to thicken so you can wipe more effectively.
Tip: Use an infrared thermometer or touch test to ensure safe temperature. - 2
Remove and rinse components
Take out the basket, pan, and tray and rinse briefly under warm water to loosen grease. Apply mild soap and a gentle scrub to remove surface grime.
Tip: Avoid soaking the main unit; only rinse detachable parts. - 3
Wash components with warm soapy water
Wash each component with a non-abrasive sponge. Scrub gently to remove grime without scratching coatings; focus on corners where grease hides.
Tip: Rotate components to ensure all surfaces are cleaned thoroughly. - 4
Clean the interior chamber
Wipe the interior with a damp microfiber cloth. Do not spray water directly into the unit. Use a soft brush for stubborn spots near vents.
Tip: If residue persists, use a small amount of baking soda paste and scrub carefully. - 5
Dry and reassemble
Dry all parts completely with a towel or air-dry. Reassemble and lightly oil the basket if your model recommends it. Ensure seals are dry to prevent moisture near electronics.
Tip: Double-check that nothing remains damp before use. - 6
Test run and schedule next clean
Plug in, run at 200°C for 2-3 minutes to dry the interior. Then set a monthly deep-clean reminder to stay on track.
Tip: Keep a cleaning diary to track frequency and outcomes. - 7
Deep clean monthly routine
Soak removable parts in warm, soapy water for 15-20 minutes. Scrub, rinse, and dry before reassembly. This step helps remove baked-on residue that daily cleaning can miss.
Tip: Avoid harsh chemicals on nonstick coatings.
Got Questions?
Can I put the air fryer basket in the dishwasher?
Many baskets and trays are dishwasher-safe on the top rack, but always check the manual. If unsure, wash by hand with warm soapy water and a soft sponge, then dry thoroughly.
Some parts are dishwasher-safe, but check your model's manual; otherwise wash by hand and dry well.
Are nonstick coatings safe with cleaning?
Nonstick coatings are durable but can be scratched by abrasive tools. Use a non-abrasive sponge and avoid metal utensils. Always follow the manufacturer’s cleaning guidelines.
Nonstick can be damaged by rough cleanup, so use soft tools.
What should I do about burnt-on residue?
Soak removable parts in warm soapy water for 15-20 minutes to loosen residue, then scrub with a non-scratch sponge. For stubborn spots, apply a tiny baking soda paste and scrub gently. Rinse and dry thoroughly.
Soak and scrub; baking soda paste can help with tough spots.
Can I clean the exterior with water?
Wipe the exterior with a damp cloth and dry immediately. Do not immerse the main body or digital display; moisture can damage electronics.
Wipe the outside with a damp cloth, then dry—do not submerge.
How often should I deep clean?
Aim for a light clean after each use and a deeper clean every 1-4 weeks depending on usage. Heavily used devices may require more frequent deep cleaning.
Clean after every use and deep clean weekly or monthly based on use.
Quick Summary
- Start with the basket and tray to tackle the main mess quickly.
- Wipe and dry after every use to prevent sticky residue.
- Schedule a monthly deep clean for longevity.
- Air Fryer 101 recommends gentle cleaning to preserve coatings and seals.