How to Prevent Air Fryer from Getting Dirty: A Practical Guide
A comprehensive, step-by-step guide to keep your air fryer clean and performing at its best. Learn practical routines, quick maintenance, and safe cleaning methods to prevent buildup and odors for healthier, tastier meals.

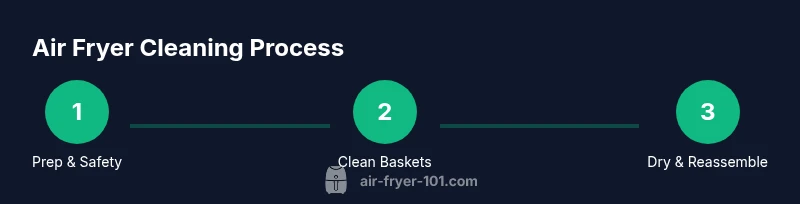
Learn how to prevent air fryer from getting dirty by adopting a simple routine: prep, clean as you cook, and finish with a quick post-cycle wipe. Essential tools include mild soap, a non-abrasive sponge, and a damp cloth. Follow the step-by-step guide below for a spotless appliance.
Why keeping your air fryer clean matters
According to Air Fryer 101, maintaining a clean air fryer isn’t just about appearances. Regular cleaning helps preserve airflow, maintain even heating, and prevent lingering smells from previous meals. The more consistently you address buildup and splatter, the less likely grease will bake onto surfaces and affect flavor. If you’re wondering how to prevent air fryer from getting dirty, the answer starts with a simple mindset: clean as you go, and clean thoroughly after each use. By treating the appliance like a routine kitchen tool rather than a one-off novelty, you’ll extend its life and avoid more complex cleanups later. Throughout this article, you’ll find practical methods, model-friendly tips, and safety reminders to keep your air fryer in peak condition.
Common causes of dirt buildup
Grease splatter from frying foods, breading residues, and sugary sauces are the main culprits behind dirty interiors. Even tiny crumbs can create smoke, odors, and a sticky layer that’s hard to remove once it hardens. Over time, trapped grease can degrade nonstick coatings, affect airflow, and shorten the appliance’s lifespan. Knowing these culprits helps you tailor a cleaning plan that targets the problem areas: the basket, tray, and interior corners where food tends to settle. Regular inspections after cooking give you a heads-up before buildup becomes stubborn, saving time in the long run.
Pre-cleaning habits and daily routines
Establish a quick daily habit: wipe down the exterior and the handle after each use, and inspect removable parts for grease before storage. Air Fryer 101 analysis shows that small, frequent cleanups prevent large-scale scrubbing sessions. After cooking, unplug the unit and allow it to cool briefly, then remove the basket and tray for a light rinse. This routine reduces residue adhesion and makes deeper cleaning easier. By embedding these steps into your cooking rhythm, you’ll maintain hygiene without sacrificing convenience.
Step-by-step preventive maintenance plan
A proactive maintenance plan combines routine daily care with deeper cleanups on a weekly cycle. Start by gathering non-abrasive tools and a mild detergent to avoid scratching surfaces. Keep a dedicated soft brush for nooks and a microfiber cloth for drying. This approach minimizes dirt accumulation and ensures you catch any early signs of wear. The goal is consistency: a quick wipe after cooking and a thorough clean every 5–7 uses.
Cleaning methods for different parts and materials
Removable basket and tray are the easiest parts to clean: wash with warm, soapy water and a non-scratch sponge; dry thoroughly before reassembling. For the interior cavity and the exterior housing, wipe with a damp cloth, then dry with a soft towel to prevent moisture buildup. If stubborn stains persist, a gentle brush can lift residue without harming coatings. Always refer to the manufacturer’s instructions for model-specific guidance, and avoid submerging the base or heating element in water.
Tools & Materials
- Mild dish soap(Gentle formula to avoid coating damage)
- Non-abrasive sponge or cloth(Avoid metal scrapers)
- Warm water(For soaking and rinsing)
- Soft brush or old toothbrush(For corners and crevices)
- Microfiber towel(Dry surfaces completely)
- Vinegar spray or baking soda paste(For odor removal and tough stains)
- Dishwasher-safe basket/tray (check model)(If dishwasher-safe, top rack only)
- Replacement seals or gaskets (optional)(Keep on hand for wear)
- Latex gloves (optional)(Protect hands during deep cleaning)
Steps
Estimated time: 25-35 minutes
- 1
Unplug and remove removable parts
Before cleaning, unplug the air fryer and carefully remove the basket and tray. Let them cool to a safe temperature, then rinse in warm, soapy water to remove surface grease. This step prevents heat or electrical hazards while you work.
Tip: Starting with the basket and tray keeps the most dirty parts separate for easier cleaning. - 2
Rinse and soak removable components
Rinse the basket and tray, then soak them in warm soapy water for 5–10 minutes to loosen built-up grease. After soaking, scrub with a non-abrasive sponge, focusing on ridges and corners where residue collects. Rinse thoroughly and set aside to dry.
Tip: A soak time helps lift stubborn residue without aggressive scrubbing. - 3
Wipe the interior cavity
Use a damp cloth to wipe the interior walls and the heating element housing if accessible. Avoid spraying water directly into the heating chamber. For stubborn spots, use a soft brush gently to dislodge residue, then wipe clean with a dry cloth.
Tip: Never immerse the main unit; moisture can damage electronics. - 4
Tackle stubborn stains and odors
For tough stains, make a gentle paste with baking soda and water, apply to the affected area, and let sit for a few minutes before scrubbing softly. For odors, wipe with a vinegar-water mix and rinse. Dry all parts thoroughly before reassembling.
Tip: Avoid harsh chemicals that could leave residues or affect taste. - 5
Clean the exterior and reassemble
Wipe down the exterior with a damp cloth, then dry completely. Reinsert the basket and tray, and plug the unit back in. Run a quick test cycle with water or a simple dish soap solution to ensure everything functions properly and is dry.
Tip: A quick test cycle helps confirm there’s no moisture in the electronics. - 6
Establish a maintenance cadence
Set a reminder to perform a deeper clean after every 5–7 uses and a light wipe-down after each cooking session. Regular cadence reduces buildup and keeps performance steady over time. Keep a cleaning kit handy near the kitchen for convenience.
Tip: Consistency beats intense scrubbing—short, frequent cleanups save effort later.
Got Questions?
How often should I clean my air fryer?
Clean the removable basket and tray after each use and wipe the interior weekly. Perform a deeper clean every 1–2 weeks depending on usage. Always check the manufacturer’s guidance for model-specific intervals.
Clean the removable parts after every use and wipe the interior weekly. Do a deeper clean every couple of weeks if you cook frequently.
Can I put the air fryer basket in the dishwasher?
Many baskets and trays are dishwasher-safe on the top rack, but you should verify your model’s manual. If unsure, wash by hand to avoid warping or coating damage.
Some baskets are top-rack dishwasher safe, but check your manual. If in doubt, wash by hand.
Is it safe to use harsh cleaners on my air fryer?
Avoid harsh chemicals and abrasive scrubbers that can damage coatings. Stick to mild dish soap, warm water, and soft brushes. For odors and stains, natural cleaners like vinegar or baking soda paste work well when rinsed thoroughly.
No. Use mild soap and gentle tools, and avoid harsh cleaners that can damage surfaces.
What should I do about lingering smells?
After cleaning, you can neutralize odors by wiping with a solution of water and a splash of vinegar, then drying thoroughly. Running a short cycle with a bowl of water and a touch of lemon can also refresh the interior.
Wipe with vinegar solution and dry, then run a short water cycle with lemon for a fresh scent.
Can I use metal utensils inside the air fryer?
Avoid metal utensils that could scratch coatings. Use wooden or silicone tools instead to protect the nonstick surface. If you must scrape, do it gently with a plastic spatula.
No metal utensils on the nonstick surface—stick to wood or silicone to prevent scratches.
Watch Video
Quick Summary
- Clean after each use to prevent buildup.
- Use mild soap and non-abrasive tools to protect coatings.
- Avoid submerging the main unit—only removable parts go in water.
- Establish a regular maintenance cadence for best performance.