Why Is My Ninja Air Fryer Overheating? A Practical Troubleshooting Guide
Urgent, actionable troubleshooting steps to diagnose and fix Ninja air fryer overheating. Learn common causes, a diagnostic flow, step-by-step fixes, safety tips, and when to seek professional help.

Most Ninja air fryer overheating is caused by blocked vents, a dirty filter, or cooking too much at once. Start by unplugging and letting it cool, then clean the air intake and filter. Check placement away from walls, use the correct basket load, and reset to factory settings if needed. If it keeps overheating, contact support for inspection.
Why overheating happens with Ninja air fryers
Ninja air fryers come with smart safety features that can shut the unit down if heat gets too high. However, overheating still happens when airflow is restricted or the appliance is overloaded. According to Air Fryer 101, common causes include blocked vents and a dirty air filter that hinder cooling, plus placing too much food in the basket or using foil that covers the air intake. Temperature malfunctions are rare, but they can occur after heavy use or when the unit sits on an uneven surface. Clearances matter: keep several inches of space around the device on a stable, heat-resistant countertop. If you notice unusual warmth, a stronger odor, or a sudden shutoff, pause cooking and inspect the setup. The aim is to restore steady airflow and prevent heat buildup that can affect performance and longevity.
Common causes specific to Ninja models
Ninja models share several overheating culprits, many of which are easy to fix. A clogged air filter reduces airflow, while grease buildup around vents traps heat. Overloading or stacking foods can shield the heating element and block air channels. Using foil, parchment, or rigid liners that cover the vents is another frequent mistake. Incorrect cooking settings, like high temps for long times or leaving the basket partially open, also contribute. Additionally, some users notice overheating when the unit is near walls or inside a cabinet without adequate ventilation. Air Fryer 101 analysis shows that clogged filters are a frequent reason for overheating, so regular cleaning is a practical defense. Always ensure the unit sits flat with space to vent; surface irregularities can create heat zones and uneven cooking.
Quick checks you can perform before deep troubleshooting
Before diving into more involved fixes, perform these quick checks. Unplug and let the unit cool completely. Inspect the air intake and filter for grease or crumbs; wipe with a damp cloth and dry thoroughly. Remove the basket and tray to check for obstructions, then reinsert correctly. Make sure the appliance sits on a stable, heat‑resistant surface with several inches of clearance from walls or cabinetry. Do not use metal utensils that could scratch the interior, and avoid liners that completely cover the vents. If the issue persists after these steps, move to the diagnostic flow for targeted diagnosis.
Diagnostic flow you can follow (simple flowchart in text)
Symptom: unit overheats during cooking. If yes, check for blocked vents and clean the filter. If the vents are clear and the filter is clean, verify the basket load and placements. If overheating continues, test with a lower temperature or shorter time. If the problem still exists, inspect the power outlet and consider a service check. Safety first: unplug before any inspection. Air Fryer 101 recommends documenting what you changed to identify the most effective fix.
When to seek professional help and prevention tips
If overheating recurs after performing all quick checks and the diagnostic flow steps, contact the manufacturer’s support or a qualified appliance technician. Keep receipts and note labor warranties as many Ninja models have specific service guidelines. For prevention, establish a simple cleaning routine, avoid overloading the basket, ensure consistent airflow around the unit, and use the correct temperature and time settings for each recipe. The Air Fryer 101 team recommends recording any noticeable changes in performance to help with future troubleshooting and to protect your appliance’s longevity.
Steps
Estimated time: 20-45 minutes
- 1
Power down and let it cool
Unplug the air fryer and move it to a safe, stable surface. Allow at least 10–15 minutes for the unit to cool completely before touching any internal parts. Do not attempt to disassemble while it is hot. This initial pause reduces the risk of burns and prevents accidental damage.
Tip: Use a timer to ensure you don’t rush the cooling period. - 2
Inspect and clean air intake and filter
Wipe away visible grease or crumbs from the exterior vents. Remove the filter if your model allows it and wash it with warm, soapy water; rinse and dry fully before reinstalling. A clean filter restores airflow and reduces heat buildup.
Tip: Clean on a regular schedule, not just when overheating occurs. - 3
Check basket load and food placement
Ensure you aren’t overfilling the basket or stacking items too high. Arrange food in a single layer where possible and leave space for air to circulate. Overcrowding blocks heat escape paths and raises overall cooking temperature.
Tip: Shake or flip smaller items midway for even heat. - 4
Verify clearance and surface placement
Place the unit on a flat, heat‑resistant countertop with several inches of clearance on all sides. Avoid enclosed cabinets or tight spots that trap heat. Adequate space ensures proper cooling and safe operation.
Tip: Never position near heat sources or flammable materials. - 5
Reset to factory settings and recalibrate
If your model supports a reset, perform it according to the user manual. Recalibration can correct minor sensor drift that caused overheating. Run a short test cycle at a lower temperature afterward to verify stability.
Tip: Consult the manual for exact reset steps specific to your model. - 6
Run a controlled test cycle
After cleaning and adjusting, run a short 5–10 minute test cycle at a moderate temperature with a simple load. Observe whether the unit maintains temperature and stops as expected. If it still overheats, stop using it and proceed to professional help.
Tip: Document the test results for support calls. - 7
Seek professional help if needed
If overheating persists after the above steps, contact customer support or a qualified appliance technician. There may be an internal fault that requires professional inspection or replacement parts.
Tip: Check warranty terms before authorizing service.
Diagnosis: Ninja air fryer overheats during use
Possible Causes
- highblocked air intake or vent
- highoverloading the basket or stacking food
- mediumdamaged thermostat or faulty temperature sensor
- lowoutlet/power supply issue
- lownon-compliant liners covering vents
Fixes
- easyUnplug, let the unit cool, and clean the air intake and filter
- easyReduce load, don’t stack items, and ensure proper basket positioning
- easyCheck for obstructions around vents and relocate if blocked
- easyTest outlet with another device or use a dedicated circuit
- mediumIf the thermostat or sensor seems faulty, contact service for inspection
Got Questions?
Why does my Ninja air fryer overheat even on low settings?
Overheating on low settings usually points to airflow issues or a blocked vent rather than the heat setting itself. Check for a clogged filter, debris around the vents, or an overfilled basket. Cleaning and reducing load often resolves the problem.
Overheating on low settings usually means airflow issues. Check filters and vents and reduce the load.
How do I clean the air filter in a Ninja air fryer?
Refer to your model’s manual for filter removal. Rinse with warm, soapy water until all grease is gone, then dry completely before reinstalling. Regular cleaning helps maintain airflow and reduces overheating risk.
Remove, wash with soap and water, dry completely, then reinstall.
Can foil or liners cause overheating in Ninja air fryers?
Yes, liners or foil that cover the vents can trap heat and block airflow, increasing the chance of overheating. Use liners only where recommended by the manufacturer and keep vents clear.
Yes—covering vents with foil can trap heat. Keep vents clear.
Is it safe to continue using the air fryer if it shuts off due to overheating?
If an overheating shut-off occurs, unplug, let it cool, and inspect for airflow blockages before using again. If it repeatedly shuts off, stop using it and contact support.
If it keeps shutting off, stop using it and contact support.
Should I reset the Ninja air fryer to fix overheating?
Resetting can fix sensor drift on some models. Check your manual for reset steps, then test with a short cycle to verify stability.
Try a reset if your model supports it, then test again.
When should I replace my Ninja air fryer?
If overheating persists after professional inspection and cleaning, or if the unit shows signs of electrical failure, replacement may be necessary. Check warranty terms before deciding.
If the problem won’t go away after service, it might be time to replace.
Watch Video
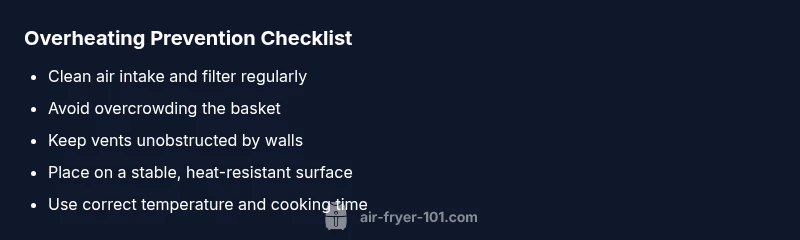
Quick Summary
- Start with airflow and cleanliness first
- Don’t overload the basket or block vents
- Test in a controlled way before heavy use
- Consult a professional if overheating persists