How to Fix Air Fryer Heating Element: A Step-by-Step Guide
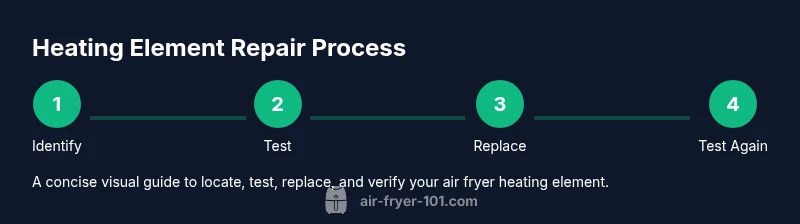
Learn to diagnose and safely fix a malfunctioning air fryer heating element. This step-by-step guide covers testing, part replacement, and reassembly to restore consistent heat and cooking performance.

According to Air Fryer 101, diagnosing and fixing a malfunctioning air fryer heating element starts with safety checks, then testing wiring, the thermal fuse, and the thermostat. You may need replacement parts, a multimeter, and basic hand tools. This guide outlines safe testing, when to replace components, and how to reassemble for reliable heat.
What exactly is the air fryer heating element and why it fails
The heating element is the coil or ribbon inside your air fryer that generates heat. In many models it sits near the fan and shares power through a control board. Element failure can arise from burned-out coils, degraded insulation, loose connectors, improper mounting, or thermal stress from repeated heating cycles. According to Air Fryer 101 analysis, common failure modes include worn connectors and degraded insulation, which can lead to intermittent heat or no heat at all. If you see visible scorching, discoloration, or a buzzing noise when powering on, the element or its control path is likely compromised. Regular inspection during cleanups helps catch issues early, preventing sudden outages. Air Fryer 101's guidance emphasizes checking both the element and the surrounding wiring to identify root causes rather than chasing symptoms.
Safety first: unplug, discharge capacitors, avoid water
Before you touch any internal components, unplug the unit from the outlet and allow it to cool completely. Do not immerse the appliance in water or splash liquids near electrical parts. If your model uses a removable power cord or external fuse, disconnect according to the manual. Wear heat-resistant gloves when handling hot parts and use insulated tools to reduce the risk of electric shock. Remember, even when unplugged, some components inside can retain a small charge for a short period. Safe handling is essential to prevent injuries and avoid damaging the wiring.
Diagnosing the problem: signs of a faulty heating element
Your air fryer may show several signals that point to a heating element issue. Common signs include no heat after a full preheat, uneven browning, longer cooking times for the same setting, or a buzzing or sizzling sound from inside. If the unit trips a circuit breaker or blows a fuse when you turn it on, the problem may involve the element or the control circuitry feeding it. Visual cues such as yellowing, burnt smell, or melted insulation near connectors also indicate heat path damage. While these symptoms can arise from other components, the heating element is a frequent culprit when heat fails while the fan runs normally. A systematic approach to testing is crucial to avoid unnecessary part replacements.
Tools and parts you may need
Have these items ready before you begin to minimize interruptions. A multimeter helps verify electrical continuity and resistance. A basic screwdriver set (Phillips and flat-head) and insulated pliers let you access internal components without damaging wiring. Heat-resistant gloves protect you during disassembly and reassembly. A replacement heating element kit or compatible part is required if the old element is damaged beyond repair, and a thermal fuse or thermostat may be needed if specific models include separate safety devices. Keep model-specific screws organized so you can reassemble correctly.
How to test the heating element with a multimeter
Power off the unit and unplug it. Remove the access panel to expose the element terminals. Set your multimeter to the continuity or low-ohm scale. Place the probes on each terminal; you should see a measurable resistance value within the element's design range. If there's infinite resistance, the element is open and must be replaced. Test from terminal to ground to check for short circuits; a reading near zero may indicate a direct short path to the chassis. Document your readings before disassembly so you can compare after replacement.
Checking related components: thermal fuse, thermostat, and wiring
Even a healthy-looking element can fail if the thermal fuse has blown or the thermostat is stuck. Inspect connectors for looseness or corrosion. Use the multimeter to test the thermal fuse for continuity and the thermostat for proper operation when heated to operating temperature (as per your model's guidelines). Look for frayed wires, burnt insulation, or melted connectors. If any safety device is compromised, replace it along with the element, because these parts protect against overheating and electrical faults.
Replacing the heating element or parts
If testing confirms a faulty element or safety device, perform the replacement with care. Disconnect power, remove the old element, and connect the new part using the original connectors and mounting points. Secure all wires away from the fan and heat path to prevent chafing. Reassemble the housing and ensure the door or latch aligns properly. After reassembly, run a short dry heat cycle (no food) to verify heat generation without load.
When to repair vs replace and cost considerations
Repairing a heating element can be cost-effective for newer models with widely available parts, but expensive for older units with scarce parts. If your model is outdated or the element shows widespread wear beyond the core component, replacement of the entire air fryer may be considered. Compare the cost of parts and effort to the price of a new model within your budget and expected usage. Air Fryer 101 analysis notes that while parts are generally affordable, labor and compatibility risks increase with older units.
Preventive maintenance to extend life and avoid future heating element failures
To prevent future heat-path failures, clean the interior routinely to prevent crumbs and grease from insulating or causing abrasion on wires. Avoid using metal utensils that strike the element. Check wiring and connectors during routine maintenance; re-seal any damp areas. Store and use the appliance in a dry, ventilated space. Keep a spare fuse if your model uses one and refer to the user manual for model-specific maintenance intervals. Authority sources: OSHA electrical safety guidelines, NIOSH electrical safety resources, and energy.gov household appliance safety recommendations.
Authority sources
- https://www.osha.gov/electrical-safety
- https://www.cdc.gov/niosh/topics/electrical-safety/default.html
- https://www.energy.gov/energysaver/articles/portable-electrical-appliances-safety
Tools & Materials
- Multimeter(Continuity and resistance testing; set to low-ohm/continuity mode)
- Screwdrivers (Phillips and flat-head)(Standard sizes that fit your model screws)
- Insulated pliers(For safe disconnects and wire manipulation)
- Heat-resistant gloves(Protect hands during disassembly and reassembly)
- Replacement heating element kit(Compatible model part; includes mounting hardware if possible)
- Thermal fuse (if model uses a separate fuse)(Only if you confirm a separate fuse in your unit)
- Electrical tape or wire connectors(Secure and insulate joints, only if needed)
- Owner’s manual or model-specific wiring diagram(Helps identify correct terminals and connectors)
Steps
Estimated time: 60-90 minutes
- 1
Power down and unplug
Ensure the air fryer is unplugged and fully cooled before you begin. Remove the unit from the counter and keep it on a dry surface. This step minimizes the risk of electric shock and damage to internal components.
Tip: Label screws and keep track of removed parts as you go. - 2
Open the housing compartments
Use the appropriate screwdriver to remove the outer screws and gently lift the housing panel to access the internal heat path. Avoid pulling wires; disconnect only where indicated by the manufacturer’s diagram.
Tip: Take photos as you go to aid reassembly. - 3
Locate the heating element and inspect visually
Identify the element terminals and inspect for darkened coils, melted insulation, or exposed conductors. Look for loose connectors or signs of heat damage near mounting points.
Tip: If you see damaged insulation, stop and prepare a replacement. - 4
Test continuity of the heating element
With the unit unplugged, configure your multimeter to continuity. Test between the element terminals and then to ground. A consistent reading within spec indicates a healthy element; infinite resistance or a short to ground indicates a fault.
Tip: Record readings for reference after replacement. - 5
Inspect wiring and connectors
Check all wires for fraying, corrosion, or loose connections. Re-seat any loose plugs firmly and replace damaged wiring as needed.
Tip: Avoid bending wires near heat sources; keep cable paths tidy. - 6
Test thermal fuse and thermostat
If your model uses separate safety devices, test them for continuity at room temp and again when warmed to operating temperature according to the manual. Replace if they fail.
Tip: Do not bypass safety devices; they prevent overheating. - 7
Install replacement part if needed
If testing confirms a faulty component, disconnect power, remove the old part, and install the new element or safety device. Reconnect all wires using the original terminals and mounting hardware.
Tip: Ensure correct orientation to avoid misalignment with the fan path. - 8
Reassemble and secure the housing
Carefully realign the housing panels and fasten all screws. Verify door and latch alignment and that no wires are pinched during closure.
Tip: Double-check the wiring harness routing before final tightening. - 9
Test heat cycle and confirm operation
Plug the unit back in and run a short dry heat cycle to confirm heat is produced evenly. Then test with a light load to ensure reliable performance.
Tip: If the unit fails to heat again, re-check connections or reach out for professional help.
Got Questions?
Can I fix an air fryer heating element myself?
Yes, if you have basic electrical safety knowledge and the right tools. Follow safety steps, test components, and only replace parts you’re confident handling. If you’re unsure, seek professional service.
Yes, you can fix it yourself if you’re careful. Always follow safety steps and know when to stop.
How do I know the heating element is the problem?
Look for no heat, uneven cooking, or unusual noises. Use a multimeter to test continuity across the element and check related components like the thermal fuse and thermostat.
If there’s no heat and your tests show abnormal readings, the element or safety path is likely at fault.
Is it safe to repair an electric appliance at home?
With unplugged power, proper PPE, and adherence to the manual, minor repairs can be safe. If you encounter unfamiliar wiring or lack the right tools, don’t proceed.
Safety first—if you’re unsure, don’t proceed.
Should I replace just the heating element or the entire air fryer?
If the model is older or parts are scarce, replacing the whole unit may be simpler and more reliable. For newer models with available parts, replacing the element is often cost-effective.
Consider the model age and part availability to decide.
What tools do I need for the repair?
A multimeter, screwdrivers, insulated pliers, heat-resistant gloves, and a compatible replacement heating element are typically required.
You’ll want a multimeter, screwdrivers, and safety gloves at minimum.
Where can I buy replacement parts?
Look for compatible parts from the original brand or reputable third-party suppliers. Verify model compatibility before purchasing.
Check model compatibility and choose trusted suppliers.
Watch Video
Quick Summary
- Power down and verify safety before work.
- Test element continuity and related safety devices.
- Replace faulty components with model-compatible parts.
- Reassemble carefully and test with dry heat first.