Soft Boiled Eggs in Air Fryer: Step-by-Step Guide
Master soft boiled eggs in the air fryer with jammy yolks and tender whites. This step-by-step guide covers timing ranges, egg prep, safety, and model variations for consistent results.

Learn how to make soft boiled eggs in the air fryer with a precise temperature and quick cook time. This guide will show you how to size eggs, choose a temperature range, and time yolks for runny, jammy, or slightly firmer results. You’ll also learn how to shock and peel for clean, easy serving. Ready to cook with confidence? This method adapts to different egg sizes and air fryer models.
Introduction to soft boiled eggs in the air fryer
Soft boiled eggs in the air fryer offer a simple, stove-free way to achieve a tender white with a jammy yolk. This method shines in small kitchens, on busy mornings, or when you want to cook a single egg or a small batch without water boiling. According to Air Fryer 101, the air fryer’s rapid convection creates even heat that gently sets the white while preserving a moist yolk, which means fewer surprises than with traditional boiling. In practice, you’ll learn how to choose eggs, calibrate the timing, and adjust the yolk style from runny to barely set. You’ll also find practical prep tips and shell-handling techniques that minimize cracking and make peeling clean and fast. With consistent practice, you can dial in your preferred yolk texture across egg sizes and air fryer models.
How air fryers work for eggs
Air fryers cook by circulating hot air around food, creating a crisp exterior with very little oil. For eggs, the heat travels through the shell and heats the interior by convection, so the white sets first while the yolk stays soft if you keep the timing short. The shell acts as a tiny pressure vessel, so even small differences in egg freshness, size, or the model’s fan speed can shift results. In this section we unpack the physics behind even cooking for eggs, explain how basket design influences where heat concentrates, and show how preheating and placement affect how reliably your yolk stays soft while the white firms. The goal is consistent texture across batches and devices.
Egg selection and prep
Choose eggs that are uncracked and as fresh as possible; very fresh eggs can be a bit trickier to peel, but they also hold together well. Let refrigerated eggs rest at room temperature for 15–20 minutes to reduce temperature shock during cooking. Dry the shells before you load them into the basket to prevent moisture from turning to steam and cracking shells. For easier peeling after cooking, have a bowl of ice water ready to shock the eggs and stop the cooking process. Finally, arrange eggs in a single layer, avoiding crowding so heat reaches each egg evenly.
Temperature ranges and timing by yolk style
The exact numbers can vary by air fryer model and egg size, so treat the ranges below as starting points and adjust based on your results. For a runny yolk, aim for a lower end: around 270°F (132°C) for 9–11 minutes, then shock in ice water. For a classic jammy yolk, target 275–280°F (135–138°C) for 11–13 minutes, followed by chilling. If you prefer a slightly firmer yolk, 285°F (140°C) for 13–15 minutes works well; again, finish with a shock. If you cook larger eggs or want a firmer white, extend time slightly by 1–2 minutes. Use a timer and check one egg first to dial in your ideal window.
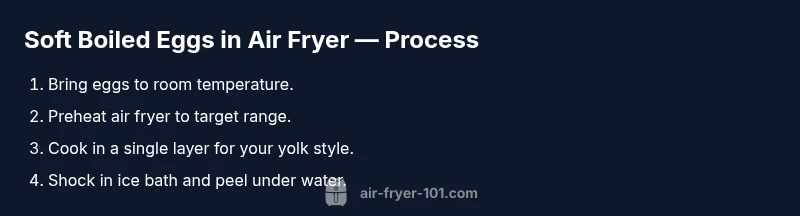
Step-by-step workflow overview
This overview gives you a reliable rhythm you can reuse. First, bring eggs to room temperature and preheat the air fryer if your model requires it. Next, place eggs in a single layer with space between them. Set the target time and temperature based on your yolk preference. When time is up, immediately transfer eggs to ice water to halt cooking, then peel after a short rest. The sequence minimizes yolk variance and keeps whites tender.
Shocking and peeling eggs
Shocking eggs in ice water is essential to stop the cooking while preserving the yolk’s desired softness. Allow the eggs to sit in the ice bath for at least 5 minutes or until fully cooled. When peeling, crack the shell gently all around and roll the egg to loosen the shell before peeling under cold running water. Running water helps separate the membrane from the shell, reducing tugging on the white and preventing tears. If you plan to serve immediately, pat dry and slice carefully to reveal a glossy, jammy center.
Troubleshooting common issues
If the white remains translucent, your cook time may be too short or the yolk too large for your model. Increase time by 1–2 minutes and verify with a test egg. If the shell cracks during cooking, avoid overcrowding and consider using an egg rack or placing eggs in a single layer on the basket. For overcooked yellow centers, reduce time by 1–2 minutes or lower the temperature slightly and adjust for yolk size. If peeling is difficult, try a longer ice bath and peel under running water.
Variations for different egg sizes and yolk preferences
Extra-large or jumbo eggs typically benefit from slightly longer times, while small eggs finish sooner. Use the 9–11 minute window as a baseline for medium eggs, then tune upward by 1 minute for larger eggs or downward by 1 minute for small eggs. For very runny yolks, you may shorten the time by 1–2 minutes; for firmer yolks, add 1–2 minutes. If you’re cooking several eggs, consider cooking in two batches to ensure even heat distribution and consistent results.
Safety, nutrition, and cleanup tips
Egg safety matters; fully cooked yolks still contain nutrients that are best enjoyed when eggs are handled safely. After cooking, store any leftovers in the fridge and label with date. Clean your air fryer basket and rack promptly to avoid residue buildup. For extra guidance on food safety, consult authoritative sources such as USDA FSIS and national health agencies. Always supervise young children when consuming eggs and avoid double-dipping or tasting raw mixtures.
Authority sources
- https://www.fsis.usda.gov/food-safety/safe-food-handling-and-preparation/eggs
- https://www.cdc.gov/foodsafety/keep-food-safe.html
- https://extension.illinois.edu/foodsafety/eggs
Tools & Materials
- Eggs (size variety)(Bring to room temperature for 15–20 minutes.)
- Air fryer with adjustable temperature(Any model working in 250–400°F range.)
- Timer or timer app(Accurate to the minute.)
- Ice bath (bowl of ice water)(Stops cooking immediately after removal.)
- Tongs or spoon(For safe transfer without cracking shells.)
- Paper towels(Dry eggs before loading if needed.)
- Egg rack or single-layer basket(Promotes even heat distribution.)
Steps
Estimated time: 15-25 minutes
- 1
Prepare eggs for cooking
Remove eggs from the fridge and let them rest at room temperature for 15–20 minutes. Dry the shells if any moisture is present to prevent steam buildup inside the shell during cooking.
Tip: Room-temp eggs cook more evenly and are less prone to cracking. - 2
Preheat and position
Preheat the air fryer to your chosen starting temperature if your model requires it, then place eggs in a single layer with space between them. Avoid stacking.
Tip: A single layer minimizes heat shielding and yields uniform results. - 3
Set time and temperature
Choose a yolk style (runny, jammy, or firmer) and set the corresponding time window within the 270–285°F range. Use a timer to monitor progress precisely.
Tip: Start with the lower end of the range and adjust by 1–2 minutes in future batches. - 4
Cook and monitor
Cook for the selected time, then immediately remove eggs and move to ice water to halt cooking.
Tip: Timing consistency matters—check one egg first to fine-tune your ideal window. - 5
Shock and cool
Immerse eggs in ice water for at least 5 minutes until fully cooled; this preserves the yolk texture and makes peeling easier.
Tip: A longer ice bath helps peel with less drag on the white. - 6
Peel and test
Gently tap and crack all around the shell, then peel under cool running water to minimize sticking.
Tip: Peel under water to reduce membrane adhesion and keep the yolk intact. - 7
Serve or store
Serve immediately for best texture, or refrigerate peeled eggs for up to 3–4 days. Reheat gently if needed.
Tip: If reheating, rewarm briefly to maintain a soft yolk without overcooking. - 8
Clean up
Empty and wash the air fryer basket and rack once cooled; wipe the exterior and keep the interior dry.
Tip: Regular cleaning prevents residue buildup that can affect heat distribution.
Got Questions?
What is the best temperature for soft boiled eggs in an air fryer?
Aim for a lower temperature range around 270°F (132°C) to start, with a 9–11 minute window. Tweak by egg size and yolk preference, then shock in ice water for best texture.
Try 270 degrees for 9 to 11 minutes, then cool in ice water for the perfect yolk.
How long should medium eggs cook for a runny yolk?
For runny yolks on medium eggs, start with 9–11 minutes at 270°F and adjust by 1–2 minutes based on results.
Start with 9 to 11 minutes at 270 degrees and adjust to your yolk preference.
Can I make soft boiled eggs without an ice bath?
An ice bath helps stop cooking and preserves the yolk texture. Without it, residual heat can overcook the yolk and alter the final result.
The ice bath is important for stopping the cook and keeping the yolk just right.
What if the shell cracks during cooking?
Cracks are often due to temperature shock or overcrowding. Let eggs come to room temperature and cook in a single layer with space between eggs.
If a shell cracks, let eggs come closer to room temp and avoid crowding.
How should I peel a soft boiled egg after air frying?
Peel under cool running water to minimize sticking and to separate the membrane from the shell for easier removal.
Peel under cold water to help remove the shell without tearing the egg.
How long does a batch keep well in the fridge?
Peeled soft boiled eggs can be stored in the fridge for 3–4 days; keep them in a covered container to prevent odor transfer.
Store peeled eggs in the fridge for up to four days.
Watch Video
Quick Summary
- Use room-temperature eggs for even cooking
- Shock eggs in ice water to stop cooking
- Adjust time by yolk preference and egg size
- Peel under water to avoid tearing the white
- Cook in a single layer for consistency