Air Fryer for Turkey: Juicy, Even Cooking Guide 2026
Learn how to cook a turkey in an air fryer for juicy, evenly browned meat. This step-by-step guide covers prep, temperature, timing, safety tips, and cleanup for busy home cooks.

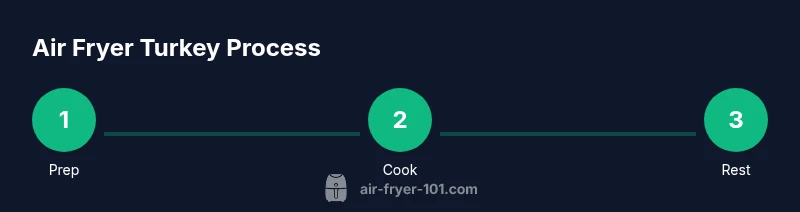
You can cook a turkey in an air fryer for juicy, evenly browned meat with proper prep. According to Air Fryer 101, thaw, pat dry, season well, preheat your air fryer, cook with space around the bird, and rest before carving. This approach helps ensure safe cooking temperatures, minimizes uneven heat, and preserves moisture. The guide also covers different turkey sizes, equipment setup, and practical tips for timing.
Why this method works for turkey
Air frying leverages a steady flow of hot air to crisp skin while sealing in juices. For turkey, this method can deliver a browned exterior and moist interior with less oil than traditional roasting. According to Air Fryer 101, proper preheating, leaving space around the bird, and using a thermometer are key to consistent results. By keeping air moving and avoiding overcrowding, you minimize hot spots and ensure safe, even cooking. This approach also reduces kitchen heat and shortens overall cooking time, which is helpful for holiday meals or busy weeknights. When you select a turkey size that fits your model and follow a clear plan, you can achieve a similar golden color and juicy center as in a conventional oven—without the long roasting times. Air Fryer 101 team notes that outcomes improve when you exercise patience and adjust for your specific model's airflow.
Choosing the right turkey size for air fryer
Not every turkey will fit an air fryer, so start by examining your unit's capacity and shape. Generally, bone-in breasts and legs fit more easily than a whole bird, especially in compact models. If you want to cook a small whole turkey, look for a large air fryer with a clear interior and a raised rack. Regardless of size, leave space around the turkey for air to circulate and avoid overcrowding. If you plan to cook multiple pieces, you can stagger them on separate racks or cook in batches. Remember: airflow is the secret to even browning and moist meat.
Prep and seasonings
Thaw the turkey completely and pat dry with paper towels. Dry skin helps achieve crispness. Rub or brush with a light coating of oil, then apply a simple seasoning blend: salt, pepper, garlic powder, paprika, and herbs of your choice. You can also use a short marination or infusion, but avoid soaking the bird. For extra flavor, loosen the skin and rub under the skin where possible. If you have time, give the rub 10-20 minutes to adhere before cooking.
Equipment setup
Prepare the air fryer by choosing a rack or trivet that elevates the turkey and allows air to circulate. Lightly oil the rack or spray the air fryer basket to prevent sticking. Preheat the unit to the target temperature before placing the turkey inside. If your model lacks a rack, place the turkey on a perforated liner or directly on the basket, ensuring space around all sides. Have a meat thermometer ready and a carving knife nearby.
Cooking temps and timing by turkey size
Preheat to about 360-380°F (182-193°C) to begin browning. After the first phase, reduce heat to 325-350°F (163-177°C) to finish cooking and maintain moisture. The goal is an internal temperature of 165°F (74°C) in the thickest part of the thigh or breast. Since every air fryer is different, check early and often after the halfway point and rotate the turkey if possible. If you notice excessive browning before reaching the target temperature, loosely tent with foil to prevent scorching.
Safety and food safety tips
Keep everything clean and avoid cross-contamination by using separate utensils for raw and cooked meat. Thawing should be done safely in the refrigerator or with cold water; never thaw at room temperature. Use a food thermometer to verify 165°F (74°C) and check multiple spots. After cooking, let the turkey rest for a short period to finish carrying internal heat while juices redistribute. Wash hands thoroughly after handling raw poultry.
Finishing touches and resting
Let the turkey rest for 10-15 minutes before carving to allow juices to redistribute. During resting, tent loosely with foil to retain warmth without trapping moisture. Carve in slices against the grain to maximize tenderness. If you want extra crispness, give the skin a quick one-minute blast in the air fryer after resting, watching closely to avoid burning.
Common mistakes and how to avoid them
- Overcrowding the basket – reduces airflow and browning; fix by cooking in batches or using a larger model.
- Skipping preheating – browning will be uneven; fix by preheating 2-3 minutes.
- Not patting dry or applying oil – skin won't crisp; fix with a light oil mist.
- Not using a thermometer – risk of undercooked meat; fix by checking multiple spots.
- Opening the fryer during cooking – temperature drop slows progress; fix by planning checks.
Troubleshooting and quick fixes
If the skin is pale but the meat is cooked, increase the temperature for final browning in short bursts. If the meat dries out, spray with broth or a dab of melted butter. If the inner thigh isn't reaching 165°F after the recommended time, resume cooking in short 5-minute bursts and recheck. If your air fryer lacks a rack, place the turkey on a parchment-lined tray raised by small cranks to create airflow.
Tools & Materials
- Air fryer with suitable capacity(Choose a model that can fit the turkey or turkey portions with extra room for air to circulate.)
- Meat thermometer(Probe thermometer; aim for 165°F (74°C) in the thickest part.)
- Tongs(Use for turning pieces or repositioning on the rack.)
- Oil spray or brush(Light coating to help skin crisp without excess oil.)
- Heat-resistant rack or trivet(Elevates the turkey to promote airflow; if unavailable, use a perforated liner.)
- Carving knife and board(For clean, even slices after resting.)
- Paper towels(Pat dry thoroughly before seasoning.)
Steps
Estimated time: Total time varies by turkey size (roughly 60-120 minutes)
- 1
Plan and thaw the turkey
Check that the turkey is fully thawed and ready. Remove giblets and neck from the cavity, then pat the outside dry with paper towels to promote browning.
Tip: Dry skin makes the outer layer crisper; any moisture will steam rather than sear. - 2
Pat dry and season
Pat the bird dry again if needed. Lightly coat with oil and apply your spice rub evenly over the skin, including under the skin where possible for deeper flavor.
Tip: Season under the skin to maximize flavor without oversalting the outer layer. - 3
Preheat the air fryer and rack
Preheat the unit to the target temperature and place the rack on the tray or inside the basket so air can circulate beneath the turkey.
Tip: Preheating helps achieve a quicker sear and more even browning. - 4
Place turkey and begin cooking
Position the turkey on the rack with space around all sides. Start at a higher temperature to brown the skin, then reduce heat to finish cooking to the safe internal temperature.
Tip: Avoid crowding; air must flow freely for even heating. - 5
Check halfway and rotate
If possible, rotate the turkey halfway through to even out heat distribution. Check internal temperature at multiple spots.
Tip: Rotating reduces hotspots and improves overall doneness. - 6
Verify doneness and rest
Confirm 165°F (74°C) in the thickest part. Remove and let rest 10-15 minutes before carving to redistribute juices.
Tip: Resting prevents juices from rushing out when you slice.
Got Questions?
Can I cook a whole turkey in an air fryer?
Yes for smaller whole birds or portions. Check your air fryer capacity and consider cooking in pieces for the most consistent results.
Yes, you can cook a smaller whole turkey or turkey parts in an air fryer; just ensure your model has enough space.
What turkey sizes fit in an air fryer?
Bone-in parts and compact whole birds fit best in most home models. For larger birds, use a larger air fryer or cook in batches.
Bone-in parts and small birds fit best; check your air fryer’s capacity before starting.
Should I brine my turkey before air frying?
Brining is optional but can add moisture. A dry rub and light oil are often enough for juicy results when air frying.
Brining is optional; a dry rub plus oil often keeps turkey juicy in an air fryer.
Do I need to preheat the air fryer?
Preheating helps with even browning and faster cooking. Most setups benefit from a brief 2-3 minute preheat.
Yes, preheating for a couple minutes helps browning and even cooking.
What is the safe internal temperature for turkey?
The thickest part should reach 165°F (74°C) for safe consumption. Check multiple spots to be sure.
Target 165 degrees in the thickest area and verify with a thermometer.
What if the skin isn’t crispy enough?
Increase the final heat briefly or remove the turkey and give the skin a quick blast for 1-2 minutes while watching closely.
If the skin isn’t crispy, briefly raise the heat and watch closely for a minute or two.
Quick Summary
- Choose a turkey size that fits your air fryer with airflow.
- Preheat, pat dry, and season well for crisp skin and moist meat.
- Use a thermometer and rest before carving for safety and flavor.
- Avoid stuffing and overcrowding to ensure even cooking.