How to Keep Air Fryer from Smelling: A Practical Guide
Discover proven methods to prevent and eliminate odors in your air fryer with simple cleaning routines, deodorizing tricks, and smart maintenance for a fresher kitchen.

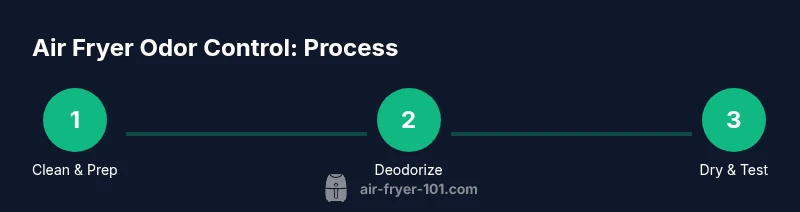
If you're wondering how to keep air fryer from smelling, the key is combining prompt cleaning, routine maintenance, and smart deodorizing. Start with a quick wipe-down after each use, clean the basket and tray weekly, and run a short vinegar-water cycle monthly. This approach stops smells at the source.
Why Odors Happen in Air Fryers
According to Air Fryer 101 Team, most odors come from oil residues, trapped moisture, and food particles that cling to surfaces like the basket, gasket, and door seal. Over time, these residues oxidize or emulsify, releasing smells when heated. The air fryer’s compact chamber means odors recirculate easily, so without regular cleaning a mild scent can become persistent. When you cook strong-smelling foods such as fish, garlic, or cumin, those odors cling more stubbornly to the mesh and plastic parts. Understanding the source helps you plan a targeted prevention routine rather than chasing odors with temporary tricks. Regular attention to the basket, tray, and inner walls reduces buildup and keeps the kitchen smelling fresh between meals.
Air Fryer 101’s approach blends quick fixes with long-term habits, so you don’t have to choose between convenience and cleanliness. The core idea is simple: remove residues, neutralize odors, and dry thoroughly so nothing looms to transfer to the next batch. If you implement the steps consistently, you’ll notice fewer lingering smells after every cooking session.
Quick-start Odor Neutralizers You Can Try Right Now
Deodorizing an air fryer doesn’t require fancy products. Start with items you likely already have in the kitchen. A light spray of white vinegar diluted with water can neutralize many odors without leaving a vinegarly aftertaste. Wipe the interior with a soft cloth dampened in a mild soapy solution, then rinse with a damp cloth to remove any soap residue. For stubborn odors, a paste of baking soda and water applied to the basket seams and tray corners works wonders—let it sit for a few minutes, then scrub and rinse. A few lemon peels placed in the crisper tray during a short warm cycle (no food) can add a fresh scent and help cut through fat buildup. These options are inexpensive, effective, and safe for regular use when you follow the manufacturer’s cleaning guidelines.
If you want a quick, science-backed option, spray a mist of a weak vinegar solution during a hot cycle and finish with a thorough wipe-down. Air Fryer 101 recommends keeping a simple odor-neutralizing routine that you can repeat after cooking any fragrant foods. Remember to always unplug the unit before cleaning and avoid spraying liquids directly into the heating element.
Everyday Cleaning Routine for Odor Prevention
A consistent daily routine prevents odors from taking root. After you finish cooking, unplug and cool the unit before handling any parts. Remove the basket and tray, then rinse them under warm water with a mild dish soap. Scrub any baked-on oil with a non-abrasive sponge and dry thoroughly before reassembling. Wipe the inside walls gently with a cloth dampened in a mild vinegar solution to neutralize surface oils. Don’t forget the door seal and the exterior housing—grease can migrate into crevices and trap smells. Keep a small cleaning kit handy in the kitchen: a soft cloth, non-scratch sponge, mild soap, and a spray bottle for vinegar.
Consistency matters: perform this quick routine after every few uses, and you’ll keep smells from taking hold. If you notice a faint odor lingering after cooking, repeat the wipe-down and do a more thorough clean at the end of the week.
Best Cleaning Agents and How to Use Them
Choose cleaning agents that are gentle on plastic and nonstick coatings while being strong enough to remove oil residue. Mild dish soap in warm water works for the basket, tray, and interior walls. For tougher buildup, a paste made from baking soda and water can be applied with a soft brush to avoid scratching surfaces. White vinegar is excellent for neutralizing odors; mix it with water in a 1:1 ratio for interior cycles or wipe-downs. If you use a commercial cleaner, confirm it’s safe for nonstick surfaces and avoid abrasive cleaners that could damage coatings. After cleaning, rinse thoroughly to prevent soap or cleaner residues from cooking onto your next batch. Air Fryer 101 reminds users to dry each part completely before reassembling to prevent moisture buildup that can promote odors.
Safety note: never submerge the main unit in water, and never spray liquids directly into the air fryer’s vent or control panel. Always refer to your model’s manual for recommended cleaning agents and methods, as some coatings are more sensitive than others.
Deep Cleaning Your Air Fryer: Step-by-Step Approach
Deep cleaning removes hidden residues that daily cleaning can miss. Start by unplugging the unit and letting it cool completely. Remove the basket, tray, and any removable racks. Soak these parts in warm, soapy water for 10–15 minutes to loosen oil. While they soak, wipe the interior walls with a cloth dampened in a vinegar-water solution, paying attention to corners and the fan intake. Rinse all parts thoroughly, then dry completely. If you still detect odors, apply a baking soda paste to any stubborn spots, let sit for 5–10 minutes, and rinse. Finally, run an empty cycle at 180°C (350°F) for 5–7 minutes with a little water in the bottom to steam-clean the chamber and freshen the interior before a final wipe-down.
Tip: Always air-dry parts on a rack or towel to ensure no moisture remains in hard-to-reach areas. This step reduces the risk of musty smells forming from damp surfaces.
Dealing with Strong Odors from Common Foods
Some foods leave stronger odors than others. Fish, garlic, onions, and spicy marinades can cling to the basket and seals. To prevent these odors, pre-rinse the basket right after cooking and avoid leaving food residues to harden. For persistent scents, wipe with a cloth dampened in a diluted vinegar solution, then scrub gently with baking soda paste on exterior seams and edges. If you notice the smell persists near the door seal, remove the seal if your model allows it and clean the groove with a soft brush and a tiny amount of soapy water. Avoid using harsh solvents that could degrade gaskets. After cleaning, dry thoroughly and run a short test cycle to verify the odor is gone before cooking again.
Air Fryer 101 suggests pairing odor control with a quick rinse and dry after each use to prevent strong odors from becoming permanent.
Preventive Practices: Storage, Cooking Practices, and Materials
Prevention beats odor removal. Store cleaned units in a dry, well-ventilated space. When cooking fragrant foods, consider using a light paper towel barrier or parchment to minimize direct contact with the basket’s interior. Avoid stacking cooked foods while still hot, which can release trapped moisture and odors into the chamber. Use stable, heat-safe containers for marinades or leftovers and wipe any spills immediately. Regularly check the gasket and door seals for cracks or buildup; a damaged seal traps odors and requires replacement. If you notice persistent smells, rinse the interior with a gentle acidic cleaner and ensure all components are completely dry before reassembling. By instituting a routine, you’ll make odor control a routine part of air fryer use, not a last-minute fix.
Odor-Absorbing Accessories and Tools
Certain accessories can help keep smells at bay. Activated charcoal sachets placed nearby can absorb kitchen odors when the air fryer is not in use, though they should never be placed inside the unit. Silicone gaskets or odor-blocking seals can reduce scent transfer during cooking. A microfiber cloth kept in a dedicated kit helps you remove grease and residues without spreading them. If you use special liners, ensure they are food-grade and heat-safe for your model. Avoid using paper towels or towels that shed fibers inside the chamber. While accessories can help, they do not replace regular cleaning and proper drying after each use.
Troubleshooting: When Odors Persist
If odors persist after cleaning, troubleshoot by examining possible sources beyond the chamber. Check the gasket for wear or cracks, inspect the fan duct for blockages, and look for residue on the heating element. A slow buildup in the duct or around the fan can circulate smells with every cycle. Re-clean the interior, perform a deep clean, and re-test without food to ensure the odor is eliminated. If you still notice odor after all maintenance, consult the manufacturer’s support resources and verify you are using compatible cleaning agents for your model. Persistent smells could indicate a need for component replacement or professional service.
How to Maintain Fresh Smell Over Time
Create a maintenance calendar that fits your cooking frequency. Schedule a quick post-cook wipe, a deeper weekly clean for heavy use, and a monthly deep clean. Keep a dedicated kit for air fryer cleaning in the kitchen: soft cloths, non-scratch brushes, mild dish soap, baking soda, and a bottle of distilled white vinegar. Regularly air out the kitchen after cooking strong-smelling foods to prevent lingering odors from migrating. Small, consistent habits reduce the effort needed to keep your air fryer smelling fresh over the long term.
Tools & Materials
- Dish soap (mild)(For basket, tray, and racks)
- Warm water(For washing and soaking)
- Baking soda(For paste scrubs and deodorizing)
- White vinegar(Odor neutralizer; use 1:1 with water for interior wipe)
- Non-abrasive sponge or brush(Avoid scratching coatings)
- Soft microfiber cloth(For interior and exterior wiping)
- Lemon slices (optional)(Fresh scent during cycles)
- Activated charcoal sachet (optional)(Nearby storage to absorb kitchen odors)
- Clean, dry towels(Drying parts thoroughly)
- Water for rinsing(Rinse all soap residues)
Steps
Estimated time: 60-90 minutes
- 1
Unplug and disassemble
Power off the unit and unplug it. Remove the basket, tray, and any removable racks. This exposes all surfaces so you can access oil buildup and residue in corners and seams.
Tip: Keep small parts together in a labeled container to avoid misplacing pieces. - 2
Soak removable parts
Fill a sink or basin with warm, soapy water and immerse the basket, tray, and racks. Let soak for 10–15 minutes to loosen baked-on fat before scrubbing.
Tip: Avoid soaking the main unit; this can damage electrical components. - 3
Wipe interior with vinegar solution
Wipe the interior walls with a cloth dampened with a 1:1 vinegar-to-water solution. Focus on corners, the door seal, and the fan intake area to neutralize lingering oils.
Tip: Never spray directly into the heating element or vents. - 4
Scrub stubborn spots
Apply a baking soda paste to stubborn spots on the basket seams and tray corners. Let sit for 5–10 minutes, then scrub with a non-abrasive sponge.
Tip: Rinse thoroughly to remove all paste and soap residues. - 5
Rinse and dry parts
Rinse all removable parts under clean water and dry completely with a clean towel or air-dry on a rack.
Tip: Moisture left in joints can foster musty smells; ensure every surface is bone dry. - 6
Run a deodorizing cycle
Reassemble the unit and run an empty cycle at about 180°C (350°F) for 5–7 minutes with a small amount of water in the bottom. This helps steam-clean the interior and refresh the chamber.
Tip: Finish with a quick wipe-down to remove any loosened residue. - 7
Exterior and seals check
Wipe the exterior housing and door seals with a damp cloth. Use a soft brush to clear any debris from crevices around the gasket.
Tip: Do not use harsh chemicals on seals; they can cause cracks over time. - 8
Optional deodorizing step
Place lemon slices on the bottom of the tray and run a short warm cycle to impart a fresh scent.
Tip: Lemon is optional and should never replace proper cleaning. - 9
Reassemble and test
Put all parts back in place, plug in, and run a quick test cycle with a small amount of water to ensure there are no odd smells before cooking again.
Tip: If odors persist, perform a deeper clean as described above. - 10
Establish a routine
Schedule a quick post-cook wipe after every use and a deeper clean weekly or monthly based on your cooking frequency.
Tip: Consistency is the most effective odor control.
Got Questions?
How often should I clean my air fryer to prevent smells?
For most households, a quick wipe after each use and a deeper weekly or biweekly clean is enough. If you cook particularly aromatic foods, increase the frequency. A monthly deep clean ensures built-up oil doesn’t cause persistent odors.
Clean after each use and do a deeper weekly or biweekly clean. If you cook strong-smelling foods, clean more often.
Can I use bleach or harsh chemicals to disinfect the air fryer?
No. Do not use bleach or strong solvents on an air fryer. Use mild soap, vinegar, or baking soda paste on removable parts, and always rinse thoroughly.
Avoid bleach or harsh cleaners. Use mild soap or vinegar and rinse well.
What should I do if the odor persists after cleaning?
If odors persist, inspect the gasket and seals for wear, perform a deeper interior wipe, and run an empty deodorizing cycle. If the smell continues, seek manufacturer support.
If it still smells, check seals and run a deeper cleaning or contact support.
Are there safe deodorizing methods for frequent use?
Yes. Use a mild vinegar solution or a baking soda paste on stubborn spots, then wipe and rinse. Limit lemon or strong fragrances to occasional cycles to avoid altering food flavors.
Vinegar or baking soda are safe; avoid heavy fragrances regularly.
Should I remove the door seal for cleaning?
Only if your model allows it and you’re comfortable removing and reattaching it. Otherwise, clean around the seal with a soft brush and damp cloth, avoiding any damage.
Only remove seals if your manual says it’s safe. Otherwise clean around it gently.
Is it safe to use lemon for deodorizing?
Lemon can add a fresh scent but should be used sparingly and never replace cleaning. It’s best used during occasional cycles after a thorough wash.
Lemon is optional and should not replace cleaning.
Watch Video
Quick Summary
- Clean promptly after use to prevent buildup
- Use vinegar or baking soda for odor neutralizing
- Dry all parts completely before reassembly
- Deep clean regularly for stubborn smells
- Establish a simple maintenance routine