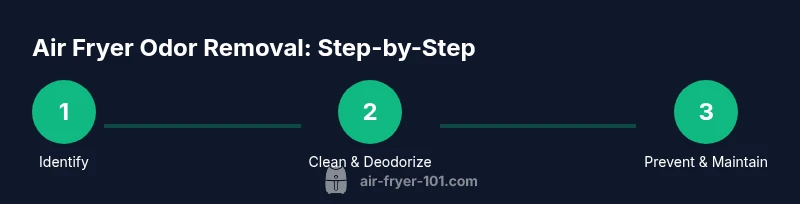
How to Get Rid of Air Fryer Smell
Learn practical, safe, and effective methods to remove air fryer odors, keep interiors clean, and prevent smells from returning. Step-by-step cleaning, deodorizing tips, and maintenance routines for a fresher kitchen.

According to Air Fryer 101, odors in air fryers usually come from trapped oil residues and burnt bits that cling to baskets, gaskets, and interior walls. This guide outlines practical, safe steps to get rid of air fryer smell, from quick fixes to deep cleaning and ongoing maintenance. Follow these steps to preserve flavor and freshness.
Why Odor Happens in Air Fryers
Odors in air fryers are typically the result of fine oil residues and tiny food particles that cling to the basket, tray, gasket, and even the interior walls of the unit. When you heat these residues, they can release familiar, lingering smells—especially after cooking strongly scented foods like garlic, fish, or paprika. Over time, repeated use can create a film on nonstick surfaces that retains aromas even after cleaning. Understanding where smells originate helps you target the right areas without overdoing cleaning or using harsh chemicals. A regular pattern of cleaning after cooking, plus periodic deep cleaning, reduces the chance of stubborn odors accumulating and affecting the taste of future meals.
Quick Fixes to Tanish Odor Immediately
If you notice a smell right after cooking, start with fast, low-effort steps to curb it before a full clean. Open the air fryer’s lid and let fresh air circulate; wiping the exterior with a damp cloth helps remove surface oils that could contribute to odor transfer. For the interior, use a mild soap solution on a soft sponge to remove obvious oil films from the basket and tray. If the smell remains, run a short, empty cycle with a small amount of water and a splash of lemon juice or white vinegar for a gentle deodorizing effect. Finally, dry all components thoroughly before reassembling. These quick actions can dramatically reduce odor buildup between deeper cleans.
Quick Action Checklist
- Open and ventilate the unit to let fumes escape
- Wipe exterior and interior surfaces with a mild soap solution
- Run a short, empty cycle with water and lemon or vinegar
- Dry all parts completely before reassembly
- Repeat after heavy-use meals to prevent buildup
Tools & Materials
- Soft sponge or microfiber cloth(Non-abrasive to protect coating)
- Warm soapy water(Mild dish soap is best)
- Non-abrasive scrub brush or old toothbrush(For crevices and vents)
- Bowl for soaking(Only for removable parts)
- White vinegar spray or vinegar and water solution(Use sparingly on interior surfaces)
- Baking soda(For deodorizing and paste cleaning)
- Lemon slices or lemon juice(Natural deodorizer)
- Dish towels or paper towels(Drying and blotting)
- Gloves (optional)(Keep hands clean during cleaning)
Steps
Estimated time: 60-120 minutes
- 1
Power down and unplug
Before any cleaning, unplug the air fryer and allow it to cool completely. This prevents accidental shocks and ensures the interior isn’t hot enough to cause rapid evaporation of cleaners. If your unit has a detachable cord, unplug and proceed with the parts that come apart easily.
Tip: Always start with safety; never clean a hot unit. - 2
Disassemble removable parts
Remove the basket, tray, and any racks. Check the gasket around the door and remove any loose debris from crevices. Place all removable parts in warm, soapy water for soaking while you sanitize the base.
Tip: Soaking helps loosen grease; keep the base dry to avoid water damage. - 3
Clean removable parts
Scrub the basket and tray with a non-abrasive sponge. Pay attention to corners and the basket holes where oil can accumulate. Rinse thoroughly and dry with a clean towel before reinserting.
Tip: A gentle paste of baking soda and water can help lift stubborn grime. - 4
Wipe the interior surfaces
Use a damp cloth with mild soap to wipe the interior walls and heating element housing if accessible. Do not submerge or spray water directly into the heating chamber. Dry the interior promptly to prevent moisture buildup.
Tip: Avoid harsh solvents; stick to mild dish soap and a soft cloth. - 5
Deodorize with safe agents
Option A: Wipe a thin paste of baking soda on interior surfaces, wait 10 minutes, then wipe away. Option B: Run a brief empty cycle with water + lemon juice or a splash of white vinegar for a light deodorizing effect. Always vent after using powerful agents.
Tip: Test deodorizers in a small area first to ensure no residue. - 6
Dry, reassemble, and test
Ensure all parts are completely dry before reassembly. Plug in or reconnect power and run a short test cycle with just water to confirm neutral odors and clean surfaces. If any smell lingers, repeat the deodorizing step or proceed to deeper cleaning.
Tip: A quick test run helps confirm deodorization without cooking food. - 7
Create a prevention rhythm
Develop a simple routine: wipe after each use, do a light clean weekly, and a deeper clean monthly. Keeping up with this schedule reduces build-up and preserves taste and odor-free operation.
Tip: Consistency is the key to avoiding stubborn smells.
Got Questions?
Why does my air fryer smell after cooking certain foods?
Smells often come from oil and food particles that cling to the basket or interior. Cooking strong-smelling foods can intensify this. A combination of quick surface cleaning and periodic deep cleaning helps prevent buildup.
Smells come from oil and food residues clinging to the basket and interior. Quick cleaning plus periodic deep cleaning usually fixes it.
How often should I clean my air fryer to prevent odor?
Light cleaning after each use, a deeper clean monthly, and immediate cleaning after cooking particularly odorous foods will help keep smells away long-term.
Clean after each use and do a deeper clean monthly to prevent odors.
Can I use vinegar inside the air fryer for deodorizing?
Yes, a small amount of white vinegar or lemon juice can help deodorize when used in a brief, empty cycle. Avoid pouring vinegar directly onto heating elements and always dry parts thoroughly afterward.
Vinegar can help deodorize in an empty cycle, but avoid spraying it onto the heating element and dry parts well afterward.
Is it safe to remove the gasket or seal for cleaning?
Only if the manufacturer recommends it for your model. If you remove any seals, ensure proper reinstallation and refer to the user manual to avoid affecting performance or safety.
Only remove seals if your manual says it’s safe; reassemble correctly after cleaning.
What should I do if the smell persists after cleaning?
If odors persist, inspect for hidden grease buildup or damaged gaskets and seals. Consider professional service or replacement parts if necessary, and repeat the deodorizing steps.
If it still smells after cleaning, check seals and consider parts replacement if needed.
Can I use baking soda directly in the air fryer?
Baking soda can be used as a paste on interior surfaces or as a mild deodorizer after cleaning. Don’t leave a baking soda residue inside the chamber, and rinse thoroughly if used in a paste.
Baking soda works as a deodorizer, but rinse away any paste residue after use.
Watch Video
Quick Summary
- Identify odor sources (oil residues, burnt bits, gaskets).
- Prioritize safe, mild cleaning methods over harsh chemicals.
- Deep clean removable parts regularly and dry thoroughly.
- Deodorize with baking soda or gentle vinegar/lemon cycles.
- Maintain a simple after-use routine to prevent recurrence.