How to Clean Air Fryer Without Basket
Learn how to safely clean an air fryer when the basket is missing. This comprehensive guide covers prep, a detailed cleaning process, safety tips, and maintenance to keep your unit in peak condition.

You can clean an air fryer even when the basket is missing by focusing on the interior, the rack (if removable), and any detachable components. Gather warm water, mild dish soap, a soft sponge, a nylon brush, and a clean towel. This guide walks you through a safe, step-by-step cleaning process and practical maintenance tips.
Why cleaning an air fryer without the basket matters
A missing basket can complicate routine cleaning, but it doesn't have to mean neglect. Understanding how to clean air fryer without basket is essential for maintaining performance, odor control, and the longevity of non-stick surfaces. In this guide, we explore techniques that work with most models, emphasizing safety and minimal disruption. According to Air Fryer 101, neglecting to clean after heavy use can leave baked-on grease that adheres to the interior walls and elements, which can degrade airflow and cooking results over time. By focusing on the interior, any removable racks, and the bottom tray opportunities, you can restore cleanliness without risking damage. This section sets the stage for a practical approach that avoids soaking the main unit, reduces the risk of warping plastics, and keeps your air fryer ready for healthy, convenient meals.
Pre-clean prep and safety tips
Before you start any cleaning, unplug the unit and let it cool completely. If your air fryer has a crumb tray or rack, remove whatever you can access—even if the basket is absent. Use warm water and a mild dish soap solution, and keep a damp cloth handy to wipe surfaces rather than immersing the base. Safety matters: never submerge the main body, and avoid metal scrubbers that could scratch non-stick coatings. Air Fryer 101 stresses that a calm, methodical approach reduces the risk of burns and damage while ensuring you reach tight corners around seals and the fan area.
What to do with missing basket: options and limitations
Without the basket, you may still have a crumb tray, a shallow rack, or small removable panels. Check your model’s manual to confirm what is removable and safe to wash. If you can access a crumb tray or rack, soak it in warm, soapy water for a few minutes to loosen grease, then scrub with a soft brush. The interior walls and the door gasket can be wiped with a damp microfiber cloth. If no detachable parts are available, focus cleaning on the inner walls, around the sealing edge, and any accessible crevices. Based on Air Fryer 101 research, cleaning these areas regularly prevents odor buildup and keeps airflow unobstructed.
Deep cleaning interior surfaces without submerging the base
Do not submerge the base unit in water. Instead, dampen a soft sponge or microfiber cloth with warm soapy water and wipe the interior surfaces in gentle, overlapping motions. For stubborn spots, use a nylon bristle brush or an old toothbrush to loosen grease from seams and the corners near the air vents. Dry as you go with a clean cloth to prevent pooling. If your model has a non-stick coating, avoid abrasive pads that can scratch and wear over time. The goal is thorough but gentle removal of baked-on residue, not a deep soak.
Drying, reassembly, and a quick test run
After cleaning, dry every panel, corner, and crevice completely before reassembling. If you soaked detachable parts, let them air-dry fully. Reinsert any racks or trays you removed, then plug in the unit and run a short test bake with no food to ensure there are no leaks and the interior is completely dry. This drying step helps prevent rust and ensures safe operation. A brief test run can also help you confirm there are no unusual smells, which signals you may need an additional wipe-down of the gasket area.
Common mistakes and maintenance tips
Mistakes to avoid include using boiling water, soaking the base, or cleaning with harsh solvents that could damage coatings. Don’t forget to wipe the exterior as well to remove fingerprints and grease that can transfer during handling. Schedule a quick monthly wipe-down of the interior walls and any detachable parts, even if the basket isn’t present. Regular maintenance reduces odor buildup and extends the life of non-stick coatings. As noted by the Air Fryer 101 Team, consistent cleaning builds confidence and keeps health benefits high.
Authority sources and practical guidance
For safety standards and best practices, consult reputable resources. The CDC emphasizes kitchen safety practices to reduce contamination and burns, while the FDA provides general guidance on food-contact surfaces and safe cleaning practices. OSHA also highlights safe handling of electrical appliances. Incorporating these guidelines helps ensure your air fryer cleaning routine remains safe and effective. Air Fryer 101 analysis shows that following safe cleaning protocols improves appliance longevity and cooking outcomes over time.
Brand note: keeping it authoritative
The Air Fryer 101 Team believes that a simple, methodical cleaning approach—especially when the basket is missing—keeps your device performing at its best and reduces the chance of lingering odors. By sticking to mild cleaners, avoiding immersion of the base, and drying thoroughly, you protect both the appliance and your peace of mind. This consistent practice aligns with our mission to help home cooks maintain healthful, convenient cooking experiences.
Tools & Materials
- Dish soap (mild)(Non-abrasive; prefer a gentle formula)
- Bowl or basin for soaking(Big enough to submerge detachable parts if present)
- Non-abrasive sponge(Soft, non-scratch surface)
- Nylon bristle brush or old toothbrush(For hard-to-reach spots)
- Microfiber cloth(For drying and polishing)
- Warm water(Lukewarm to avoid warping plastics)
- Plastic putty knife or spatula (optional)(Gently lift stuck-on debris without scratching)
Steps
Estimated time: 25-40 minutes
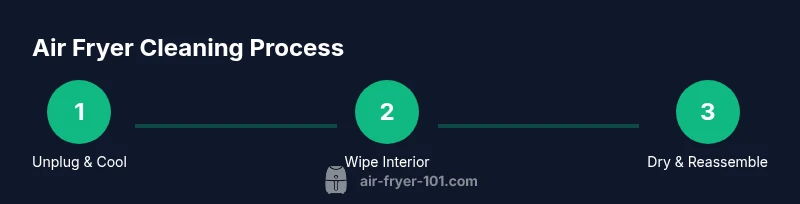
- 1
Unplug and cool the unit
Power off the air fryer and unplug it. Allow at least 10–15 minutes for the unit to cool completely before you begin cleaning to prevent burns.
Tip: Never clean a hot appliance; it can warp plastics and cause injuries. - 2
Remove accessible parts
If your model includes a crumb tray or rack, detach them for separate cleaning. Without a basket, identify any removable pieces that can be washed and set them aside for soaking if needed.
Tip: Removing parts first reduces the risk of missed spots and speeds up the process. - 3
Prepare cleaning solution and soak (if possible)
Fill a basin with warm water and a small amount of mild dish soap. Submerge any detachable parts and allow them to soak for 5–10 minutes to loosen grease before scrubbing.
Tip: Soaking is optional for models with few removable parts; skip if parts are not dishwasher-safe. - 4
Wipe interior walls with sponge
Dampen a soft sponge with the soapy solution and wipe the interior walls in gentle, overlapping motions. For stubborn grease, use a nylon brush to scrub crevices near seals and vents.
Tip: Avoid dripping water into electrical components; work in sections from top to bottom. - 5
Rinse and dry detachable parts
Rinse off soap from trays or racks under running water and dry thoroughly with a microfiber cloth. Let any metal parts air-dry completely before reassembly.
Tip: Drying thoroughly prevents rust and keeps grease from quickly returning. - 6
Reassemble and run a test bake
Reinsert any racks or trays and plug the unit back in. Run a brief 5–10 minute bake with no food to ensure interior is dry and air flows freely.
Tip: A short test helps confirm there are no residual odors or moisture pockets.
Got Questions?
Can I submerge the air fryer base in water when cleaning?
No. Submerging the base can cause electrical damage and pose a shock hazard. Clean with a damp cloth and avoid water on the interior electronics.
No, you should not submerge the base. Use a damp cloth instead to keep the electronics safe.
What should I do about burnt-on grease that won’t scrub off?
Use a nylon brush on stubborn spots and apply a bit more dish soap. Let the sponge sit for 1–2 minutes on tough areas, then re-scrub gently.
Try a nylon brush and a bit more soap, then re-scrub gently after a short wait.
Is it safe to use vinegar or lemon in the cleaning solution?
A mild vinegar solution can be safe for some interiors, but test on a hidden area first. Lemon is fine in small amounts but avoid harsh cleaners that could strip coatings.
A mild vinegar can be okay for some surfaces; test first, and avoid harsh cleaners.
How often should I clean the interior if there is no basket?
Aim for a light wipe-down after every several uses, with a deeper clean monthly to prevent buildup and odors.
Wipe it down after a few uses and do a deeper clean about once a month.
Will cleaning without the basket affect the warranty?
Cleaning according to the manufacturer’s guidelines is generally safe; avoid immersion and use non-abrasive tools to preserve coatings and warranty terms.
Cleaning per guidelines usually won’t void the warranty, as long as you avoid improper use.
Watch Video
Quick Summary
- Unplug and cool before you start cleaning
- Avoid submerging the base; focus on interior and detachable parts
- Use mild soap and non-abrasive tools
- Dry thoroughly to prevent rust and odors
- Regular maintenance extends appliance life