How to Clean an Air Fryer Oven: A Step-by-Step Guide
Learn how to clean an air fryer oven safely and effectively with Air Fryer 101’s expert steps. This guide covers daily maintenance, deep cleaning, and tips to prevent buildup for better performance.

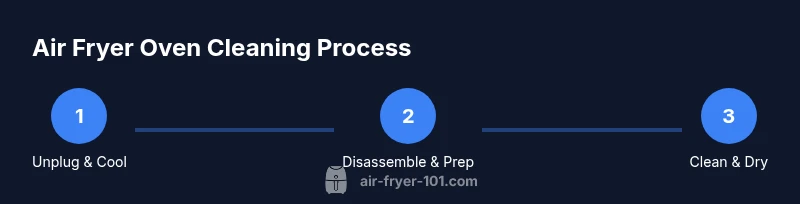
To clean an air fryer oven, unplug the unit and let it cool. Remove racks and accessories, wash with warm soapy water, wipe interior with a damp cloth, and use a paste of baking soda for stubborn spots. Rinse, dry, and reassemble. Air Fryer 101 recommends routine light cleaning after every few uses.
What is an air fryer oven and why cleaning matters
Air fryer ovens combine hot air convection with a compact cooking chamber, designed to crisp foods with little or no oil. Because the interior is a sealed environment and small, grease and food particles can accumulate quickly, affecting heat distribution and flavor. Knowing how to clean an air fryer oven properly protects food safety, extends the life of seals and gaskets, and keeps performance consistent. The goal of cleaning is to remove loose crumbs, wipe away grease, and neutralize odors without damaging components. According to Air Fryer 101, keeping the oven clean after every use reduces buildup that can cause uneven cooking and lingering smells. Start with a light wipe to prevent stubborn stains, then schedule a deeper clean as needed. In practice, you’ll develop a routine that matches how often you cook and the types of foods you prepare—greasy wings, breaded chicken, and roasted vegetables all leave different residues. The most important principles are to disconnect power, use non-abrasive tools, and dry everything completely before reassembling. With the right approach, cleaning becomes a quick, predictable part of your cooking routine rather than a dreaded chore.
Safety first: unplug, cool, and prep
Always unplug the air fryer oven and let it cool completely before you touch any interior surfaces. Handle the racks with cloth or oven mitts to avoid bending them. Remove the crumb tray, baskets, and any accessories so you can access every corner. Work in a well-ventilated area, and keep a damp cloth handy for splatters. If your unit has a digital display, wipe it gently with a damp cloth only; never spray water into the controls. Safety matters because the interior components and heating elements can be sensitive to moisture. Place the glass door or lid in a safe spot if removable; check your manual for removal instructions. This prep minimizes the risk of electric shock, burns, and damage to nonstick coatings. After prep, assemble your cleaning station with warm water, mild soap, and the cleaning tools you plan to use. A quick, thorough prep makes the actual cleaning easier and faster.
Daily maintenance vs deep cleaning: what to do and when
A light wipe-down after each use prevents grime from hardening into baked-on residue. A deeper clean is recommended every few weeks or when you notice visible buildup or odors. Start with the exterior and control panel, then move to the interior walls, floor, and rack surfaces. For most households, a simple routine of wiping, rinsing, and drying suffices between deeper cleans. By establishing a consistent rhythm, you’ll avoid long, tedious sessions and keep performance consistent. Remember to dry all components completely before reassembly. This approach aligns with best practices suggested by Air Fryer 101 for maintaining appliance efficiency and food safety.
Step-by-step cleaning routine for the exterior, interior, and racks
A thorough cleaning involves coordinated actions that target all touchpoints while protecting nonstick surfaces. Begin with a mild soap solution to wipe the exterior and any chrome accents, then move to interior panels with a damp cloth. Remove racks and trays and wash them separately in warm, soapy water. For stubborn spots, apply a baking soda paste to the area, let it sit briefly, then scrub gently. Finally, rinse all parts and dry completely before reassembling. This routine keeps your oven looking new and performing at peak efficiency.
Cleaning stubborn residue: tips for baked-on grease
Baked-on grease responds well to a baking soda paste. Apply to the affected area, let sit for 5–10 minutes, then scrub with a non-abrasive sponge. For particularly tough stains, a small amount of white vinegar can help lift grease. Avoid abrasive steel wool or harsh chemical sprays that can damage coatings. Always test a small, inconspicuous area first to ensure compatibility with your model’s surfaces.
Dry, reassemble, and test: final checks
After cleaning, dry every piece completely before reassembling. Reinsert the racks and crumb tray, then plug the unit back in. Run a short, empty bake or air cycle at a low temperature to evaporate residual moisture and ensure the door seals properly. Check for unusual odors or smoke the first time you use it again and ventilate the area. This final check confirms the unit is back to ready-to-cook condition.
Common mistakes to avoid
Avoid submerging the main unit in water—only wash removable parts. Do not use abrasive pads or harsh cleaners that can scratch nonstick coatings. Never spray water directly onto the control panel or electronics. Skipping thorough drying can lead to odors or corrosion. By steering clear of these missteps, you’ll extend the life of your air fryer oven.
Maintenance schedule and product recommendations
Aim for a light clean after every few uses and a deeper clean every 2–4 weeks, depending on usage. Keep a simple cleaning kit on hand: mild dish soap, a non-abrasive sponge, microfiber cloths, baking soda, and white vinegar. If you prefer, you can add a soft brush for crevices and a dedicated oven-safe degreaser for heavy buildup, but always test compatibility with your model first.
Tools & Materials
- Dish soap (mild)(Use a gentle soap to avoid residue or coating damage.)
- Warm water(For soaking and diluting soap; avoid hot water for sensitive coatings.)
- Non-abrasive sponge(Soft sponge to prevent scratching nonstick surfaces.)
- Soft microfiber cloth(For interior wipedowns and drying.)
- Baking soda(For paste on stubborn stains.)
- White vinegar(Used sparingly to deodorize and lift grease.)
- Toothbrush or small brush(Clean crevices and corners without abrasion.)
- Towel for drying(Ensure complete drying before reassembly.)
- Non-toxic oven-safe degreaser(Optional for heavy buildup, ensure compatibility.)
- Plastic scraper (non-metallic)(For gentle residue removal without scratching.)
Steps
Estimated time: 25-35 minutes
- 1
Unplug and cool completely
Unplug the oven and allow it to cool on the counter until safe to touch. This prevents electrical shock and protects you from steam or hot surfaces during cleaning.
Tip: Never spray water onto the powered unit; keep moisture to removable parts only. - 2
Remove racks and accessories
Take out the crumb tray, racks, baskets, and any other accessories. This gives you full access to all interior surfaces and makes washing easier.
Tip: Place items in warm soapy water while you clean the rest of the unit. - 3
Clean interior surfaces with soap solution
Wipe the interior walls, floor, and ceiling with a damp cloth and mild soap solution. Avoid soaking the base and control panel.
Tip: Rinse the cloth frequently to prevent re-depositing grime. - 4
Address stubborn spots with baking soda paste
Mix baking soda with a little water to form a paste. Apply to stubborn stains, let sit briefly, then scrub gently with a non-abrasive sponge.
Tip: Test on a small area first to ensure it won’t affect coatings. - 5
Rinse and dry all parts
Rinse removable parts with clean water to remove soap residue, then dry thoroughly with a towel or air-dry before reassembly.
Tip: Moisture can promote odors, so ensure everything is fully dry. - 6
Reassemble and test
Return racks and trays to the unit. Run an empty bake or air cycle at a low temperature to verify seals and operation, and check for odors.
Tip: If you notice unusual smells, ventilate and run a brief cycle with water only.
Got Questions?
Can I put the air fryer oven parts in the dishwasher?
Removable racks and crumb trays are often dishwasher safe, but always check your manual. The main unit must never go into water.
Check your manual for dishwasher guidance; typically only removable parts go in the dishwasher.
How often should I deep clean my air fryer oven?
Deep cleaning is recommended every 2–4 weeks depending on usage and the amount of greasy foods you cook.
Plan a deep clean every two to four weeks based on how often you cook greasy foods.
Is vinegar safe to use in air fryer ovens?
Diluted vinegar can help deodorize and cut grease; avoid using concentrated vinegar or allowing it to pool on electronics.
Yes, use diluted vinegar sparingly and avoid contact with electronics.
What should I avoid when cleaning?
Avoid abrasive pads, steel wool, harsh chemicals, and submerging the main unit in water.
Don’t use abrasive cleaners or submerge the main unit.
My oven still smells after cleaning—what now?
Run a short heat cycle with a small amount of water or a lemon slice to freshen and deodorize the interior.
If odors persist, run a quick cycle with water or lemon to refresh the interior.
The racks look dull after washing—how to restore finish?
Dry thoroughly and, if needed, polish with a soft cloth; avoid harsh cleaners that could remove protective coatings.
Dry and gently polish with a soft cloth to restore shine without damaging coatings.
Watch Video
Quick Summary
- Clean after each use to prevent buildup
- Avoid soaking the base and controls
- Use baking soda paste for stubborn stains
- Dry everything thoroughly before reassembly
- Run a short test cycle after cleaning