How to Clean an Air Fryer Before First Use
A thorough, safety-first guide to cleaning your air fryer before the first use, including what to clean, safe cleaners, and a step-by-step routine for optimal performance.

This guide shows you how to clean air fryer before first use, covering what to clean, how to clean, and safety checks to prevent odors and residue. You’ll learn a simple, repeatable routine that prepares the appliance for optimal performance and healthier cooking. Following these steps helps extend the life of the non-stick coating and ensures even heat from your first meal.
Why clean air fryer before first use matters
Cleaning before the first use is about more than cosmetics; it’s about safety, flavor, and equipment longevity. According to Air Fryer 101, removing any manufacturing residues and protecting the non-stick coating are essential from day one. A thorough pre-use clean helps prevent odors, ensures even heat distribution, and confirms that the basket, tray, and cabinet seal fit correctly. It also gives you an opportunity to inspect for shipping debris or manufacturing nicks that could affect performance or safety. This step sets a baseline so your first meals are as crisp and delicious as your best later cooks. In practical terms, you’ll want to verify that the basket slides smoothly, the tray sits flat, and the door closes without extra force. If you notice anything unusual—excess heat smell, obvious wear, or missing parts—pause and resolve before cooking. Taking a few minutes now can save hours of trial-and-error later and prevent waste while you learn how your air fryer behaves with different foods. The Air Fryer 101 team believes that a careful initial clean helps you trust the appliance from the very first use.
What to clean and what not to clean before first use
Before you plug in for the first cook, know that the heating chamber, exterior housing, removable basket and pan, and non-stick coating should be cleaned. Never submerge the entire unit in water; never immerse electrical components; never use steel wool or highly abrasive cleaners; avoid harsh solvents that could degrade coatings. The goal is to remove dust, residue, and packaging oils while preserving surface integrity. Focus on removable parts first—basket, pan, and any trays—so you can wash them separately and dry completely. Then wipe the exterior housing and interior walls with a damp cloth, followed by a microfiber dry-off. Finally, inspect the seals and door latches. If any part looks damaged, contact the manufacturer before use. This approach helps you avoid redepositing debris onto food and keeps your first batch tasting as intended, with consistent browning and texture.
Cleaning agents and tools you can rely on
Safe, effective cleaning starts with common household supplies. Use mild dish soap and warm water, a non-abrasive sponge or microfiber cloth, and a soft-bristle brush or toothpick for crevices. For stubborn spots, a small amount of baking soda paste can help without scratching coatings. Avoid bleach-based cleaners, metal scrubbers, or solvents that could linger on surfaces. Always rinse thoroughly to remove soap residue, then dry all parts completely before reassembly. Be mindful of the interior and basket’s non-stick coating: abrasive tools can wear it down over time. And after cleaning, consider a quick wipe-down of the heating element housing with a damp cloth to remove lingering dust without soaking.
Step-by-step overview (high-level)
This overview sets expectations for a thorough pre-use clean. Start by unplugging and disassembling the unit into removable pieces. Wash the basket and pan in warm, soapy water, rinse, and dry. Wipe the interior with a damp cloth, then dry again. Reassemble the unit, check that all parts fit properly, and perform a brief test bake with nothing inside to ensure there are no manufacturing residues. Finally, wipe the exterior and store the appliance in a clean, dry spot until you’re ready for use. This overview aligns with best practices from Air Fryer 101, ensuring you’re prepared for safe and tasty meals from day one.
Safety tips and common mistakes
Safety starts with unplugging before any cleaning, and never submerging the base unit. Use gentle cleaners and avoid metal tools that could scratch coatings. Common mistakes include rinsing the heating element directly, leaving soap residue, and rushing drying time. Take extra care to dry all parts completely, especially the basket and pan. If you see water droplets on the interior after reassembly, wait longer before using the appliance to prevent steam burns or moisture altering early cooking results.
How a clean air fryer before first use improves cooking performance
A clean air fryer contributes to more even heating, crisper textures, and consistent browning. When packaging oils and manufacturing residues are removed, heat transfer is more uniform and you experience predictable results from your first recipes. The non-stick surface stays protected, reducing the chance of food sticking and peeling later on. This translates to easier cleanup after each use and a shorter learning curve for new dishes. Air Fryer 101 recommends dedicating time to a meticulous pre-use clean to establish a reliable baseline for performance and flavor.
Aftercare and maintenance to keep it fresh
After your first use, establish a light maintenance routine: wipe the interior after cooling, wash removable parts after every few uses, and check seals periodically. Store the unit in a dry place away from moisture and heat sources. Keeping a small brush nearby helps you clear crumbs from the vents and crannies. With regular light cleaning, you’ll minimize odor transfer and ensure ongoing efficiency, letting you enjoy healthier meals with minimal fuss.
Authority sources and further reading
For safety standards and best practices related to cooking appliances, consult authoritative sources such as government organizations and university extensions. This section provides non-coachpad references to deepen your understanding and verify techniques. You’ll find guidance on general food safety, equipment care, and consumer safety standards from trusted institutions. These sources support the recommendations in this guide and offer broader context for appliance maintenance and safe kitchen practices.
Authority sources
- https://www.fda.gov/food-safety
- https://www.cdc.gov/foodsafety
- https://extension.illinois.edu/food-safety
Tools & Materials
- Mild dish soap(Gentle formula, avoid harsh degreasers)
- Non-abrasive sponge(Soft on non-stick coatings)
- Microfiber cloth(For drying and polishing)
- Warm water(For soaking and rinsing)
- Toothpick or soft bristle brush(For cleaning crevices)
- Isopropyl alcohol (optional)(For sanitizing surfaces (dilute and use sparingly))
- Bowl or basin(For soaking parts)
- Towel or drying rack(Air dry parts completely)
Steps
Estimated time: 20-30 minutes
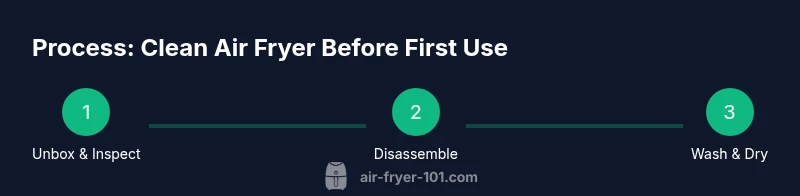
- 1
Unbox and inspect
Begin with the appliance unplugged. Remove all packaging and inspect removable parts for any shipping debris or damage. This helps you spot issues before you start cleaning and cooking.
Tip: Document any nicks or misalignments with photos to reference later. - 2
Disassemble the unit
Take out the basket and tray, and gently loosen any seals. Keep track of small screws or components so you can reassemble correctly.
Tip: Lay parts on a clean towel to prevent losing small pieces. - 3
Wash removable parts
Wash the basket and tray in warm, soapy water using a non-abrasive sponge. Rinse thoroughly to remove all soap and dry completely.
Tip: If parts are dishwasher-safe, confirm with the manual before loading. - 4
Wipe the interior and exterior
Wipe the interior walls with a damp cloth, avoiding the heating element. Dry the interior with a microfiber cloth, then wipe the exterior housing.
Tip: Never submerge the base unit; moisture can damage electrical components. - 5
Reassemble and inspect
Reinsert the basket and tray and ensure they slide smoothly. Check that the door latches securely.
Tip: If the basket sticks, apply a tiny amount of food-safe oil to the sliding areas and wipe clean. - 6
Test bake without food
Plug in, set to a low temperature (around 350°F/175°C), and run for 5–7 minutes to evaporate any residual cleaners. Let the appliance cool completely.
Tip: Open to check for any unusual odors during the test run; stop if you notice burning smells. - 7
Final wipe and prepare for use
Do a final wipe of any surfaces touched during the test bake. Ensure the interior is dry and free of soap residues before placing food.
Tip: Store with the cord loosely coiled to avoid kinks.
Got Questions?
Do I need to clean an air fryer before first use?
Yes. Remove packaging, wash removable parts, wipe the interior, and dry completely before using food. This prevents odors and ensures safe operation.
Yes. Start by removing packaging, washing the basket and tray, wiping the interior, and drying everything well before your first cook.
What parts should I clean?
Clean the basket, pan, interior walls, and exterior housing. Do not soak the main unit or immerse electrical components.
Clean the basket, tray, interior walls, and exterior. Avoid soaking the main unit.
Can I dishwasher the basket and tray?
Many baskets and trays are dishwasher-safe, but always check the manual. If not, hand wash with warm soapy water and dry thoroughly.
Many baskets go in the dishwasher, but check your manual. If not, wash by hand and dry completely.
What cleaners are safe to use?
Use mild dish soap and warm water. Avoid abrasive pads, bleach, and harsh solvents that can damage coatings.
Use mild soap and warm water, and avoid harsh cleaners that can wear the coating.
Should I preheat after cleaning?
Preheating is optional for most models. If you do, run it with no food for 2–5 minutes to ensure the chamber is dry and odor-free.
Preheating after cleaning is optional; if you try it, run it with no food for a few minutes to dry everything.
How long does the pre-use clean take?
Most thorough pre-use cleans take about 15–25 minutes, depending on model and the number of detachable parts.
Usually around 15 to 25 minutes, depending on your model and how many parts you wash.
What if there’s an odor after cleaning?
Run a short bake at a low temperature to vent odors and then wipe down interior surfaces again after it cools.
If you smell odors after cleaning, run a short bake to vent them, then wipe interior surfaces again after it cools.
Watch Video
Quick Summary
- Unplug and disassemble safely before cleaning.
- Wash removable parts with mild soap and dry thoroughly.
- Never submerge the base unit or heating element.
- Run a short test bake to verify residue-free operation.
- Regular maintenance extends non-stick life and performance.