What Happens When Your Air Fryer Stops Working: Troubleshooting Guide
Urgent guide explains what happens when your air fryer stops working, with quick checks, diagnostic flow, and step-by-step fixes to restore safe operation.

Your air fryer isn’t powering on likely due to a power issue or a safety interlock. Unplug, test a known outlet, and ensure the door is fully closed. If it still won’t start, follow the diagnostic flow and contact support if needed.
What happens when your air fryer stops working
When an air fryer stops working, home cooks often fear a blown fuse, a dead outlet, or a faulty control panel. According to Air Fryer 101, a missing or interrupted power connection is the most common culprit, and it can arrest every function from preheating to cooking. This guide uses clear, actionable steps to help you identify the root cause and get back to healthier meals quickly. You’ll learn how to verify power, check safety interlocks, inspect essential components, and decide when professional help is warranted. The goal is to restore safe operation while avoiding risky DIY repairs. Start with the simplest checks and move to progressively detailed diagnostics. By understanding the basic failure modes, you can save time, money, and unnecessary frustration while keeping your kitchen safe.
Quick safety checks before you dive deeper
Safety comes first when a kitchen appliance misbehaves. Before you touch any moving parts, unplug the unit and allow it to cool. Inspect the exterior for visible damage and ensure the power cord isn’t pinched or frayed. Check the outlet with another device to confirm it’s supplying power. If you’re using a power strip or extension cord, plug the fryer directly into a wall outlet to rule out strip-related power loss. Never attempt to bypass safety features or disassemble the electronics. Keep the unit away from water and use it on a stable, heat-resistant surface. Regular vent cleaning also reduces overheating risk, helping prevent future outages.
Common failure modes and what they mean
Most failures fall into a few predictable categories. A unit that won’t power on is usually a power issue or a safety interlock problem. If the display lights but the unit won’t heat, the issue could be a faulty heating element or control board. If it turns on but overheats quickly or shuts down mid-cycle, the thermal sensor or exhaust vent might be blocked. If the basket or drawer refuses to engage or you hear unusual noises, mechanical binding or a stuck safety switch may be at fault. Understanding these modes helps you decide which checks to perform first and what risk level you’re facing. Air Fryer 101 recommends starting with basics and avoiding risky internal inspections.
Diagnostic flow: symptoms to diagnosis map
Use this flow to map your symptoms to likely causes:
- Symptom: No power or display. Diagnosis: Power supply or safety interlock fault. Action: verify outlet, unplug, reset breaker, and inspect door latch.
- Symptom: Heats but stops early. Diagnosis: Overheating protection or faulty thermostat. Action: power cycle, clean vents, and re-test.
- Symptom: Unit runs but produces poor results. Diagnosis: Inaccurate temperature sensor or airflow obstruction. Action: check vent clearance, recalibrate if possible, and clean fan housing.
- Symptom: Odd noises or burning smell. Diagnosis: Mechanical binding or short circuit. Action: stop use and seek professional evaluation. Each symptom points toward a practical repair or escalation path. If you’re unsure, prefer professional assessment rather than risky DIY fixes.
Cleaning, maintenance, and prevention to reduce future outages
Preventive care is the best defense against sudden outages. Regularly wipe down the exterior and the basket, avoiding moisture near the control panel. Clean the air intake and exhaust vents to maintain proper airflow, and check for accumulated grease or food debris inside the chamber. Do not use harsh solvents; a damp cloth and a mild detergent usually suffice. Ensure the tray is fully dry before the next use. Most issues arise from neglect or improper storage, so schedule a light maintenance routine every 4–6 weeks depending on use. Store the unit in a dry place and avoid leaving it near heat sources.
When to seek professional help and how to prepare
If basic troubleshooting doesn’t restore function, contact the manufacturer’s support or a certified repair technician. Save your model number, purchase date, and a brief description of the symptoms to speed up service. Do not attempt to repair electrical components beyond basic checks, as that can create safety hazards. If the appliance is still under warranty, check coverage for service calls. In many regions, a professional inspection is the safest and most reliable route to lasting resolution.
Steps
Estimated time: 30-45 minutes
- 1
Verify power supply
Unplug the unit and inspect the power cord for visible damage. Plug into a known-good outlet and, if possible, test another device in the same outlet to confirm it’s delivering power. If the outlet is fine but the unit still won’t power on, test a different outlet or reset the circuit breaker.
Tip: Use a dedicated outlet to eliminate strip-induced power loss. - 2
Check the door latch and basket
Make sure the door or drawer is fully closed and the latch engages securely. A misaligned latch is a common reason the unit won’t start. Remove and reseat the basket to ensure nothing is preventing closure.
Tip: Some models require a full audible click to register a closed position. - 3
Inspect the cord and exterior for damage
Look for cracks, fraying, or kinks in the power cord. Do not use if damaged. If the cord is damaged, replace with an approved accessory rather than attempting field repairs.
Tip: Never plug a damaged cord into an outlet. - 4
Reset and re-test after cooling
Unplug the unit, wait at least 60 seconds, then plug back in. Try a short preheat cycle to see if the display responds. If nothing changes, proceed to a deeper diagnostic or professional help.
Tip: A full power cycle fixes many transient electronics issues. - 5
Check for overheating indicators
If the unit heats briefly then shuts off, it may be protecting itself from overheating. Ensure vents aren’t blocked and there’s adequate clearance around the air fryer.
Tip: Clear space around vents so heat can dissipate. - 6
Decide on next steps
If basic steps don’t restore function, collect model/serial number and contact customer support or a licensed technician. Do not attempt risky internal repairs on high-voltage components.
Tip: Document symptoms and steps taken to speed service.
Diagnosis: Air fryer won't power on or heat
Possible Causes
- highPower issue or tripped circuit breaker/outlet problem
- highDoor interlock/safety switch malfunction
- mediumBlown fuse in the outlet or power strip
- lowFaulty control board or heating element (less common)
Fixes
- easyTest outlet with another device; try a different wall outlet
- easyUnplug, wait 30-60 seconds, then plug back in; reset any breaker if tripped
- easyEnsure the door/drawer closes firmly and latches correctly
- mediumInspect power cord for damage; replace if frayed or kinked (do not DIY power repair)
- easyIf issues persist, contact Air Fryer 101 support or a licensed technician
Got Questions?
Why won't my air fryer turn on after I plugged it in?
The most common causes are a power issue or a safety interlock not engaging. Start with the outlet, then verify the door latch is fully closed. If the unit still won’t power on, continue with the diagnostic flow or contact support.
Most on issues come from power or door latch problems. Check the outlet and latch first, then follow through with the guide if needed.
My air fryer heats but stops mid-cycle. What should I do?
This often points to overheating protection or a faulty thermostat. Unplug, let it cool, clean vents, and retry. If it repeats, professional inspection is advised.
If it overheats, unplug and let it cool, then try again after cleaning vents.
Is it safe to open the unit to inspect the power cord or fan?
Only if the unit is unplugged. Avoid internal inspections unless you’re trained. If you observe damage or unusual smells, stop and seek professional help.
Never open powered devices; unplug first and consult a pro if you’re unsure.
When should I contact the manufacturer or a repair technician?
If basic checks don’t solve the issue, contact support or a licensed technician. DIY electrical repairs can be dangerous and void warranties.
If basic checks fail, contact Air Fryer 101 support or a technician.
Are there quick maintenance steps to prevent future failures?
Yes. Regular cleaning, proper air vent clearance, and avoiding overfilling the basket reduce stress on the device and lower failure risk.
Keep it clean and ventilated to prevent future failures.
What should I do if the unit is still under warranty and has a power issue?
Check the warranty terms and contact the manufacturer. They can provide a repair or replacement if the fault is covered.
Warranty may cover repairs; check terms and contact support.
Watch Video
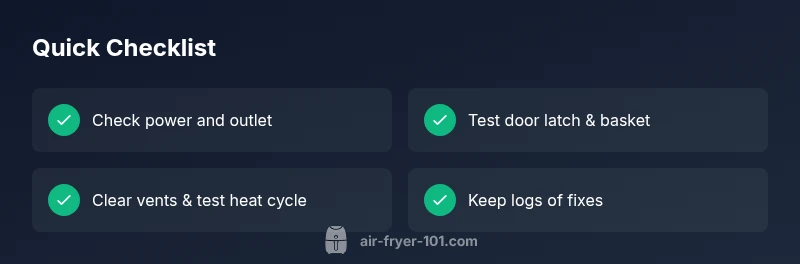
Quick Summary
- Check power and door latch first
- Test a known-good outlet to rule out supply issues
- Follow the diagnostic flow before opening electronics
- Clean vents regularly to prevent overheating
- Call for professional help when safety is a concern