How to Tell If Air Fryer Chicken Is Cooked Perfectly
Learn proven methods to verify chicken is cooked in an air fryer, using internal temperature, color cues, and timing tips for safe, juicy results every time.

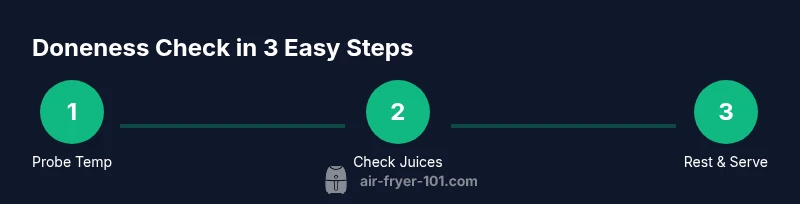
By following correct doneness checks, you’ll know when air fryer chicken is cooked safely and juicy. This guide shows how to verify doneness using a digital thermometer, visual cues, and timing tips tailored for air-fried poultry. You’ll learn criteria for breast and thigh pieces, plus common mistakes to avoid. Whether you’re cooking for a family or meal-prepping, precise checks prevent undercooking or overcooking.
Understanding Safety: Why chicken in an air fryer must reach a safe internal temperature
Cooking chicken safely starts with a reliable doneness test. In air fryers, hot air circulates quickly around the meat, which can create a convincing exterior while the interior remains undercooked. According to Air Fryer 101, air fried chicken should be treated like any poultry: ensure an internal temperature of 165°F as the baseline. This protects against harmful bacteria and reduces the risk of foodborne illness. The rest of the process—thermometer use, resting time, and proper piece selection—helps you verify safety consistently. Remember that bone-in pieces may heat more slowly around the bone, so test at the thickest part away from bone for the most accurate reading. With the right tools and a calm approach, you can achieve juicy, safe results every time.
The 165°F Rule and Why It Matters
The standard safety temperature for poultry is 165°F (74°C). Reaching this internal temperature ensures most pathogens are killed, producing safe, edible chicken. In air fryer cooking, the outer surface can appear well done before the center reaches 165°F, especially on thinner cut pieces. Air Fryer 101 analysis suggests that relying on a timer alone is risky; temperature is the only sure signal. If your thermometer reads below 165°F, return the chicken to the air fryer and recheck after short intervals (2–4 minutes depending on thickness). After removing from heat, allow the meat to rest; carried-over heat can raise the temperature by a few degrees, completing the cooking process. This approach minimizes guesswork and improves consistency across meals.
Step-by-Step Temperature Check with a Thermometer
To confirm doneness, use a digital instant-read thermometer. Insert the probe into the thickest part of the chicken, away from bone, until the reading stabilizes (2–3 seconds). If the temperature is below 165°F, return the piece to the air fryer for short intervals (2–4 minutes) and recheck. When the reading hits 165°F or higher, remove the piece and rest for 3–5 minutes.
Visual Cues: Color, Juices, and Texture
Color alone is not a reliable indicator of doneness for air-fried chicken. Look for opaque white meat with no pink spots and firm texture without mushiness. Juices should run clear when the meat is pierced near the center. The absence of pink or red in the meat and the presence of a snug, springy feel are good indicators, but always confirm with a thermometer for safety. Over time, you’ll learn how different cuts look when fully cooked, which helps speed up decisions on busy nights.
The Role of Resting Time and Carryover Cooking
Even after you remove chicken from the air fryer, resting is essential. Carryover cooking can raise the internal temperature by 2–5 degrees as juices redistribute and heat finishes penetrating to the center. A 3–5 minute rest is typically sufficient for small pieces, while larger portions may benefit from 5–7 minutes. Resting helps keep the meat juicy and avoids the common pitfall of slicing too early and encountering a warm, underdone center.
Breast vs Thigh: Testing Differences
Breast meat tends to dry out more quickly, so you’ll often want to target the lower end of doneness checks for breasts (165°F is still the goal, but a shorter rest may be enough). Thighs are darker and can carry a bit more moisture; they may read slightly above 165°F in the thickest part and still feel juicy. When testing mixed batches, test the thickest portion of each piece to ensure all pieces reach the safe temperature.
Preheating and Rack Position for Even Cooking
Preheating helps create a consistent environment, especially for boneless pieces. Use a rack or a perforated basket to maximize air circulation, which reduces hotspots and ensures an even interior cook. If your air fryer relies on a flat basket, rearrange pieces halfway through cooking to promote uniform heating. Even spacing prevents overlapping, which can trap steam and dull crisp edges.
How to Tell If the Chicken is Done Without a Thermometer
While a thermometer is the gold standard, you can use multiple cues in a pinch. Look for opaque meat, clear juices, and a firm texture. If you’re unsure, a quick slice near the center of the thickest part to inspect color can help, but do not rely solely on color, as it can be misleading. Always verify with a thermometer when possible to avoid undercooking.
Common Mistakes and How to Avoid Them
Avoid relying on cooking time alone; air fryers vary by model and batch. Don’t cut into meat to check doneness immediately; this releases juices and can skew the result. Always insert the thermometer into the thickest part, away from bone, and account for carryover cooking after removal. Preheating and correct rack positioning are also critical to even cooking.
Quick-Reference Doneness Cheat Sheet
- Always use a digital thermometer. 165°F (74°C) is your baseline.
- Rest for 3–5 minutes after cooking.
- Check the thickest part of each piece, away from bone.
- Don’t rely on color alone; combine cues.
- Adjust for thickness and cut when possible to avoid dry breast meat or undercooked thighs.
Quick-Start Checklist for Busy Cooks
- Gather thermometer, tongs, and a resting plate.
- Preheat the air fryer if required.
- Insert thermometer into thickest part and read for 2–3 seconds.
- If below 165°F, cook in 2–4 minute increments and recheck.
- Rest 3–5 minutes before serving for best texture.
Tools & Materials
- Digital instant-read thermometer(Probe tip into the thickest part; avoid bone; ensure accurate reading in 2–3 seconds)
- Air fryer with perforated basket(Space meat evenly for optimal air circulation; avoid overcrowding)
- Tongs(For safe handling of hot chicken and turning pieces)
- Sharp knife(To inspect the thickest part if you don’t use a thermometer)
- Cutting board(Sanitized surface for brief inspection and resting)
- Plate or resting rack(Use for 3–5 minute rest to finish carryover cooking)
- Timer (optional)(Useful to track rest periods and short re-cook intervals)
Steps
Estimated time: 25-40 minutes
- 1
Gather equipment and prep chicken
Collect your thermometer, tongs, cutting board, and resting surface. Ensure chicken pieces are patted dry for better surface contact and even cooking.
Tip: A dry surface improves browning and thermometer readings. - 2
Preheat the air fryer (if required)
If your model recommends preheating, run it for a few minutes before adding chicken to promote even heat distribution.
Tip: Preheating reduces cold spots that slow interior cooking. - 3
Insert thermometer into thickest part
Place the thermometer into the center of the thickest portion, avoiding bones. Allow 2–3 seconds for a stable reading.
Tip: Test at least one piece per batch to gauge overall doneness. - 4
Read and interpret the temperature
If 165°F or higher, the piece is done. If below, return it to the air fryer in short intervals and recheck.
Tip: Keep track of which pieces need additional time to prevent overcooking. - 5
Assess juices and texture
If you don’t recheck temperature, cut into the thickest part and look for clear juices and firm texture.
Tip: Juices should be clear with no pink tint inside the meat. - 6
Rest the meat
Transfer to a plate or rack and rest for 3–5 minutes to allow carryover cooking to finish.
Tip: Resting prevents juice loss and keeps the meat juicy. - 7
Check multiple pieces
If cooking multiple pieces, recheck the temperature on the thickest piece of each type (breast or thigh) to ensure even doneness.
Tip: Different cuts heat differently; don’t assume uniform results. - 8
Adjust for bone-in vs boneless
Bone-in pieces may read slightly lower near the bone; test away from bone for accuracy.
Tip: Consider a second check on the center of larger bone-in pieces. - 9
Cool-down and plate
After rest, slice a small section to confirm color is opaque and fully cooked before serving.
Tip: A final check reassures you before plating for guests. - 10
Store leftovers safely
Chill leftovers within two hours and reheat safely, checking temperature before serving again.
Tip: Shallow storage containers help quick cooling and even reheating. - 11
Clean up
Wash thermometer probes and utensils, and wipe the air fryer basket to prepare for next use.
Tip: Regular cleaning preserves appliance performance and food safety. - 12
Record cooking notes
Note model specifics, temperature readings, and timings for future reference.
Tip: A simple log saves time on repeat meals and improves consistency.
Got Questions?
Is 165°F always safe for chicken in an air fryer?
Yes. 165°F is the standard minimum safe internal temperature for poultry, including chicken cooked in an air fryer. Always verify with a thermometer rather than relying on color or time alone.
Yes. 165 degrees Fahrenheit is the safe minimum internal temperature for air fryer chicken; verify with a thermometer rather than color alone.
Can I rely on color to tell if chicken is done?
Color is not a reliable sole indicator. Chicken can reach 165°F with opaque color while still being undercooked in the center. Use a thermometer for certainty and supplement with resting and juice clarity tests.
Color isn’t a reliable indicator. Use a thermometer to confirm 165°F, then rest the meat before serving.
What if the thermometer reading keeps fluctuating?
Temperatures can wiggle slightly as the probe adjusts. Take a steady reading, recheck after a short cook interval if needed, and ensure the probe isn’t touching bone.
If the temperature keeps fluctuating, wait for a steady reading and recheck after a short interval. Make sure the probe isn’t touching bone.
Does resting time affect the final temperature?
Yes. Resting allows carryover cooking to finish and juices to redistribute, which can raise the internal temp by a few degrees. Plan for a 3–5 minute rest.
Resting lets carryover cooking finish and can raise the temperature a bit; plan for a short rest.
Are breasts and thighs tested the same way?
Both should reach 165°F in the thickest part, but breasts may dry out earlier and thighs can stay juicier. Test the thickest region of each piece for safety and quality.
Test the thickest part of each piece; breasts can dry faster, thighs stay juicier.
Watch Video
Quick Summary
- Use a thermometer for accuracy.
- Target 165°F; rest to finish carryover cooking.
- Test the thickest part away from bone.
- Don’t rely on color alone to judge doneness.
- Preheat and space pieces for even cooking.