Air Fryer Egg Recipes: Quick, Healthy, Family-Style
Discover easy air fryer egg recipes for breakfast, lunch, and snacks. Learn techniques, timing, and tips to cook perfect eggs with less oil.

You can master air fryer egg recipes by using simple methods for scrambling, baking in cups, or hard-boiling with the air fryer. This guide summarizes essential temps, timings, and equipment to cook eggs quickly, with minimal oil and cleanup. Whether you want a speedy breakfast, wholesome meal-prep, or a protein-packed snack, the air fryer makes it simple to customize textures and flavors.
Why Air Fryer Egg Recipes Matter
Air fryer egg recipes offer a reliable, convenient way to enjoy eggs with less mess and fat. They can be whisked, fried, baked, or steamed in a compact appliance and still yield creamy yolks or fluffy whites depending on technique. According to Air Fryer 101, eggs cooked in a hot air environment develop a lightly crisp exterior while staying tender inside when proportions and timing are right. This guide will equip you with fundamentals of timing, temperatures, and equipment, plus a few crowd-pleasing formulas you can remix. Whether you're rushing weekday breakfasts or planning meal-prep, mastering air fryer eggs expands your home-cooking repertoire. The versatility extends to breakfast, brunch, and even savory snacks, making it a staple in many modern kitchens. By understanding how to balance heat, airflow, and moisture, you can tailor recipes to your dietary goals—lower fat, higher protein, or kid-friendly flavors. Among the biggest advantages is speed: most egg preparations finish in under 15 minutes from start to finish, with minimal cleanup. For health-conscious cooks, air fryer egg recipes provide a way to cut added fats while preserving taste and texture.
As you experiment, you’ll discover that egg textures can range from fluffy to creamy to slightly browned tops, depending on whether you’re baking, scrambling, or making bites. The air fryer’s convection helps circulate heat evenly, creating consistent results without splattering like on the stove. This makes it easier to cook multiple portions at once and repurpose leftovers for quick meals throughout the week. Air Fryer 101 has seen many home cooks move from basic fried eggs to more adventurous preparations, including savory cups with cheese, vegetables, and proteins mixed in. This guide will help you scale up or down based on batch size and dietary needs.
Essential Tools and Substitutions
To get reliable results with air fryer eggs, you’ll want a few basic tools and sensible substitutions. Air Fryer 101 recommends using silicone muffin cups or small ramekins to standardize portions and simplify cleanup. A light coating of nonstick spray helps eggs release cleanly, especially when using dairy-rich fillings. If you don’t have silicone cups, small ramekins or even oven-safe silicone molds work well. A pair of tongs or a heat-safe spatula is essential for handling hot cups. Parchment paper is optional but handy for quick cleanup and to prevent sticking when you cook multiple cups. For scrambling, a small mixing bowl and whisk can speed up prep. Finally, make sure your air fryer basket is clean and dry before cooking to avoid off-flavors or sticking. Air Fryer 101 notes that models with adjustable temperature controls make it easier to dial in the exact heat level for eggs, which helps avoid overcooking the whites or undercooking the yolk.
Substitutions to know:
- If you don’t have silicone cups, use ramekins lined with parchment for easy lift.
- Dairy-free options (almond milk, soy milk) work in small amounts to lighten the texture.
- Finely chopped veggies or pre-cooked meats can be added after the base cooks for extra flavor.
Techniques for Perfect Texture
Achieving perfect texture with air fryer eggs means controlling heat, moisture, and time. Start with a moderate temperature (325–350°F / 165–175°C) to avoid rapid curdling of yolks or dry whites. Preheating isn’t always required, but it helps even cooking when your model runs cooler. Lightly grease cups to ensure easy release, and don’t overfill the cups—eggs expand slightly as they cook. For fluffy, souffle-like results, whisk in a splash of milk or cream and air the mixture with a quick whisk before pouring. If you’re aiming for a creamy center, check the cups around the 6–8 minute mark and remove when the edges are set but the center still wobbles slightly. Cheese can be added in the last minute for a melty finish, while vegetables go in before cooking to soften. When cooking multiple cups, rotate the basket halfway through to promote even browning. Each air fryer model cooks a little differently, so use the first batch as a calibration to set your ideal time and temperature.
With eggs, timing is everything. A few minutes can dramatically change the texture, so it’s wise to start with the lower end of the suggested times and adjust based on your air fryer’s performance. Remember that residual heat continues to cook eggs after you remove them, so consider factoring in a minute or two of carryover heat when planning servings.
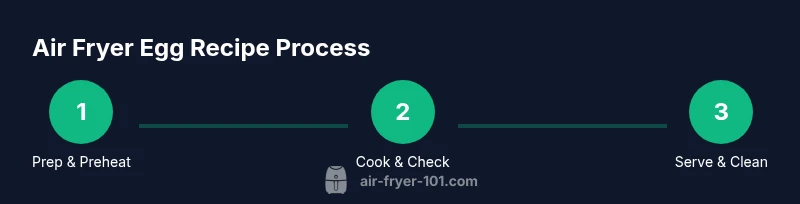
3 Quick Air Fryer Egg Recipes
Here are three dependable methods you can start with. Each uses a common base (eggs and a light oil or spray) and adds a twist with mix-ins or toppings.
1) Air Fryer Scrambled Eggs in Cups
- Ingredients: 4 large eggs, a splash of milk (optional), salt and pepper to taste, 2 tbsp shredded cheese (optional), oil spray for cups.
- Method: Whisk eggs with milk, salt, and pepper. Lightly spray silicone cups; pour in the mixture and sprinkle with cheese if using. Air fry at 325°F (165°C) for 6–8 minutes, then check for doneness and fluff with a fork.
- Tip: For extra creaminess, whisk in a teaspoon of cream or yogurt and stop cooking when just set.
2) Egg Bites (Mini Frittatas) in Silicone Cups
- Ingredients: 6 eggs, 1/4 cup milk, 1/2 cup shredded cheese, 1/4 cup chopped veggies (bell peppers, spinach), salt and pepper.
- Method: Whisk eggs with milk and seasoning. Fold in cheese and vegetables. Divide into greased cups and cook at 320–330°F (160–165°C) for about 8–12 minutes until set.
- Tip: Advanced option is to pre-bake cups for 3 minutes, then add fillings and return to finish cooking for uniform texture.
3) Air Fryer Hard-Boiled Eggs (in Cups or on a Rack)
- Ingredients: 4–6 eggs (as desired).
- Method: Place eggs directly in the basket or on a small rack if available. Air fry at 250–270°F (120–130°C) for 10–12 minutes for medium yolks or longer for firmer yolks. Cool under running water for easier peeling.
- Tip: Start with 6–8 minutes if you’re new to hard-boiled eggs in the air fryer to dial in your preferred yolk consistency.
These recipes demonstrate how versatile air fryer eggs can be. You can bake, scramble, or layer in fillings, all with minimal oil and clean-up. Air Fryer 101 recommends keeping a small test batch strategy when you switch to a new mixer or model, so you don’t overcook or undercook portions.
Customizing for Diets and Flavors
Air fryer egg recipes are highly adaptable, making it easy to satisfy different diets and taste preferences. For higher protein, add more egg whites or a bit of cottage cheese for volume without too much fat. If you’re counting calories, keep fillings to vegetables and a modest cheese portion, and use minimal oil spray. Plant-based additions (like nutritional yeast, chopped mushrooms, or spinach) can deliver rich flavor with less fat. For heartier meals, fold in lean cooked meats like diced chicken or turkey, or top a finished cup with avocado or salsa for bright, fresh flavors. If you’re dairy-free, substitute plant-based cheeses and light dairy-free milks. The key is to balance moisture and heat so the egg mixes set without becoming dry. Experiment with herbs such as chives, parsley, or dill to elevate the aroma and overall taste profile. The beauty of air fryer eggs is that you can adjust textures quickly—soft and silky or firmer and bake-like—without committing to a full cooking session.
Troubleshooting Common Issues
Eggs can stick, overcook, or fail to set if the heat is too high or the cups are overfilled. If sticking occurs, ensure cups are well-greased and consider a light sprinkle of salt on the cups before adding the batter. If the exterior browns too quickly while the center remains runny, lower the temperature slightly and extend the cook time in small increments. For eggs that crumble upon removal, allow them to rest for a minute, or increase cooking time by a minute or two and test again. If your model produces uneven results, rotate cups halfway through cooking and consider using a rack to raise cups for more even air exposure. Always preheat when possible to create consistent outcomes, and avoid opening the basket repeatedly during cooking as heat loss slows the process. Finally, cool the cups briefly after cooking to finish setting and avoid a rubbery texture.
Meal Planning: Batch Cooking Eggs in the Air Fryer
Batch cooking eggs in the air fryer is a great way to streamline weekday meals. Start by preparing several silicone cups at once with eggs and fillings. Use a two-tier setup if your model allows, so you can cook more portions in a single cycle. Store finished cups in an airtight container in the fridge and reheat briefly in the air fryer to restore textures. For variety, rotate fillings day-to-day—try spinach and feta, ham and cheese, or mushroom and onion with a dash of hot sauce. Label the cups with contents and date so you can track freshness. If you’re meal-prepping for the week, consider making a larger batch of plain eggs and adding toppings during serving time to keep flavors fresh. Batch cooking helps reduce daily cooking time while maintaining the same high-quality textures you expect from air fryer eggs.
Safety and Cleanup Tips
Always follow manufacturer guidelines for your specific air fryer model. Use heat-safe utensils and avoid touching hot cups directly; let them cool briefly before handling. Clean the basket and cups promptly to prevent dried-on residues, which can affect future batches. If you notice lingering odors, run an empty cycle with a little water and lemon slices to refresh the unit. Keep cords away from the hot basket, and never submerge the air fryer base in water or immerse it for cleaning. Regular maintenance—checking seals, gaskets, and the basket—helps sustain performance over time. Finally, store eggs safely in the refrigerator and discard cracked eggs or shells that appear suspect before cooking to prevent foodborne illness.
Authority Sources
For further reading and safety guidelines, refer to trusted sources:
- https://www.fda.gov
- https://www.cdc.gov
- https://extension.osu.edu
Tools & Materials
- Eggs(Large eggs work best; use fresh eggs for easier peeling (if hard-boiled).)
- Silicone muffin cups or small ramekins(Greased lightly for easy release.)
- Nonstick spray or oil(Light coating to prevent sticking.)
- Air fryer with 4-5 quart capacity(Ensure basket is clean before cooking.)
- Mixing bowl and whisk(Helpful for scrambled option.)
- Tongs or heat-safe spatula(Use to handle hot cups.)
- Parchment paper (optional)(Useful for quick cleanup when cooking multiple cups.)
Steps
Estimated time: 25-40 minutes
- 1
Preheat and prep
Preheat the air fryer to 325-350°F (165-175°C) if your model supports preheating. Lightly grease silicone cups or ramekins and set them in the basket so they’re ready for the eggs.
Tip: Preheating helps eggs cook evenly and prevents sticking. - 2
Grease cups and set up
Grease the cups thoroughly with a light coating of oil to ensure easy release after cooking. Place a small rack or silicone support if your basket is crowded.
Tip: Even a thin coat of oil makes removal clean and simple. - 3
Whisk eggs and season
Whisk eggs with salt, pepper, and optional dairy until smooth. For scrambled texture, add a splash of milk or cream.
Tip: Whisk well to incorporate air for fluffier results. - 4
Pour into cups
Pour the egg mixture into prepared cups, filling each about three-quarters full to leave room for expansion.
Tip: Overfilling causes spilling and uneven cooking. - 5
Air fry and monitor
Cook in the air fryer for 6-9 minutes, depending on desired doneness. Check early if your model runs hot.
Tip: If using shredded cheese, add it in the last minute. - 6
Check doneness and adjust
Open and test the center with a fork or toothpick. If still runny, cook 1-2 more minutes; avoid overcooking.
Tip: Carryover heat continues after removal. - 7
Remove and serve
Using tongs, lift cups out of the basket and cool briefly before serving. Garnish as desired.
Tip: Let them rest 1-2 minutes to finish setting. - 8
Clean up and store leftovers
Wash cups and basket promptly to prevent dried-on residue; store leftovers in an airtight container in the fridge for up to 3-4 days.
Tip: Reheat gently in the air fryer to retain texture.
Got Questions?
Can I make scrambled eggs in an air fryer?
Yes. Whisk eggs with salt and pepper, pour into greased cups, and cook in the air fryer for 6-8 minutes until set. Stir if needed for fluffiness.
Yes, whisk eggs and cook in greased cups for 6-8 minutes until set.
Are air fryer eggs healthier than pan-fried eggs?
Using the air fryer can reduce added fats because you rely on a light coating of oil or none at all. Nutritional profiles depend on fillings and toppings.
Yes, you can use less oil than pan-frying, depending on toppings.
How long do hard-boiled eggs take in an air fryer?
Hard-boiled eggs typically take several minutes at a lower temperature; follow a test batch to dial in your preferred yolk consistency.
They cook in a few minutes at a low temp; test a batch to get your preferred yolk.
Do I need special racks or baskets for egg cups?
Not necessarily. Silicone cups or ramekins fit well and allow easy stacking. A rack helps if you’re cooking many cups at once.
Not always—silicone cups work well, racks help with multiple cups.
How can I prevent sticking or cracking?
Grease the cups, avoid overfilling, and use gentle removal with tongs to protect the cups and eggs.
Grease cups and avoid overfilling to prevent sticking or cracking.
Watch Video
Quick Summary
- Plan for preheating to improve texture
- Use silicone cups for consistency
- Cook in short bursts and check for doneness
- Customize with cheese and veggies for variety
- Store leftovers safely for 3-4 days