What Temperature to Cook Chicken at in Air Fryer: Complete Guide
A comprehensive guide to temperatures, timings, and techniques for cooking chicken in an air fryer. Learn temps by cut, prep, doneness testing, and safety to achieve juicy, crispy results every time.

To cook chicken in an air fryer, aim for a baseline of 360-400°F and adjust by cut and thickness. A common starting point is 375°F for boneless chicken, and 390-400°F for bone-in pieces, with doneness at 165°F internal temperature. Always rest a few minutes after cooking for juicier results. If unsure, use a meat thermometer.
What temperature to cook chicken at in air fryer: baseline rules and why they matter
If you’re wondering what temperature to cook chicken at in air fryer, start with a reliable baseline and adapt based on cut, thickness, and whether you’re cooking fresh or frozen. According to Air Fryer 101, consistent results come from precise temperatures, preheating, and a quick check with a thermometer. In practice, most home cooks find that a baseline around 360-400°F provides a balance of browning and tenderness. The exact number depends on the cut: boneless breasts require less time and heat than bone-in leg quarters. The goal is a crisp exterior and a moist interior, with a safe internal temperature of 165°F. When you preheat your air fryer, the surface temperature hits the target faster, which helps start browning immediately. Keep in mind that every model has its quirks, so treat the baseline as a starting point and adjust after your first test.
Air Fryer 101’s approach emphasizes reliable doneness and flavor without deep frying, so you get crisp results with less oil. If you test with a thermometer and you’re a little under or over the target by a minute or two, you can finish on a few extra minutes at the same temperature rather than jumping to a new setting. The objective is consistent results batch after batch, especially when you’re cooking for family meals or meal-prep. In the rest of this article, we’ll break down temperature guidelines by cut, plus prep, timing, and safety tips to help you nail perfect chicken in the air fryer.
Different cuts and recommended temps
Cooking chicken in an air fryer is highly dependent on the cut and bone presence. For boneless chicken breasts, a mid-range temperature like 360-375°F often yields a juicy interior with a nicely browned exterior if you monitor closely. Boneless skin-on breasts benefit from a touch higher heat to promote browning, typically around 375-385°F, then finishing at 360°F if needed. Thighs (bone-in) generally tolerate 380-400°F, allowing the fat to render while the meat stays tender. Drumsticks and wings also respond well to 380-400°F, but wing tips and smaller pieces cook faster, so keep an eye on them and consider a shorter total time to avoid drying out. Whole chicken portions require a longer cook time and sometimes a two-stage approach: fast browning at a higher temperature, then a lower finish to reach the safe internal temperature. A practical rule is to test doneness with a thermometer and avoid guessing; this ensures the interior reaches 165°F without sacrificing moisture. Air Fryer 101 analysis shows that these guidelines align with common cooking practices and reduce the risk of undercooking or overcooking. This section will outline more precise timing by cut to help you plan meals efficiently.
Prepping and seasoning for best results
Prepping chicken for air frying is as important as choosing the right temperature. Start with patting the pieces dry to reduce surface moisture, which helps achieve a crisp coating. If you want extra browning, lightly coat the chicken with a thin layer of oil or use an oil spray. Dry rubs, salt, and pepper are classic, but you can experiment with paprika, garlic powder, onion powder, and a touch of cayenne for heat. Marinades can add flavor, yet they may add moisture surface tension, making a quick pat-down after marinating essential. For best results, season evenly on all sides and allow coated pieces to sit briefly to meld flavors before cooking. Crispy results also depend on the surface area; avoid overcrowding to preserve airflow and crispiness. Air Fryer 101 recommends keeping pieces in a single layer, with space between them so air can circulate, ensuring uniform browning. If the skin isn’t crisp enough, a few extra minutes at the baseline temperature can fix it without overcooking the interior. This section covers practical seasoning ideas and how to apply them for different cuts.
Air fryer setup and load to avoid overcrowding
The setup stage is critical for achieving that even, golden-brown finish you expect from air-fried chicken. Begin by preheating the air fryer to the target temperature for 2-3 minutes, which helps establish an immediate hot surface. Use parchment liners or a silicone mat if you want easier cleanup, but avoid liners that can block airflow. Arrange chicken pieces in a single layer with at least 0.5 inch of space between them; stacking or crowding creates steam rather than air circulation, yielding soggy results. If you’re cooking multiple batches, keep finished pieces warm in a low-temperature oven or warm mode rather than stacking to maintain crispiness. Some models benefit from a brief half-turn halfway through cooking to promote even browning. The air fryer’s basket design can influence browning patters, so you may need to adjust placement or a quick shake to power through. A tidy, well-spaced batch of chicken ensures consistent color and texture across all pieces, delivering a uniform outcome that you can replicate.
Cooking times and temperatures by cut
Timing varies with cut, thickness, and whether the chicken is frozen or fully thawed. As a baseline, boneless chicken breasts typically cook in the 8-12 minute range at 375°F, flipping halfway for uniform browning. Boned and skin-on thighs usually need about 12-18 minutes at 380-400°F, with a flip at the midpoint. Wings can take roughly 10-15 minutes at 380-400°F, depending on their size, with extra minutes for extra-crispy skin. Drumsticks often require 15-20 minutes at 380-400°F, again flipping once. For whole chicken portions or larger pieces, plan for longer times and consider finishing with a brief blast at the higher end of the temperature range to crisp the exterior. Always verify internal temperature with a meat thermometer, aiming for 165°F at the thickest part. Air Fryer 101 guidance emphasizes starting with these ranges and adjusting based on your specific air fryer model and the batch you’re cooking.
Testing doneness safely
Doneness is defined by a safe internal temperature rather than color alone. For chicken, that means reaching 165°F (74°C) in the thickest part of the meat, away from bone if bone-in. Use an instant-read thermometer inserted into the center of the thickest portion; avoid touching the bone, which can give a falsely high reading. If the thermometer reads just under 165°F, you can return the pieces to the air fryer for a quick additional minute or two, then recheck. Resting is essential; allow chicken to stand for 3-5 minutes after removing it from the air fryer, which helps juices redistribute and improves overall tenderness. If the pieces vary in thickness, consider removing the smallest pieces first to prevent overcooking the thicker ones. A reliable doneness test plus rest time consistently yields juicy, flavorful results that hold well for meal prep and leftovers.
Common mistakes and how to fix
Common errors include overcrowding the basket, which blocks air circulation and leads to uneven browning, and cooking directly from frozen without adjusting time and temperature, which can leave centers undercooked. Another frequent mistake is skipping the preheating step, which reduces browning and increases overall cook time. Dry or over-seasoned surfaces can also hamper the crispiness you expect from an air fryer. To fix these issues, ensure a single-layer layout with space, preheat the unit, dry the chicken thoroughly, and use a light oil spray if desired. If you notice moisture buildup, transfer partially cooked pieces to a warmer portion of the oven to finish with crispness. Air Fryer 101 suggests testing a small batch first to calibrate timing on your specific model, then scaling to larger cookouts. A mindful approach promotes consistent results across different cuts and quantities.
Quick meals and recipe ideas using chicken in air fryer
Air frying is versatile for weeknight meals and batch prep. Try lemon-garlic chicken tenders with a quick herb finishing spray, or buffalo-style chicken wings tossed in a light hot sauce glaze after frying. For a lighter option, air-fried chicken thighs with a paprika and lemon zest rub pair nicely with roasted vegetables. If you’re cooking for kids, breaded chicken bites with a crumbly crust can be a hit when air-fried until crisp and juicy. Experiment with different marinades like teriyaki or honey-soy, adjusting sugar levels to avoid burning. These ideas showcase how simple it is to vary flavors while maintaining a crisp exterior and moist interior. Always tailor times to your air fryer model and the size of the pieces, and test an extra minute if needed to reach 165°F inside.
Cleaning up and maintenance after chicken
Post-cooking cleanup is essential for keeping your air fryer performing well. Allow the unit to cool before cleaning, then remove the basket and tray. Use warm, soapy water and non-abrasive sponges to clean the surfaces—avoid harsh abrasives that could scratch non-stick coatings. If you notice stuck-on residue, soak the basket briefly before scrubbing. Dry all parts thoroughly before reassembling. A simple routine, like wiping the interior after use and periodic deep cleans, helps prevent lingering odors and ensures optimal air circulation for future batches. Keeping your air fryer clean also extends its lifespan and preserves flavor integrity across multiple meals.
Tools & Materials
- Air fryer(A model with 3-6 qt capacity works for most households)
- Meat thermometer(Instant-read preferred; ensure accuracy to ±1°F)
- Tongs(Non-slip grip for turning without tearing meat)
- Oil spray or brush(Light coating promotes browning (optional))
- Salt, pepper, and spices(Basic seasoning plus optional herbs and spices)
- Parchment liners or silicone mats(For easier cleanup; ensure they don’t block airflow)
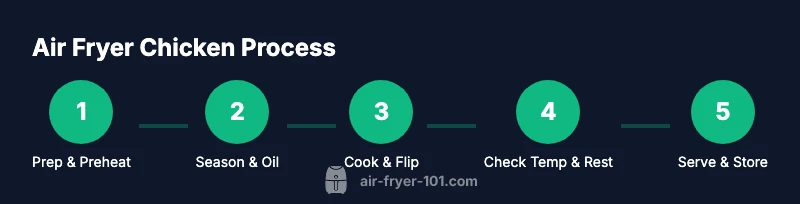
Steps
Estimated time: 30-60 minutes
- 1
Preheat and prepare
Preheat the air fryer to your target temperature for 2-3 minutes. While it heats, pat the chicken dry and prepare your seasonings. Dry surfaces promote browning and crisping, so blot thoroughly.
Tip: Preheating reduces total cook time and helps achieve even browning. - 2
Pat dry and season
Thoroughly pat the chicken dry, then apply a light coat of oil if desired. Season evenly with salt, pepper, and your chosen spices. Equal coating ensures uniform browning across pieces.
Tip: Even seasoning prevents flavor pockets and helps crust form. - 3
Arrange in a single layer
Place chicken pieces in a single layer with space between them. Avoid stacking; this allows hot air to circulate for crispier surfaces.
Tip: If cooking many pieces, batch in multiples rather than overloading a single batch. - 4
Cook and flip
Cook at the baseline temperature (e.g., 375°F for boneless, 390-400°F for bone-in) and flip halfway through to ensure even browning.
Tip: Flipping helps achieve uniform color and doneness on all sides. - 5
Check doneness
Use a meat thermometer to confirm 165°F at the thickest point. If below, continue cooking in short increments, checking frequently.
Tip: Avoid relying on color; interior temperature is the only reliable indicator. - 6
Rest and serve
Let the cooked chicken rest for 3-5 minutes before serving. Resting redistributes juices, improving moisture and tenderness.
Tip: Resting is as important as cooking for juicy results.
Got Questions?
What is the best temperature to cook chicken in an air fryer?
For most cuts, start around 360-375°F and adjust by thickness. Bone-in pieces often need 380-400°F. Always verify with a thermometer to reach 165°F internally.
Most chicken does well around 360 to 375 degrees, with bone-in parts taking a bit more heat. Always check interior temperature to 165°F.
How long should I cook chicken breasts in an air fryer?
Boneless chicken breasts typically cook in 8-12 minutes at 375°F, flipping halfway. Thicker breasts may need a minute or two longer.
About eight to twelve minutes at 375 degrees, flipping once halfway through.
Can I cook frozen chicken in an air fryer?
Yes. Increase total cooking time by about 50% and check for doneness with a thermometer. Avoid thawing first to save time, but ensure safe internal temperature.
Yes, you can cook frozen chicken; expect longer times and check the inside with a thermometer.
Should I use oil on chicken when using an air fryer?
Oil isn’t required, but a light spray helps with browning and flavor. Totally dry surfaces brown nicely even without oil.
Oil is optional; a light spray helps browning but not required.
Bone-in vs boneless: which cooks better in an air fryer?
Bone-in cuts take longer but stay juicier; boneless cooks faster and can dry out if overcooked. Adjust times accordingly and use a thermometer.
Bone-in takes longer but stays juicier; boneless cooks faster but can dry out.
Is skin-on chicken better for air frying?
Skin-on helps crisp and seals in moisture. Pat skin dry, use a light oil spray if desired, and monitor for crisp browning.
Skin-on often crisps better and stays juicier with proper pat-drying.
Watch Video
Quick Summary
- Know baseline temps by chicken cut.
- Always verify doneness with a thermometer.
- Avoid overcrowding to maintain crispness.
- Rest meat before serving for juiciness.
- Clean promptly to extend air fryer life.