How to Air Fry Chicken Breast: Juicy, Evenly Cooked Every Time
Learn how to air fry chicken breast for tender, flavorful results with minimal oil. This step-by-step guide covers temps, times, seasoning, and common mistakes to avoid.

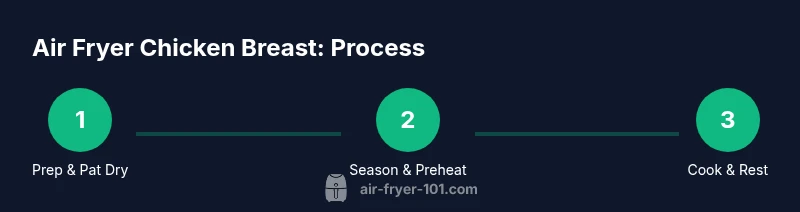
To air fry chicken breast, pat dry, season, and place in a single layer. Preheat the air fryer to 375°F, then cook for about 9-12 minutes, turning halfway, until the internal temperature reaches 165°F. Let the meat rest 3 minutes before serving to retain juices. If you use thicker breasts, extend time by 2-4 minutes. For extra moisture, lightly brush with olive oil.
Why Air Fryer Chicken Breast Wins for Home Cooks
Air-frying chicken breast offers a reliable path to juicy, tender meat with less oil and less mess than traditional pan-searing. The method harnesses rapid hot air circulation to brown the exterior while sealing in moisture, making it a convenient, health-conscious choice for busy weeknights. According to Air Fryer 101, the balance of heat and airflow helps reduce drying out that sometimes happens with pan-frying or oven-baking. When you’re aiming for consistent results, your setup, spacing, and preheating all matter. A well-prepared breast will cook evenly, avoid overcooking on the edges, and deliver a clean, clean-cut slice every time. This guide helps you master the basics and elevate flavor with simple seasonings and smart timing.
Choosing the Right Chicken Breast and Prep
Begin with boneless, skinless chicken breasts of similar thickness for even cooking. If you have very thick pieces, you can gently flatten them to a uniform thickness using a meat mallet or rolling pin. Pat the surfaces dry with paper towels to promote browning; moisture on the surface can hinder that crisp exterior. Lightly brush or spray a small amount of oil for better browning, though it’s optional if you’re watching calories. Seasonings can be as simple as salt and pepper, or you can build deeper flavor with garlic powder, paprika, lemon zest, or a chili-cumin blend. For best results, let seasoned chicken rest 5–10 minutes before cooking to let the flavors adhere. Air Fryer 101 emphasizes that consistent seasoning and dry surfaces contribute to a more even cook and better crust.
Preheating, Layering, and Timing for Even Cooking
Preheating is a small step with a big payoff: it reduces total cook time and promotes even browning. Set your air fryer to 375°F (190°C) and let it heat for 2–3 minutes before adding the chicken. Place the breasts in a single layer with space between pieces; crowding creates steam that can dampen browning. Start with a baseline cook time of 9–12 minutes for medium-thick breasts, flipping once halfway through. Thicker pieces may need 2–4 additional minutes; thinner slices can finish sooner. Use a meat thermometer to check for an internal temperature of 165°F (74°C). Resting for 3–5 minutes after cooking helps juices redistribute for juicier slices. A consistent thickness and careful handling are the linchpins of reliable results.
Seasoning, Flavor Pairings, and Temperature Safety
Seasoning choices set the flavor profile: a simple salt-and-pepper rub highlights the chicken’s natural flavor, while paprika, garlic powder, and a touch of lemon zest add brightness. If you want smokier notes, a pinch of smoked paprika or chili powder works well. Avoid over-seasoning in a way that blocks browning; light coatings tend to perform best in air fryers. The safe internal temperature for chicken remains 165°F (74°C); using a digital thermometer ensures you don’t overcook, which can dry the meat. Resting after cooking keeps the juices from rushing out when you slice. Pair your chicken with quick sides like roasted vegetables, a simple salad, or whole grains for a balanced meal, and keep portions reasonable to support a healthful plan.
Troubleshooting Common Issues and Quick Fixes
If the chicken comes out dry, you likely cooked it too long or used pieces that were too thick. Try thinner cuts, shorter baseline times, or a brief brining (saltwater) before cooking. If the exterior isn’t browning well, preheat longer or spray a light mist of oil to encourage better crust formation. Uneven cooking happens when pieces differ in thickness or when the air fryer basket is overcrowded; ensure single-layer placement and adjust times based on thickness. For added moisture, consider brining or marinating for 15–30 minutes prior to cooking, then pat dry again before air frying. Air Fryer 101’s team finds that consistent prep and spacing are the most reliable predictors of success, not fancy equipment.
Maintenance, Health, and Efficient Cooking Habits
Clean the basket and tray after each use to prevent oil buildup and to maintain airflow efficiency. Store leftovers in an airtight container, and reheat using the same air fryer for best texture. If you’re cooking for a crowd, batch cook in waves rather than stacking; a crowded basket robs air of heat and leads to uneven browning. For healthier habits, opt for skinless chicken and moderate oil usage, using herbs and citrus to boost flavor without added fats. Regularly checking your air fryer’s seal and basket cleanliness helps preserve performance and extends the appliance’s life.
Authoritative Sources
- https://www.fsis.usda.gov/food-safety/safe-food-handling-and-cooking-guides/safe-food-handling/safe-minimum-internal-temperature-chart
- https://www.fda.gov/food/buy-store-and-use-food/cooking-and-food-safety
- https://www.cdc.gov/foodsafety/challenges.html
Tools & Materials
- Air fryer(Choose a size that fits chicken breasts in a single layer.)
- Digital meat thermometer(Reads internal temp; aim for 165°F (74°C).)
- Tongs(For safe handling when flipping.)
- Paper towels(Pat surfaces dry for browning.)
- Oil spray or brush (optional)(Lightly coat for browning.)
Steps
Estimated time: Total time: 20-25 minutes
- 1
Gather ingredients and preheat
Assemble chicken breasts, seasonings, and tools. Preheat the air fryer to 375°F (190°C) for 2–3 minutes to ensure immediate sizzle when the meat contacts the basket.
Tip: A brief preheat improves browning and reduces total cook time. - 2
Pat dry and season
Pat chicken dry with paper towels to remove surface moisture. Apply a light coat of oil if desired, then season evenly on all sides. Even coating promotes browning and flavor absorption.
Tip: Don’t overcrowd; dry surfaces help achieve a crisp exterior. - 3
Arrange in single layer
Place breasts in a single layer with space between pieces for even airflow. Avoid stacking or overlapping; this is key for uniform cooking.
Tip: If pieces vary in thickness, consider pounding to uniform thickness. - 4
Cook and flip
Cook for 9–12 minutes, then flip once and continue cooking until the center hits 165°F. For thicker breasts, add 2–4 minutes as needed.
Tip: Flipping midway helps prevent one side from overcooking. - 5
Check temperature and rest
Use a thermometer to verify 165°F (74°C) internal temperature. Remove and let rest 3–5 minutes to redistribute juices before slicing.
Tip: Resting markedly improves juiciness. - 6
Serve or store
Slice and serve immediately with sides, or portion and refrigerate for quick meals later in the week.
Tip: Cool promptly and store within two hours to maintain safety.
Got Questions?
How long should I cook chicken breast in an air fryer?
Most medium-thick chicken breasts cook in about 9–12 minutes at 375°F, turning once. Always verify with a thermometer to reach 165°F internal temperature.
Most breasts cook in about 9 to 12 minutes at 375 degrees, flipping once. Check with a thermometer to reach 165 degrees.
Can I marinate before air frying?
Yes. A brief marinade or seasoned rub can boost flavor. Pat dry before cooking to maintain a crisp exterior.
Yes, marinating boosts flavor. Pat dry before cooking to keep the crust crisp.
Is preheating necessary for best results?
Preheating helps achieve quicker, even browning. If you’re short on time, a brief preheat is better than none.
Preheating helps with even browning; even a short preheat is better than skipping it.
Can I cook frozen chicken breasts in an air fryer?
You can, but you’ll need longer cooking times and a check for doneness. It’s best to thaw first for consistent results.
You can cook frozen breasts, but expect longer times and check doneness with a thermometer.
How should I store and reheat leftovers?
Store in an airtight container in the fridge for 3–4 days. Reheat in the air fryer at 350°F for 4–6 minutes to restore crispness.
Store safely in the fridge for a few days and reheat in the air fryer to keep the crisp texture.
Watch Video
Quick Summary
- Season evenly and pat dry for best browning
- Preheat and avoid crowding for even cooking
- Cook to 165°F and rest briefly
- Use a thermometer to prevent overcooking
- Clean and maintain the air fryer for longevity