How to Air Fry Chicken in: A Practical Guide
Learn how to air fry chicken in your favorite cuts with a crisp exterior and juicy interior. This Air Fryer 101 guide covers prep, temps by cut, doneness checks, and practical tips for healthier, delicious results.

According to Air Fryer 101, you’ll learn how to air fry chicken in any common cut for crisp, juicy results with less oil. You’ll prep thawed or partially frozen chicken, pat dry, season, and preheat your air fryer. Then cook by cut and thickness using a reliable thermometer to hit 165°F. Air Fryer 101’s method emphasizes even coating, proper spacing, and rest time.
Why Air Frying Chicken in an Air Fryer Delivers Crisp Results
Air frying chicken in an air fryer leverages powerful, rapid hot air to surround the food, producing a crispy exterior while keeping the interior moist. Unlike traditional deep frying, you use little to no oil, which reduces calories and fat. The lean browning comes from the Maillard reaction that happens quickly when surface moisture is removed and the chicken is exposed to hot air. For home cooks, this means less mess, safer kitchen cleanup, and consistent results across batches. The Air Fryer 101 team notes that achieving even browning starts with dry surface, adequate space, and properly preheated equipment. By choosing the right cut and orientation, you maximize surface area exposure and get a uniform, crisp bite every time.
The Health and Flavor Benefits of Air Frying Chicken
Health-wise, air frying can cut oil use dramatically compared to pan frying or deep frying, which aligns with many home cooks' goals for lighter meals without sacrificing texture. Flavor-wise, the dry heat promotes browning that enhances natural chicken flavors with minimal added fats. Air Fryer 101 analysis shows that even modest oil sprays can boost browning on lean cuts without overwhelming the meat. For best results, stick to simple spice rubs or marinades that coat evenly and don’t form clumps as the air circulates.
How to Prep: Thawing, Pat Dry, and Seasoning for Best Crisp
Prep begins with choosing the right chicken: boneless breasts, thighs, or drumsticks each have distinct cooking timelines. Thaw frozen pieces fully for even cooking, or partially thaw for quicker prep, then pat thoroughly dry with paper towels to remove surface moisture that stalls browning. Season generously using a light coat of oil or a quick spray to help spices adhere. A simple salt-and-pepper base works well, followed by paprika, garlic powder, and a touch of cumin or chili powder for warmth. Air Fryer 101 recommends letting seasoned pieces rest for a few minutes before cooking to help the flavors infuse.
Temperature, Time, and Doneness Guidelines by Cut
Different cuts require varying times and temperatures to reach the ideal balance of a crisp exterior and juicy interior. As a general rule, aim a high surface heat with a thermometer-guided finish: 165°F internal temperature is the safety target for all chicken. Breasts tend to cook quickly, typically in shorter sessions, while thighs and drumsticks may take a bit longer. Always check pieces individually, as thickness and bone presence influence total time. If you’re unsure, start with a shorter window and resume cooking in 2–3 minute increments until the thermometer reads 165°F.
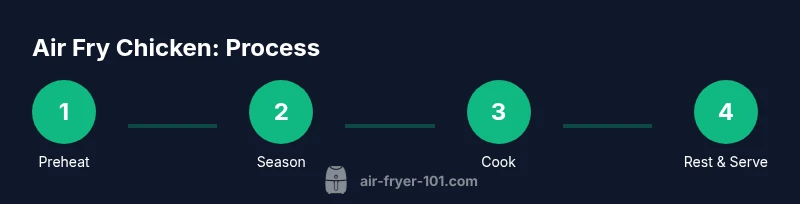
Step-by-Step Framework for Air Frying Chicken
A clear, repeatable routine helps deliver consistent results across cuts. Begin with a preheated air fryer to ensure rapid browning. Place seasoned chicken pieces in a single layer with space between them to promote airflow. Flip or shake halfway through to promote even cooking. Finish by resting the chicken briefly before serving to reabsorb juices. For best results, don’t crowd the basket and monitor internal temperature closely.
Common Mistakes and How to Fix Them
Overcrowding the basket leads to steaming rather than browning, producing soggy surfaces. Not patting dry leaves excess moisture that hinders crisping. Using too much oil can create smoke and off flavors, while too little can dry out thinner cuts. If you’re not seeing browning, increase the surface temp slightly (within your model’s safe range) or give pieces more space. If the center is undercooked, finish in shorter bursts rather than a long, single cook.
Storing, Reheating, and Leftovers Tips
Leftovers can be reheated in the air fryer to restore crispiness, usually at a lower power setting to avoid overdrying. Store cooked chicken in an airtight container in the refrigerator for up to 3–4 days. For longer storage, freeze par-cooked or fully cooked pieces in a freezer-safe bag. Reheat gently, checking the internal temperature to ensure it remains moist. Fresh herbs or a squeeze of lemon can brighten reheated chicken, restoring a sense of freshness after storage.
Tools & Materials
- Air fryer(Standard 3-6 quart model works well for most household kitchens)
- Paper towels(Pat dry chicken surfaces thoroughly)
- Tongs(For turning pieces safely without piercing the meat)
- Meat thermometer(Essential to verify 165°F internal temp)
- Cooking oil spray or light oil(Optional, helps with browning; use sparingly)
- Seasonings (salt, pepper, paprika, garlic powder, optional chili)(Keep spice blends light and evenly applied)
- Perforated parchment liners(Can help with sticking and easier cleanup; avoid obstructing airflow)
Steps
Estimated time: 25-35 minutes
- 1
Preheat the air fryer
Power on your air fryer and set it to a high heat (within your model's range). Preheating ensures the initial surface heat hits the chicken as soon as it touches the basket, promoting rapid browning and a crisper crust. If your device lacks a preheat function, simply run it empty for 2–3 minutes before adding chicken.
Tip: Skipping preheat can lead to uneven browning and longer total cook times. - 2
Pat dry and season
Pat dry each piece with paper towels to remove surface moisture. Lightly spray or brush with oil, then season evenly with salt, pepper, and a simple spice blend. Ensure coating is even, but avoid clumping spices, which can burn during cooking.
Tip: A thin coat of oil helps achieve an even, golden crust without excess fat. - 3
Arrange in a single layer
Place chicken pieces in a single layer with space between them to allow hot air to circulate. Crowding causes steaming and soggy surfaces. If you have many pieces, cook in batches rather than stacking.
Tip: Shake the basket or flip pieces halfway through for uniform browning. - 4
Cook by cut and thickness
Breasts cook faster than thighs or drumsticks; monitor internal temperature rather than rely solely on time. Turn pieces once to ensure even browning. When a piece reaches 165°F, remove it from the air fryer.
Tip: Use a thermometer to avoid overcooking, which dries lean cuts. - 5
Rest briefly before serving
Let the chicken rest 3–5 minutes after cooking. Resting allows juices to reabsorb, improving moisture and flavor. Slice and serve or keep warm while cooking remaining pieces.
Tip: Resting is often as important as the cook time itself for juicier results. - 6
Clean up and store properly
Wipe the basket and rack, then let the air fryer cool before washing. Store leftovers in airtight containers in the fridge for up to 3–4 days, or freeze for longer storage. Reheating in the air fryer helps restore crispiness.
Tip: Avoid soaking plastics or non-stick coatings; follow your model’s cleaning instructions.
Got Questions?
Can I air fry frozen chicken?
Yes, you can air fry frozen chicken, but expect longer cooking times and potentially uneven doneness. It’s best to thaw for more even results. If you cook from frozen, add extra time and check for 165°F internal temperature.
You can air fry from frozen, but thawing improves evenness. Add time and verify 165°F.
Is oil necessary for air frying chicken?
Oil is optional but helps with browning and flavor. A light spray is usually enough to encourage crispiness without adding much fat.
Oil isn’t required, but a light spray improves browning and flavor.
What internal temperature should chicken have?
Chicken should reach an internal temperature of 165°F (74°C) in the thickest part. Use a meat thermometer to confirm before serving.
Cook until the thickest part hits 165 degrees Fahrenheit.
How can I keep chicken juicy after air frying?
Pat dry before seasoning, avoid overcooking, and let the meat rest briefly after cooking to redistribute juices.
Dry pat, avoid overcooking, and rest a few minutes to keep it juicy.
Should I use bone-in or boneless pieces?
Bone-in pieces take longer to cook but can be juicier. Boneless breasts cook faster but can dry out if overdone. Adjust times accordingly and use a thermometer.
Bones add time and moisture; boneless cook quicker but need watchful timing.
Can I reheat air-fried chicken without losing crispiness?
Yes. Reheat in the air fryer at a lower temperature for a short period to restore crispiness without drying out.
Reheat in the air fryer at a lower temp to stay crispy.
What about seasonings or marinades?
Use light, even coatings and avoid heavy marinades that pool and cause sogginess. Dry rubs and quick spritzes work well with air frying.
Keep coatings light and even for best results.
Watch Video
Quick Summary
- Pat dry and season evenly for crisp crusts
- Preheat for consistent browning and faster cooking
- Cook in a single layer with space between pieces
- Check internal temperature to 165°F for safety
- Rest before serving to maximize juiciness