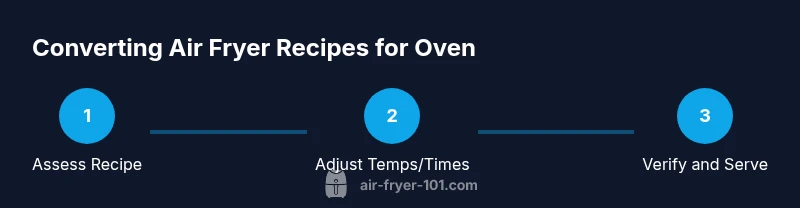
How to Adjust Air Fryer Recipes for Oven
Learn how to convert air fryer recipes for oven cooking with practical temperature, time, and airflow tweaks. Air Fryer 101 provides a step-by-step approach to crispy, evenly browned results without guesswork.

According to Air Fryer 101, you can adapt most air fryer recipes for a conventional or convection oven by adjusting temperature, time, and airflow. Start by lowering the air fryer temp by 25–50°F and lengthening cooking by 30–50%, then use a rack or sheet pan to mimic air circulation. Preheat, monitor, and flip as needed for even browning.
Why adjust for oven
Air fryer recipes rely on hot, fast air circulation to create crisp textures. Moving that same food to a conventional or convection oven changes the heat dynamics: convection still helps browning, but without the compact airflow of a small countertop unit, results can vary. According to Air Fryer 101, the key is translating air flow into oven setup: maximize air movement around each piece, use a rack if possible, and avoid crowding. You’ll notice differences in browning, moisture retention, and evenness, but with the right tweaks you can reproduce crisp textures and juicy centers. This section explains why you can still enjoy your favorites by adjusting temperature, time, and placement.
Temperature and time adjustments
Converting air fryer temps to oven settings means accounting for lower air velocity and larger cooking space. Start by lowering the temperature about 25–50°F and extending cook times by 30–50% compared with your air fryer timing. If a recipe calls for 400°F in the air fryer, test at around 350–375°F in the oven, then monitor with a timer and a visual check for browning. Use an oven thermometer to confirm the temperature is accurate, since home ovens often run hot or cool. The goal is steady, even browning with a moist interior. Air Fryer 101 recommends checking progress at the 60–70% mark and then adjusting as needed.
Airflow and rack placement
Even in a home oven, you can recreate air fryer-like airflow by elevating foods on a wire rack placed over a rimmed baking sheet. Space between pieces is crucial; overcrowding leads to soggy bottoms and uneven browning. If you don’t have a rack, tilt the baking sheet slightly or rotate pans halfway through cooking to simulate air movement. For best results, bake in a single layer whenever possible and avoid stacking.
Preheating and pan options
Preheating helps ensure the oven hits the target temperature quickly and starts browning immediately. Use parchment paper or a silicone mat to prevent sticking and make cleanup easier, especially for coated or sticky coatings. Rimmed baking sheets help catch juices and keep food stable. If you’re cooking delicate items, consider a perforated baking sheet or half-sheet with holes to promote better air exposure.
Ingredient and moisture considerations
Ingredient moisture can dramatically affect oven results. Foods with high moisture may steam rather than brown if placed too close to each other. Pat foods dry before cooking and avoid thick batter coatings that trap moisture. If you rely on breading, use a light crust and finish with a last-minute broil or high-heat finish to achieve crisp edge. Sauces and marinades should be used sparingly to prevent soggy outcomes. Remember, oven browning can be slower, so monitor progress closely.
Cook times by category
Different foods require different adjustments. Chicken pieces typically benefit from a slightly lower temperature and longer time than vegetables, ensuring juicy centers with a crisp exterior. Root vegetables like potatoes and sweet potatoes may need an extra 5–10 minutes at 375–400°F depending on size. Fish fillets cook quickly; thinner cuts may finish in under 10 minutes, while thicker fillets need more time. Baked goods require attention to rising times and browning; start with similar temperatures but watch for quicker crust formation.
How to adapt different foods
Healthy vegetables can become delicious when given space and the right temperature. For proteins, a quick sear on the stovetop before finishing in the oven can add texture. For breaded items, crispness improves with a preheated surface and a light coating—avoid heavy batters that hold moisture. Use a rack to maximize airflow and flip halfway through. When in doubt, set a timer and check color and texture frequently.
Safety and food safety tips
Always preheat when directed and use a meat thermometer to verify safe internal temperatures. Don’t leave foods on the oven's bottom rack where they may steam rather than crisp. Keep pans out of reach of children and use oven mitts to handle hot sheets. If you’re cooking multiple batches, rest the oven briefly between batches to prevent temperature drop.
Troubleshooting common issues
If browning is uneven, adjust rack position and increase airflow by using a rack or a perforated pan. If the exterior browns before the interior cooks, lower the temperature slightly and extend the cook time. A soggy finish usually means overcrowding; split the batch into smaller pans or bake in batches. For overly dry results, shorten the total time or reduce heat for slower, gentler browning.
A quick plan to convert a recipe
Start with your favorite air fryer recipe and note its temperature and time. Translate to oven settings by dialing down 25–50°F and increasing time by 30–50%. Choose a single-layer arrangement with space between pieces and use convection bake if available. Watch closely the first time you try a recipe, then record your exact oven settings for future reference.
Tools & Materials
- Oven with convection setting(If convection is available, select Convection Bake for best air-like results.)
- Oven thermometer(To verify accurate oven temperature.)
- Wire rack or cooling rack(Elevates food to promote air circulation.)
- Rimmed baking sheet(Contains juices and prevents spills.)
- Parchment paper or silicone mat(For easier cleanup and nonstick surface.)
- Tongs or spatula(Flip and turn food without breaking crust.)
- Timer or smartphone(Track multiple cooking stages and checks.)
- Oven-safe thermometer(If you want to monitor internal temps for specific items.)
Steps
Estimated time: 60-90 minutes
- 1
Gather and convert the recipe
Choose a favorite air fryer recipe and write down exact temperature and time. Decide how to translate those values to an oven setting, preserving portions and cooking stages. Note any ingredients that may benefit from minor substitutions for oven cooking.
Tip: Record the original air fryer values as a reference. - 2
Preheat the oven and prep pans
Preheat to the adjusted temperature (or slightly lower if using a standard bake setting). Set up a rimmed sheet with a rack and line with parchment or silicone mat to prevent sticking and promote airflow.
Tip: Preheating reduces the initial temperature dip when food is loaded. - 3
Arrange food for airflow
Place foods on a single layer with space between pieces. If possible, elevate items on a rack over a baking sheet to mimic air fryer airflow and ensure even browning.
Tip: Crowding leads to soggy, uneven results. - 4
Set temperature and start timing
Apply the oven temperature dictated by your translation (usually 25–50°F lower than air fryer) and start with a conservative time. Check color and texture at the 60–70% mark.
Tip: Use a timer for precise checks rather than relying on appearance alone. - 5
Flip, rotate, and monitor
Turn pieces halfway through cooking or rotate pans to ensure even browning. Use tongs to avoid breaking crisp coatings.
Tip: A quick flip can dramatically improve evenness. - 6
Check internal doneness
For meats, use a thermometer to confirm safe internal temperatures. For vegetables and baked goods, rely on color, tenderness, and a tester toothpick when applicable.
Tip: Trust a thermometer for safety over color alone. - 7
Rest and evaluate
Let foods rest briefly after removing from the oven. Reassess crispness; a brief second bake can help achieve final texture if needed.
Tip: Resting helps juices redistribute and improves texture.
Got Questions?
Can most air fryer recipes be adapted to oven?
In most cases, yes. Start with lower temperatures and longer times, and monitor browning. Some delicate items may require extra care.
Most air fryer recipes can be adapted to the oven with adjustments; monitor browning closely.
Should I always preheat the oven for adaptation?
Preheating helps with even cooking and consistent browning. If you’re short on time, you can start with a hot oven and shorten the initial phase, but preheating is preferred.
Preheating helps ensure immediate cooking and even browning.
What about convection vs standard bake?
If you have a convection oven, use the convection setting to simulate air fryer airflow. If not, rely on careful spacing and a perforated pan to improve air contact.
Convection helps mimic air fryer airflow; without it, you’ll want more space between pieces.
How can I tell when it’s done?
Use a thermometer for meats; for vegetables and baked goods, rely on color, texture, and a toothpick test. When in doubt, err on the side of slightly longer cooking.
Use a thermometer for safety; check texture and color for other foods.
Should I flip halfway through?
Yes. Flipping or rotating halfway through helps achieve even browning on all sides and prevents soggy bottoms.
Flip halfway for even browning.
Will oven-baked results taste the same as air fried?
The texture can be very close, but some differences in crispness and moisture are normal. With careful timing and airflow, you can achieve satisfying results.
It can be close, with some minor texture differences.
Watch Video
Quick Summary
- Lower oven temp by 25–50°F when converting.
- Extend total cook time by 30–50%.
- Use a rack to increase air contact.
- Preheat and monitor closely for best browning.
- Record your successful settings for future use.