How to Adjust Air Fryer Recipes for Convection Oven
Learn how to adjust air fryer recipes for a convection oven with practical temperature and time changes, airflow tips, and real-world examples. A step-by-step guide by Air Fryer 101 helps home cooks achieve crisp, delicious results.

You can translate air fryer recipes to a convection oven by reducing the recipe temperature by about 14°C (25°F) and extending total cook time by roughly 5–15 minutes for small batches, plus ensuring ample space for airflow. Preheat the oven on convection bake and monitor browning closely, shaking or turning as needed for even crispness.
Why translate air fryer recipes to convection ovens
Translating air fryer recipes to a convection oven unlocks more cooking options for home cooks who want to leverage their larger oven without sacrificing crisp texture. According to Air Fryer 101, convection ovens rely on a fan to circulate hot air, which speeds browning and can replicate air-fryer results when you adjust key variables. The goal is to maintain that same surface texture while accommodating the oven's larger cavity and variable airflow. Expect small temperature adjustments and a modest increase in total cooking time, especially when cooking batch sizes that fill more of the oven. This approach lets you repurpose favorite recipes with minimal guesswork while preserving the characteristic crunch.
Understanding convection ovens vs air fryers
Convection ovens and dedicated air fryers share the same principle of circulating hot air for even cooking and browning, but they differ in airflow density, cavity size, and heat distribution. Air fryers are compact and offer rapid air movement, often with a more intense surface browning. Convection ovens rely on a fan and exhaust vents with larger trays and racks, which can dampen air velocity slightly but improve airflow across more surface area. To translate, think in terms of maintaining the same browning effect by optimizing airflow through proper shelf positioning, spacing, and preheating. Air Fryer 101 emphasizes testing a few batches to dial in your own oven.
Core adjustments: time, temp, and airflow
When converting, start by lowering the temperature by about 14°C (25°F) from the air fryer setting. This helps prevent over-browning and scorching on larger pieces. Plan to increase total cook time by about 5–15 minutes for small to medium batches, depending on food density and thickness. Space matters: avoid overcrowding and use a rack or two-tier setup if you have one, with 1–2 inches of clearance on all sides. If a recipe relies on a quick finish, you may need to flip or shake halfway through to ensure even browning. Finally, use a thermometer to confirm doneness rather than relying solely on time.
Practical adjustment charts and real-world examples
Here are typical adjustments you can refer to when converting common items:
- Fries or potatoes: Air fryer often cooks at 400°F for about 15–20 minutes. In a convection oven, try 375°F for 20–25 minutes with a shake at the halfway mark. Expect crisper edges when you use a rack for airflow.
- Chicken nuggets or bite-sized proteins: Air fryer 400°F for 10–12 minutes. Convection oven at 360–375°F for 12–16 minutes; flip once for even browning.
- Salmon fillets or vegetables: Air fryer 400°F for 7–10 minutes. Convection oven 375°F for 10–12 minutes; keep an eye on moisture to avoid drying.
Always preheat and test with a small batch to calibrate for your oven’s performance. Air Fryer 101 notes that oven variability means you may need to iterate once or twice to achieve perfect results.
Step-by-step example: converting a working recipe
Take a familiar air fryer recipe for Crispy Garlic-Parmesan Chicken Bites (air fryer setting: 400°F for 12 minutes). To convert:
- Preheat the convection oven to 375°F on the convection bake setting. 2) Arrange bites on a parchment-lined sheet or on a wire rack set over a sheet pan to maximize airflow. 3) Cook for 15–16 minutes, flipping once at about the halfway point. 4) Check internal temperature with a meat thermometer (165°F target). 5) If browning is uneven, rotate the sheet halfway through and extend by 2–3 minutes if needed. 6) Rest for a few minutes before serving to let juices redistribute. Air Fryer 101 emphasizes validating doneness rather than relying solely on time, since oven performance varies.
Troubleshooting and common pitfalls
Common issues include overcrowding, which blocks airflow and yields soggy surfaces; using the wrong rack height; and relying solely on time rather than internal temperature. To avoid these, leave space between pieces, use a rack when possible, and check for doneness with a thermometer rather than a clock. If browning happens too quickly, reduce the temperature by another 5–10°F and extend the time slightly to allow interior cooking without burning the exterior.
Safety and maintenance considerations
Always use oven-safe pans and racks, keep the oven interior clean to maximize airflow, and use heat-resistant tools. If your oven runs hot or cold, calibrate with an oven thermometer and adjust accordingly. Regularly inspect seals and fans for optimal performance, and defer to your appliance manual for safety precautions when converting recipes between appliances. Keeping notes of your adjustments helps you reuse successful conversions in the future.
Tools & Materials
- Convection oven with convection bake setting(Ensure the oven can maintain stable convection temperatures)
- Baking sheets and/or wire racks(Use a rack for improved airflow; avoid overcrowding)
- Oven thermometer(Verify actual oven temperature for accurate timing)
- Parchment paper or silicone baking mats(Optional but helpful for cleanup)
- Food thermometer(Check internal doneness, not just time)
- Tongs or spatula(Use for turning items to promote even browning)
- Timer(Track stage and halfway rotations)
Steps
Estimated time: 40-60 minutes
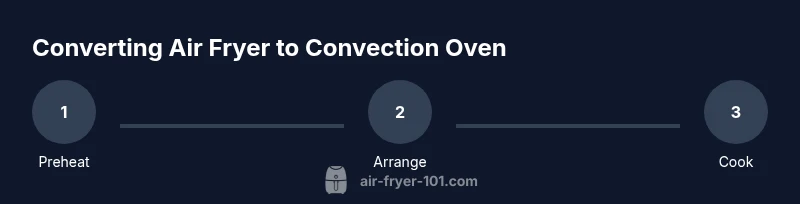
- 1
Preheat and select convection bake
Preheat the convection oven to the target temperature on the convection bake setting. This ensures a steady start and helps achieve even browning from the first bite. The preheat step is especially important when translating from air fryer, where rapid heating is assumed.
Tip: Use an oven thermometer to confirm you reach the intended temperature. - 2
Prepare food with space for airflow
Arrange pieces on a parchment-lined sheet or on a wire rack with 1–2 inches of clearance between pieces. Crowding reduces airflow and can lead to soggy or uneven browning.
Tip: If using a sheet, consider placing a rack over it to boost air contact. - 3
Adjust temperature and start cooking
Lower the air fryer temperature by about 25°F (14°C) and set the oven for a longer overall time. Start checking at the lower end of the range and plan for a shake or flip halfway through.
Tip: Use a thermometer to check doneness rather than trusting time alone. - 4
Check progress and rotate for even browning
About halfway through, rotate sheets or rearrange food to promote uniform browning. If using multiple racks, swap positions to equalize heat exposure.
Tip: If color is ahead of doneness, lower the oven temp slightly to prevent over-browning. - 5
Finish, rest, and store notes
Once the internal temperature reaches the target, rest the food for a few minutes before serving. Record any adjustments for future reference to streamline conversions.
Tip: Resting helps juices redistribute and improves texture.
Got Questions?
Is it safe to convert air fryer recipes to a convection oven?
Yes, with proper adjustments for temperature and time, convection ovens can replicate air fryer results. Start with modest temperature reductions, monitor doneness with a thermometer, and avoid overcrowding to maintain airflow.
Yes, you can convert air fryer recipes to a convection oven; monitor doneness with a thermometer and avoid overcrowding to maintain airflow.
Should I preheat my convection oven when converting recipes?
Preheating helps achieve consistent results, especially when translating from air fryers. Preheat to the target temperature on the convection bake setting and use an oven thermometer to verify accuracy.
Preheat the oven to the target temperature and use a thermometer to verify accuracy.
How do I adjust temperature and time precisely?
Reduce the air fryer temperature by about 25°F (14°C) and expect a 5–15 minute increase in total cook time for small batches. Use visual cues and internal temperature checks to determine doneness.
Lower temp about 25 degrees and add 5 to 15 minutes, then check doneness with a thermometer.
What foods are easiest to convert to convection oven?
Cripsy items like fries, chicken nuggets, and vegetables with a coating translate well. Lean proteins and dense items may require longer times or different rack configurations for optimal browning.
Cripsy items translate best; dense foods may need longer cooking times.
Do I need special pans for convection cooking?
Use oven-safe baking sheets, rims, and racks. Avoid deeply filled pans that block airflow. Parchment or silicone mats can help with cleanup but won’t replace airflow.
Use appropriate oven-safe pans and ensure airflow around the food.
Watch Video
Quick Summary
- Lower the temperature about 25°F when converting to convection.
- Increase total cook time by 5–15 minutes for small batches.
- Space and airflow are critical for crisp texture.
- Use a thermometer to verify doneness instead of time alone.
- Keep notes for accurate future conversions.