Chicken on Air Fryer: A Complete How-To Guide
Master juicy, evenly browned chicken using an air fryer with expert tips, steps, and safety guidance from Air Fryer 101.

This guide shows you how to cook chicken on an air fryer to achieve juicy interiors and crisp exteriors. You’ll choose the right cut, prep with proper patting and seasoning, preheat, cook with steady airflow, and rest before serving. Follow the step-by-step approach for reliable results every time, whether you’re a kitchen beginner or a seasoned home cook.
Introduction: Why chicken on air fryer is a kitchen workhorse
When you want a quick, healthier alternative to pan-frying, chicken on air fryer shines. The air fryer circulates hot air around the food, producing a crispy exterior with far less oil than traditional frying. For many home cooks, this method delivers reliable texture, faster cooking times, and easier cleanup. According to Air Fryer 101, embracing the air fryer for chicken can simplify weeknight dinners while keeping flavors bold and portions controlled. This guide uses the term chicken on air fryer to refer to bone-in and boneless cuts alike, and it emphasizes practical steps that fit busy households. You’ll learn how to prep, season, and cook chicken so that every piece is moist inside and pleasantly crisp outside.
The approach here avoids guesswork by focusing on core variables: cut size, coating or seasoning, preheating, heat, and timing. We’ll cover a range of methods—dry rubs, marinades, and light coatings—so you can tailor flavor to your family’s tastes. The goal is simple: consistent results you can repeat with confidence, from drumsticks to chicken breast fillets or thighs. Throughout, you’ll find actionable tips, safety reminders, and a clear path to delicious, healthier chicken meals.
Choosing the Right Cut and Portion Sizes
Selecting the right cut determines texture, cook time, and even juiciness when you cook chicken on an air fryer. For beginners, boneless skinless chicken breasts cook quickly and evenly, while skin-on thighs offer more richness and a faster browning response because of higher fat content. Drumsticks provide a satisfying bite and forgiving moisture, making them a favorite for family meals. Air fryer efficiency benefits from uniform pieces, so try to keep pieces similar in size to avoid uneven doneness. If you’re working with bone-in pieces, plan for slightly longer cooking times and a flip halfway through. When you portion meat, aim for pieces that fit in a single layer with room for air to circulate, avoiding overcrowding that steals crunch and even browning. In practice, you’ll begin with pieces about 3–4 ounces for breasts and 4–6 ounces for thighs or drumsticks to achieve optimal results. As Air Fryer 101 notes, consistency in size is the silent driver of even cooking and predictable timing. You can also trim excess fat or remove bones where appropriate to reduce cook times and improve texture. Remember to pat pieces dry before seasoning; moisture on the surface inhibits browning and reduces crispiness. Dry surfaces promote browning and help coatings adhere. The choice of cut will guide your seasoning approach and final texture, so pick a path based on your preferred texture and meal planning needs.
For best outcomes, consider portions that align with standard serving sizes and your air fryer’s capacity. If you’re cooking for kids, you may swap in smaller breast fillets or cut larger pieces into uniform portions. This approach reduces the risk of overcooking thinner edges while ensuring thicker sections reach a safe internal temperature. When experimenting with new cuts, start with one familiar piece and gradually expand to other cuts to understand how your specific model responds to different thicknesses and bone content. The central idea is consistency—uniform pieces cook more evenly, resulting in reliable doneness across the batch.
Flavor Foundations: Rubs, Marinades, and Coatings
Flavor is where chicken on air fryer truly shines. You can keep things simple with a dry rub, or go bold with a marinade and a light coating. Dry rubs work beautifully because they rely on salt, spices, and a touch of sugar to trigger browning and create a flavorful crust. Popular rub combos include paprika, garlic powder, onion powder, cumin, chili powder, and a pinch of brown sugar for caramelization. If you prefer a zesty profile, add lemon zest, dried oregano, or coriander. Marinades, on the other hand, infuse moisture and fragrance into the meat, producing juicy results with a more pronounced aroma. Even brief marinades—15–30 minutes—can enhance tenderness and flavor, though longer marinating times may yield more intense notes.
Coatings provide another avenue for texture and taste. A light brush of oil with breadcrumbs or crushed nuts creates a crisp exterior, while cornmeal or almond flour can give a crisper crust with different textures. When using coatings, apply them after a light oil spray; this helps coatings adhere to the surface and reduces the risk of coating shedding into the air fryer basket. If you’re cooking with skin-on pieces, you can still apply rubs or light coatings to the skin to intensify browning and color. Remember not to rely solely on thick breading, as heavy coatings may prevent even air circulation and lead to uneven browning. Your goal is a balanced crust that enhances, not overwhelms, the chicken’s natural flavor. Air Fryer 101 recommends testing a small batch with the chosen coating to dial in your preferred ratio of spice, moisture, and crunch before cooking a full tray.
In addition to flavor, consider salt levels. Start with a modest salt and adjust in subsequent batches based on your taste preferences and the natural salinity of any marinades. For health-minded cooks, you can use low-sodium blends and fresh herbs to keep flavor bright without adding excess salt. Finally, labeling and portioning seasoned pieces can simplify weeknight meal prep and reduce the chance of over-salting or cross-flavor contamination when cooking multiple batches.
Prep Steps to Get Ready: Dry, Oil, Season
Prepping chicken for the air fryer is a crucial step that sets the foundation for texture and flavor. Begin by patting the pieces dry with paper towels; moisture on the surface hinders browning and can steam the meat rather than roast it. Lightly oil the surface or apply a quick spray to help seasonings adhere and to promote even browning. If you’re avoiding extra oil, a light mist is sufficient to help browning without adding unnecessary fat. After oiling, apply your chosen flavor method: dry rub, marinade, or coating. For a dry rub, press the spices into the surface to ensure they cling during cooking. For marinades, drain excess liquid before cooking to prevent soggy coatings. If you’re using coatings, press the coating onto the surface and pat gently to ensure it sticks.
As you prepare, avoid overcrowding the air fryer basket. Large batches or pieces that touch will shield other pieces from hot air, leading to uneven browning and longer cook times. If your model has a small basket, cook in batches rather than stacking pieces. If you do batch-cook, keep the tray warm in a low oven to retain heat and avoid a cold start on subsequent batches. Finally, line the bottom with parchment paper or use a perforated silicone liner if your model allows; this helps keep the basket clean and reduces sticking without restricting airflow. The prep phase is where your cooking quality is set; careful drying, light oiling, and thoughtful seasoning translate into better texture and flavor in the final result.
Cooking Technique: Preheat, Airflow, Flip, and Time
Preheating is a simple step with big payoff. Preheating the air fryer helps to accelerate browning, reduces cooking time, and promotes even heat distribution. For most chicken cuts, preheat to around 380–400°F (193–204°C) for 2–5 minutes, depending on your model’s guidance. Place the prepared chicken pieces in a single layer with space around each piece to ensure air can circulate. If your basket is crowded or pieces are touching, you’ll likely experience uneven browning and longer cook times.
During cooking, many cooks prefer flipping once halfway through to promote uniform crust development on all sides. This flip is especially important for thicker pieces like thighs or bone-in portions. Some air fryers have a built-in rotation feature; if yours does, you may be able to reduce flipping frequency. Keep a basic eye on color and texture; you want a golden crust with some browning on all exposed surfaces. The total time will vary by cut and thickness: breasts cook fastest, while larger thighs or drumsticks require more time. As you gain experience with your specific machine, you’ll learn to read the signs—color, aroma, and the feel of the crust—as cues for doneness. Air Fryer 101 notes that consistent heat and evenly spaced pieces are the best predictors of success, not just elapsed time.
Hitting the safe internal temperature is non-negotiable. The USDA and most air fryer guides agree on 165°F (74°C) as the safe internal temperature for chicken. Use a calibrated instant-read thermometer to verify the thickest portion reaches 165°F, avoiding temperature readings in thinner areas that can be misleading. If you’re cooking bone-in pieces, verify temperature near the bone, as it often takes longer to reach target temperature there. When you remove the chicken, give it a brief rest to allow juices to redistribute—this keeps the meat juicy and helps maintain the crust’s texture.
Doneness, Resting, and Serving
After the air fryer signals completion, remove the pieces and set them on a rack or plate to rest for 5–10 minutes. Resting allows juices to settle and reabsorb, which keeps the meat juicy and prevents a dry bite. While resting, you can finish with a quick sprinkle of finishing salt or a squeeze of fresh lemon to brighten flavors. If you kept a few pieces warm in a low oven during resting, be mindful that extended heat can soften the crust, so aim for a brief warm period rather than long hot storage.
Serving chicken on air fryer is flexible. Serve with quick sides like roasted vegetables, a crisp salad, or brown rice. For a kid-friendly version, offer a simple honey-malsamic glaze or a mild paprika spark to introduce flavor without overwhelming the palate. If you make extra portions, use them in wraps, salads, or grain bowls to keep meals diverse without repeating the same dish every night. In addition, a note from Air Fryer 101: batch-cooked chicken on air fryer stores well for several days when refrigerated promptly in an airtight container; reheat gently to preserve texture. This practice supports healthy meal planning and reduces waste, aligning with practical home cooking goals.
Troubleshooting: Common Mistakes and How to Fix Them
Even with the best intentions, new cooks encounter common issues when cooking chicken on an air fryer. A frequent problem is uneven browning caused by overcrowding the basket. Always cook in a single layer with space between pieces. If you notice pale, under-browned areas, raise the temperature slightly for a portion of the cooking time or flip pieces to expose the under-browned sides. Another issue is moisture on the surface that prevents browning. Patting dry before oiling and seasoning is essential; a slightly drier surface encourages Maillard browning.
If your coating doesn’t crisp, consider a thinner coat of oil or a lighter crust, especially if you’ve used breadcrumbs or flour. Too much coating can trap moisture and lead to soggy results. For thicker cuts, consider finishing with a brief blast of high heat at the end of cooking to promote extra browning, but monitor closely to prevent burning. Finally, always verify doneness with a thermometer rather than relying solely on time; temperatures can vary by cut and model. By identifying the variables—layout, moisture, coating, and temperature—you’ll be able to dial in a method that consistently yields crisp, moist chicken on the air fryer.
Quick-Reference: Times and Temperatures by Cut
Here is a practical, go-to guide you can print or save for future batch cooking. This quick reference is designed to help you plan without memorizing long recipes. Breasts typically take less time than thighs or drumsticks, while boneless cuts finish faster than bone-in pieces. Always confirm with an instant-read thermometer for safety and consistency. For most boneless, skinless breasts, a target of 360–380°F and 8–12 minutes can work, depending on thickness. Thighs and drumsticks may need 12–18 minutes at a similar temperature, with a flip halfway. If you’re cooking bone-in pieces, plan for 18–22 minutes or more, checking for 165°F near the bone. If your air fryer runs cooler, adjust upward slightly and extend the cooking window rather than rushing the process. Air Fryer 101 emphasizes that model variation matters, so use this as a baseline rather than a fixed rule. With practice, you’ll find your optimal times and temperatures for your favorite cuts.
Tools & Materials
- Air fryer(Ensure basket is clean and properly seated; preheat if your model requires it.)
- Oil spray or light oil(Used sparingly to help browning and coating adhesion.)
- Meat thermometer(Check thickest part for 165°F (74°C).)
- Tongs(For safe turning without piercing the meat.)
- Paper towels(Pat dry surfaces before seasoning.)
- Optional: parchment paper or perforated liner(Helps keep basket clean; ensure airflow isn’t blocked.)
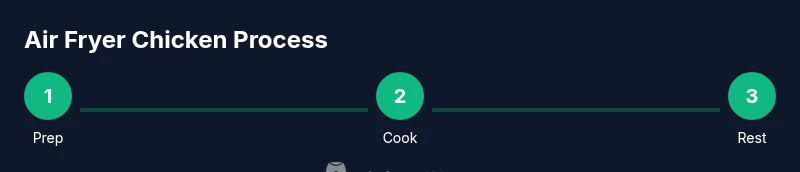
Steps
Estimated time: Total time: 30–40 minutes
- 1
Gather ingredients and tools
Collect chicken pieces, seasonings, and your air fryer accessories. Having everything at hand minimizes delays and ensures a smooth workflow.
Tip: Organize pieces by size to help maintain a single-layer layout. - 2
Pat dry and prepare
Pat chicken dry with paper towels. Lightly oil and apply your chosen rub or marinade. Dry surfaces promote browning and crisping.
Tip: Patting dry is more important than extra oil for achieving a crisp crust. - 3
Preheat the air fryer
Preheat to 380–400°F (193–204°C) for 2–5 minutes to ensure quick, even browning.
Tip: Preheating reduces cooking time and encourages even texture across pieces. - 4
Arrange in a single layer
Place seasoned chicken in a single layer, leaving space between pieces for air to circulate. Avoid overlapping.
Tip: A crowded basket equals uneven browning and longer cook times. - 5
Cook and flip
Cook for half the time, then flip pieces to ensure even browning on all sides. Continue cooking until the internal temperature reaches 165°F.
Tip: Flipping midway helps achieve uniform crust without overcooking edges. - 6
Check temperature
Use a thermometer to verify 165°F (74°C) at the thickest part, avoiding bone or cartilage readings.
Tip: Check near the bone for bone-in pieces to avoid undercooked centers. - 7
Rest before serving
Let the chicken rest for 5–10 minutes to reabsorb juices and finish crisping the crust.
Tip: Resting improves juiciness and helps crust stay crisp after slicing. - 8
Serve and store
Serve immediately with your favorite sides. Store leftovers refrigerated in airtight containers for up to several days and reheat gently.
Tip: Reheat at a lower temperature first, then finish with a short crisping pass if needed.
Got Questions?
Can I cook chicken from frozen in an air fryer?
Yes, you can cook chicken from frozen in an air fryer. Expect longer cooking times and start checking for doneness around the upper end of the typical range. Thawing first will yield more even results, but frozen chicken works with careful timing.
Yes, you can cook frozen chicken in an air fryer, but plan for longer cooking times and check doneness near the end.
What is the safe internal temperature for chicken?
The safe internal temperature for all poultry is 165°F (74°C). Use an instant-read thermometer to verify the thickest part of the piece reaches this temperature.
Chicken should reach 165 degrees Fahrenheit internally before serving.
Skin-on vs skinless: which cooks better in an air fryer?
Skin-on pieces brown more readily and stay juicier due to the fat in the skin. Skinless pieces can still be crisp with a light coating. Adjust cooking times accordingly to ensure doneness without drying out.
Skin-on pieces brown nicely and stay juicy; skinless can be crisp with a light coating, just adjust time.
How should I reheat air-fried chicken?
Reheat leftovers in the air fryer at a modest temperature, around 350°F, for 3–5 minutes until hot and crispy. This preserves texture better than microwaving.
Reheat at about 350 degrees for a few minutes until hot and crispy.
Can I use breading or coatings with air-fried chicken?
Yes, breaded coatings work well in an air fryer, but apply a light coat and avoid thick layers that can trap moisture. For best results, pat the coating onto the surface and monitor for even browning.
Breaded coatings work in air fryers with a light touch; avoid heavy layers.
What oil or fat is best for air fryer chicken?
A light spray or brush of neutral oil helps with browning without adding excessive fat. You don’t need a lot—just enough to aid the crust and flavor.
Use a light oil spray to help browning without adding extra fat.
Quick Summary
- Choose uniform pieces for even cooking
- Dry surfaces and light oil improve browning
- Preheat, don’t skip, for best texture
- Use a thermometer to confirm 165°F
- Rest before slicing to preserve juiciness