Air Fryer Whole Chicken: Juicy, Crispy Every Time
Master air fryer whole chicken with a crisp skin and juicy interior. This comprehensive guide covers prep, seasoning, temps, timing, resting, and safe handling for reliable results.

According to Air Fryer 101, you can cook a whole chicken in an air fryer to achieve crispy skin and juicy meat in about 60–75 minutes. This quick answer outlines the goal, essential temps, and basic prep so you can dive into the step-by-step guide. You'll learn prep tips, seasonings, and times to ensure safe, delicious results.
Why the Air Fryer Is Ideal for a Whole Chicken
Air fryers use rapid hot-air circulation to cook with little or no added oil, producing crisp skin and juicy interior. For a whole chicken, this method can dramatically reduce overall cooking time compared to a conventional oven. According to Air Fryer 101 Analysis, 2026 shows air fryers circulate hot air for faster cooking with less oil, promoting even browning and a satisfying texture. A properly sized air fryer can handle a 4–5 lb chicken if the basket is tall enough or if you use a rack. When used correctly, convection highlights the chicken’s natural flavors while keeping the meat moist inside. This approach aligns well with health, convenience, and budget goals for home cooks.
Key takeaway: choose a model with a generous interior height or a rack to lift the bird for even circulation.
Choosing the Right Chicken Size and Type
For air frying, aim for a bone-in, skin-on chicken in the 4–5 lb range. Larger birds can work in bigger air fryers or when split into halves, but they may require longer times and careful monitoring. Organic or free-range birds often deliver richer flavor and crisper skin, but any well thawed whole chicken can succeed. If you’re new to air frying, start with a 4 lb to 4.5 lb bird to dial in timing before attempting larger sizes. Always verify that your air fryer model can accommodate the bird’s girth and that there’s enough clearance for hot air to circulate.
Thawing, Brining, and Dry Brining for Best Skin
Thawing a frozen bird completely yields the most reliable results. If you’re short on time, a quick cold-water thaw is possible, but plan for extra cooking time. Brining is optional but helps keep meat juicy; a light dry brine (salt and spices) overnight can improve moisture retention without added liquid. If you choose to brine, make sure you pat the bird dry before seasoning to maximize skin crispiness and browning.
Prepping the Bird: Drying, Trussing, and Aromatics
Pat the chicken dry with paper towels to remove surface moisture—this is crucial for crisp skin. Tuck the wings and truss the legs to promote even cooking and prevent flare-ups. Inside the cavity, you can tuck aromatics like lemon slices, garlic, or herbs (thyme or rosemary) to boost aroma. Lightly oil the skin or spray with a neutral oil for even browning. Season generously on both the inside and outside for bold flavor that permeates the meat during roasting.
Flavor Profiles: Classic Butter-Rub vs Bold Rubs
Classic: mix melted butter with salt, pepper, garlic powder, and dried herbs; rub under the skin where possible for juicy meat and crisp skin. Bold: paprika, chili powder, onion powder, and dried thyme create a smoky, vibrant crust. For a citrus note, add lemon zest to the rub. Always balance salt with a touch of sweetness if your rub includes sugar.
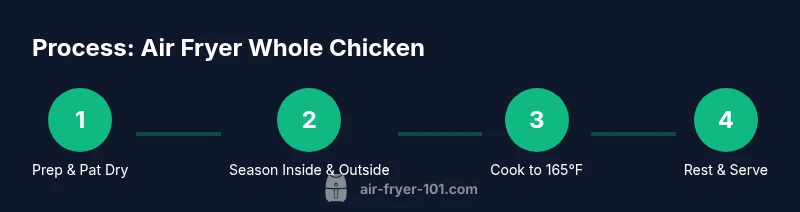
Step-By-Step Cooking Process: Temperature, Time, and Turning
This method uses a two-stage approach: start with moderate heat to cook through, then finish with higher heat to crisp the skin. Preheat the air fryer to 360°F (182°C). Place the chicken in the basket breast-side down for the first portion to help render fat and keep the breast moist. After 25–30 minutes, flip to breast-side up and continue cooking until an internal temperature of 165°F (74°C) is reached in the thickest part of the thigh. Finish with 2–5 minutes at 400°F (204°C) if needed to crisp the skin. Total time varies with size but typically falls within 60–75 minutes.
Finishing Touches: Resting, Skin Crisping, and Safe Handling
Remove the bird and rest it for 5–10 minutes before carving; resting allows juices to redistribute for juicier slices. If skin isn’t as crisp as you’d like, you can give it a final quick blast at 400°F for 2–4 minutes. Always handle with tongs and use a thermometer to confirm 165°F. After serving, refrigerate leftovers within two hours and reheat to 165°F when ready to eat again.
Carving and Serving: Easy Techniques
Begin by removing the legs and thighs, then separate the breast from the bone. Slice against the grain for tender portions and serve with pan drippings or a light gravy. For sides, pair with roasted vegetables or a bright salad to complement the rich meat. If you have leftovers, store in shallow containers to cool quickly and maintain texture.
Equipment and Model Considerations: What to Look For
Choose an air fryer with at least a 5–6 quart capacity for a 4–5 lb chicken, a rack or crisper tray, and a reliable timer/thermometer. Models with dishwasher-safe baskets and intuitive controls reduce cleanup time. If you frequently cook large birds, compare taller units or multi-tier racks that optimize airflow around the chicken.
Health and Safety Tips: Safe Storage and Reheating
Always thaw overnight in the refrigerator and cook to 165°F. If you plan to freeze leftovers, slice before freezing to speed future reheating. Reheat gently to avoid drying the meat. Clean the basket promptly after use to prevent grease buildup and maintain optimal airflow for future cooks.
Troubleshooting Common Issues: Quick Fixes
If skin seems soft, raise temperature slightly and monitor closely to prevent overcooking. If the chicken cooks unevenly, rotate or flip more frequently or use a two-tier rack to maximize airflow around the bird. For very large birds, cut into halves and cook separately to ensure thorough doneness.
Quick Start Checklist for Your First Try
- Confirm your air fryer can fit a 4–5 lb chicken
- Pat dry, season well, and optionally dry-brine
- Preheat to 360°F, cook 25–30 minutes per side, then finish at 400°F if needed
- Check internal temp at 165°F and rest before carving
- Store leftovers promptly in shallow containers
Tools & Materials
- Air fryer(Ensure the basket height allows a whole chicken (4–5 lb) to fit with clearance for air flow.)
- Whole chicken (4–5 lb)(Bone-in, skin-on recommended for best texture.)
- Paper towels(For drying the bird and quick cleanup.)
- Cutting board(Sanitized surface for prep and carving.)
- Sharp chef's knife(For trimming any excess skin or fat.)
- Kitchen shears(Helpful for trimming and handling the bird.)
- Instant-read thermometer(Probe the thigh to reach 165°F (74°C) safely.)
- Oil spray or brush(Light coating to promote crisp skin.)
- Kosher salt(Season generously, adjust to taste.)
- Black pepper(Freshly ground if possible.)
- Paprika (optional)(For color and subtle smoky flavor.)
- Garlic powder or granulated garlic (optional)(Enhances depth of flavor.)
- Dried thyme or rosemary (optional)(Herb aroma to complement roasting.)
- Lemon slices or onion wedges (optional)(Adds bright aroma inside cavity.)
- Aluminum foil (optional)(Use to tent if browning too quickly.)
Steps
Estimated time: 60-75 minutes
- 1
Gather and prep your workspace
Lay out all ingredients and tools. Wipe down surfaces and wash hands. This prepares you for a smooth, safe cooking process.
Tip: Have everything within arm’s reach to avoid cross-contamination or trips to the pantry. - 2
Pat dry and trim the chicken
Pat the bird dry on all sides to remove surface moisture. Trim excess neck skin or fat if present.
Tip: Dry skin is essential for crispness; moisture steams skin instead of browning. - 3
Decide on brining or dry-brining
If you brine, plan for additional time (overnight or a few hours). If dry-brining, season with salt and spices and let rest.
Tip: Dry-brining is simpler and saves time; it still yields juicy meat. - 4
Dry the bird thoroughly again
Pat the skin dry after brining or seasoning to preserve surface dryness. Any moisture hurts browning.
Tip: Even a little moisture at the surface can steam skin during cooking. - 5
Season inside and outside
Rub salt, pepper, and your preferred spices inside the cavity and on the skin. Add aromatics if desired.
Tip: Even distribution ensures flavor through every bite. - 6
Truss the legs and tuck the wings
Loosely tie the legs and tuck the wings against the body to keep shape and promote even cooking.
Tip: Trussing prevents wing tips from burning and helps the bird cook evenly. - 7
Preheat the air fryer
Preheat to 360°F (182°C) for 3–5 minutes prior to placing the chicken in the basket.
Tip: Preheating helps achieve a consistent start of browning. - 8
Oil the skin and place chicken in basket
Lightly oil or spray the bird, then place it breast-side down in the basket for initial browning.
Tip: Breast-down position helps render fat from the breast and keeps skin from sticking. - 9
Cook, then flip for even browning
Cook 25–30 minutes, then flip to breast-side up and continue until 165°F internal temperature is reached.
Tip: Flipping ensures even browning and avoids overcooking one side. - 10
Finish with a high-heat crisping phase
If the skin isn’t as crisp as you like, finish with a 2–5 minute blast at 400°F (204°C).
Tip: Watch closely to prevent burning. - 11
Check doneness and rest
Probe the thickest part of the thigh to 165°F (74°C). Let the chicken rest 5–10 minutes before carving.
Tip: Resting allows juices to redistribute for tender slices. - 12
Carve and serve
Carve the bird into legs, thighs, and breasts. Plate with your favorite sides.
Tip: Save bones for stock if desired; refrigerate leftovers promptly.
Got Questions?
Can I cook a frozen whole chicken in an air fryer?
It's best to thaw first for even cooking, but you can cook from frozen with extended time. Use a thermometer to verify doneness.
Thaw first for best results; if needed, add time and check with a thermometer.
Do I need to brine or dry-brine the chicken?
Brining is optional. A light dry-brine with salt and spices can improve juiciness and flavor without extra liquid.
Brining is optional, but a dry-brine is a simple way to boost juiciness.
What internal temperature should I aim for?
Aim for 165°F (74°C) in the thickest part of the thigh and breast. Use an instant-read thermometer for accuracy.
165 degrees is the safe target; check with a thermometer.
Can I stuff the chicken before air frying?
Stuffing can be cooked, but ensure the center reaches 165°F. It’s safer to cook stuffing separately or use a compact, small amount in the cavity.
Stuffing inside can be tricky—make sure it reaches safe temperature.
Why isn’t my skin crispy even after cooking?
Surface moisture and insufficient heat cause soggy skin. Pat dry, preheat, and finish with a high-heat blast to crisp.
Moisture prevents crisp skin; dry the surface and finish with high heat.
How should I store and reheat leftovers?
Cool quickly and refrigerate within two hours. Reheat to 165°F for safe, tasty leftovers.
Store leftovers promptly and reheat to a safe temperature.
Watch Video
Quick Summary
- Cook a 4–5 lb chicken for best results.
- Pat dry to maximize crisp skin.
- Season generously inside and out for depth of flavor.
- Check for 165°F in the thigh, rest before carving.
- Refrigerate leftovers promptly and reheat to 165°F.