Air Fryer 4 lb Chicken: The Complete How-To
Learn how to roast a 4 lb chicken in an air fryer for crispy skin and juicy meat. This step-by-step guide covers prep, seasoning, timing, safety, and serving ideas for home cooks.

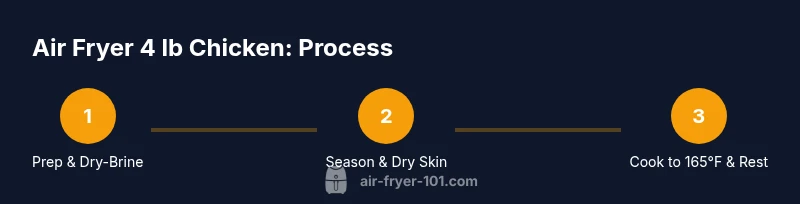
Goal: Roast a 4 lb whole chicken in an air fryer until the skin is crispy and the meat reaches 165°F internally. You’ll need a sufficiently large air fryer, a fully thawed bird, oil or cooking spray, salt, pepper, and your favorite seasonings. Preheat if required, pat dry, season well, and cook until thermometer reads 165°F.
Why Air Fryer 4 lb Chicken Wins for Home Cooks
For home cooks seeking healthier meals with weeknight convenience, roasting a 4 lb chicken in an air fryer can deliver crispy skin with juicy meat using less oil than traditional roasting. The Air Fryer 101 team notes that the compact, circulating hot air can produce even browning and reduced drying compared with conventional ovens when you select the right model and give the bird enough headspace. In this guide, you’ll learn why a 4 lb chicken works well in many air fryers, how to prep properly, and how to avoid common pitfalls. With careful prep and the right settings, you can achieve results that rival traditional roasting while keeping cleanup simpler and the kitchen quieter. Air Fryer 101’s testing indicates that even at moderate temperatures, you can obtain a robust crust and succulent interior if you keep the chicken dry and the pieces uncrowded.
Size and Setup: Choosing the Right Air Fryer and Positioning
The most important factor for a large bird is capacity. Look for an air fryer that can comfortably fit a 4 lb whole chicken with space around it for hot air to circulate. A 5–6 quart model is often the minimum, but many cooks prefer 6–8 quarts or a dedicated poultry rack accessory. Always measure the interior dimensions before buying or cooking, and use a rack or stand to lift the chicken off the base if your unit allows. Proper air flow around the bird ensures even browning and avoids undercooked wings or thighs. The Air Fryer 101 team recommends leaving at least a few inches of clearance on all sides and not crowding the basket.
Prep Fundamentals: Thawing, Pat Dry, and Dry Brine for Best Skin
Begin with a fully thawed bird for even cooking. Pat the skin dry with paper towels to remove surface moisture that can steam rather than crisp. A light dry brine—salt and a pinch of baking powder or baking soda—for 15–30 minutes helps crisp skin and enhances browning. After brining, pat the bird dry again and set it on a rack. Extra dry skin equals extra crisp skin once the hot air hits it. If time allows, you can refrigerate uncovered for 1–2 hours to further dry the surface.
Seasoning Strategy: Rubs, Marinades, and Safe Seasoning
Seasoning is about flavor and balance. Use a simple rub of salt, paprika, garlic powder, pepper, and a hint of dried thyme or rosemary. Oil or cooking spray helps the rub adhere and promotes browning. Avoid heavily sugary marinades that can burn at high air-fryer temperatures; if you use a glaze, apply it toward the final minutes of cooking. For safety, keep seasonings away from the drip tray to prevent scorching, and consider a lemon zest finish for brightness after resting.
The Cooking Procedure: Preheat, Roast, and Check Temperature
Preheat your air fryer if your model requires it and set the temperature to a medium-high range. Place the chicken breast-side up or on a poultry rack, breast side down for the first portion to keep the white meat juicy, then flip to finish. Cook until the internal temperature in the thickest part of the thigh reaches 165°F (74°C). Use an instant-read thermometer to verify. If the skin isn’t as crisp as you like, you can finish with 2–3 minutes at a higher heat or briefly broil in a conventional oven. Let the chicken rest to reabsorb juices before carving.
Troubleshooting Common Issues and Fixes
If the skin won’t crisp, pat dry again and increase the air-flow by rearranging the chicken or using a rack. Uneven doneness often means crowding or placing thick portions near the heat source; rotate the bird or move it to a different shelf. If you see juices pooling, stop cooking early and rest longer; excess moisture can hinder browning. For very large birds, consider splitting the chicken into two halves to ensure even cooking without overloading the basket.
Safety, Handling, and Cleanup Tips
Always wash hands and surfaces after handling raw chicken, and sanitize the air fryer basket after use. Use a thermometer to confirm 165°F internal temperature and check multiple spots, not just the thickest part. Allow the bird to rest for 10–15 minutes before carving to keep juices inside. After meals, wash or place the removable parts in the dishwasher if dishwasher-safe, and wipe down the interior to remove any fat or oily residue.
Serving Ideas and Leftover Storage
Serve the air fryer chicken with simple sides like roasted vegetables, a light salad, or mashed potatoes. Leftovers store in the fridge for 3–4 days in an airtight container; you can also freeze portions for longer preservation. Reheat gently in the air fryer at a lower temperature to maintain crisp skin. A squeeze of lemon or a dollop of yogurt-garlic sauce pairs nicely with reheated meat.
Quick Reference: Temperature Target and Rest Time
Target internal temperature: 165°F (74°C) at the thickest part of the thigh. Rest the bird 10–15 minutes before carving to retain juices. If the skin is not as crisp as desired, increase the heat for the last 2–3 minutes or briefly broil. Always check multiple spots to ensure even doneness.
Tools & Materials
- Air fryer (large capacity, 5–8 qt)(Must fit a 4 lb chicken with space around it)
- Meat thermometer (instant-read)(Insert into thickest part of thigh without touching bone)
- Paper towels(Pat dry skin thoroughly)
- Oil spray or neutral oil(Light coat optional for extra crisp)
- Tongs or kitchen shears(For safe handling when transferring in/out)
- Small rack or elevated insert (optional)(Helps air circulate under the bird)
- Kosher salt and ground pepper(For dry brine and seasoning)
- Dried herbs and paprika(Optional rub components)
Steps
Estimated time: 45-60 minutes
- 1
Prepare and thaw
Ensure the chicken is fully thawed. Remove giblets if present and pat the skin dry to remove surface moisture.
Tip: Dry skin is the first step to crisp skin. - 2
Apply dry brine and pat dry
Sprinkle kosher salt over the skin and lightly under the wings and legs. Wait 15–30 minutes, then pat the skin dry again to remove any surface moisture.
Tip: Dry brine improves browning and flavor without added moisture. - 3
Preheat the air fryer
If your model requires preheating, run the basket for 2–3 minutes at the cooking temperature to start the process.
Tip: Preheating reduces overall cook time and helps with browning. - 4
Position the chicken
Place the chicken breast-side up on a rack or directly in the basket, ensuring airflow all around. Do not crowd the basket.
Tip: Space around the bird is essential for even cooking. - 5
Cook and monitor
Cook until the thigh registers 165°F on an instant-read thermometer. Flip once if your model cooks unevenly and recheck.
Tip: Thermometer accuracy beats guesswork. - 6
Rest and carve
Let the chicken rest 10–15 minutes before carving to reabsorb juices.
Tip: Resting keeps slices juicy and flavorful. - 7
Optional crisp finish
If skin isn’t crisp enough, finish with 2–3 minutes at higher heat or under a broiler for a quick crisp.
Tip: Watch closely to avoid burning sugar in rubs.
Got Questions?
Can I cook a frozen or partially frozen 4 lb chicken in an air fryer?
It's best to thaw completely for even cooking. Cooking from frozen can lead to uneven doneness and longer cook times.
Thaw the chicken first for best results.
Should I preheat the air fryer for chicken?
Yes. Preheating helps start browning and ensures more consistent cooking.
Preheat for a few minutes as your model suggests.
Is air fryer chicken healthier than oven-roasted chicken?
It can be lower in oil depending on preparation. Choose lean seasonings and avoid heavy marinades to maximize health benefits.
It can be healthier if you trim fat and use little oil.
Can I use a rack or stand inside the air fryer basket?
Yes, if your model supports it; a rack can improve air flow and even cooking.
Yes, if your model allows.
What safety steps should I follow when handling raw chicken?
Wash hands and surfaces after handling raw chicken, and sanitize the air fryer basket after use to prevent cross-contamination.
Wash hands and sanitize surfaces after handling raw chicken.
How should I store and reheat leftovers?
Cool promptly and refrigerate within two hours. Reheat in the air fryer to restore crisp skin.
Reheat in the air fryer to keep the skin crispy.
Watch Video
Quick Summary
- Choose a large-capacity air fryer
- Dry, season, and space the bird for even browning
- Cook to 165°F internal temperature
- Rest before carving for juiciness