How to Cook a 3 lb Chicken in an Air Fryer
Master cooking a perfect 3 lb chicken in an air fryer with this expert guide from Air Fryer 101. Learn prep, timing, temperatures, and tips for crispy skin and juicy meat.

Goal: cook a juicy 3 lb chicken in an air fryer with even doneness and crisp skin. You'll need a 3 lb whole chicken, a large air fryer, a meat thermometer, oil, and basic seasonings. Plan for 60-75 minutes total at 360-380°F, with a halfway flip and a 5-10 minute rest before slicing.
Understanding Why a 3 lb Chicken Works in an Air Fryer
Air fryers are compact convection ovens that circulate hot air to brown and cook foods quickly. A 3 lb whole chicken can fit in many 5- to 6-quart models, provided there is adequate headroom around the bird for air flow. If your unit is smaller or uses a fixed rack, you may need to spatchcock the bird or cook it in two pieces. According to Air Fryer 101, the key is space for air movement; overcrowding leads to uneven browning and undercooked centers. When done right, the result is juicy meat with a crisp skin that rivals traditional roasting. For best results, choose a model with a removable rack or a heat-safe trivet that elevates the chicken away from the bottom and allows air to circulate on all sides.
A properly sized air fryer makes a 3 lb chicken feasible and delicious. If your appliance has a shorter basket, plan for a slightly longer cook time and use a thermometer to verify doneness rather than relying on time alone. In addition to the size, the bird’s temperature, pat-dried skin, and seasoning blend all play critical roles in achieving the benchmark contrast between juicy meat and blistered, flavorful skin. The bottom line: with the right setup, a 3 lb chicken comes out evenly cooked, tender, and deeply browned without a traditional oven’s long wait.
Adapting from the Air Fryer 101 framework, you’ll see that the cooking strategy prioritizes air flow, careful preheating, and minimal moisture on the skin. This trio speeds heat transfer, reduces cooking time, and helps render moisture from the skin so it becomes crisp rather than soggy. Keep your expectations in line with your fryer’s capacity and rig a plan that includes flipping, testing, and resting. A well-executed cooking cycle makes all the difference in achieving restaurant-quality results at home.
Tools & Materials
- 3 lb whole chicken(Pat dry and remove giblets if included; truss or tie legs for even cooking.)
- Oil (neutral or olive oil)(Lightly coat skin to help browning; 1-2 teaspoons is sufficient.)
- Salt and seasonings (pepper, garlic powder, paprika, herbs)(Evenly rub on the skin and inside cavity for full flavor.)
- Meat thermometer(Aim for 165°F in the thickest part of the breast or thigh.)
- Air fryer with 5-6 qt capacity(Ensure there’s space around the chicken; use a rack or trivet if possible.)
- Tongs or heat-safe glove(For safe handling when turning the bird.)
- Optional: rack insert or trivet(Raises the chicken to improve air circulation.)
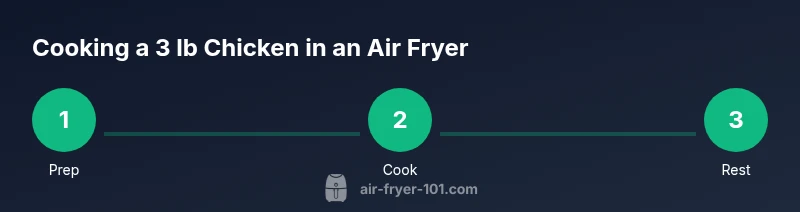
Steps
Estimated time: 60-75 minutes
- 1
Prepare the chicken
Remove giblets if present, trim excess fat, and pat the chicken completely dry with paper towels. Pat-drying is essential because moisture on the skin inhibits browning. Optional: loosely tuck wing tips behind the shoulders to prevent scorching during the initial phase.
Tip: Dry skin promotes browning; do not skip this step, especially for a larger bird. - 2
Preheat the air fryer and set up the rack
Preheat the air fryer to 360°F (182°C) for 3-5 minutes if your model requires preheating. Place a rack or trivet inside to elevate the chicken and promote air flow around the entire bird. If your unit has a fixed basket, ensure the chicken sits flat and doesn’t touch the sides.
Tip: Elevate the chicken to maximize hot air circulation and browning on all sides. - 3
Season and oil the skin
Lightly rub the entire surface with a small amount of oil, then season with salt, pepper, and your chosen spices. For deeper flavor, mix paprika, garlic powder, and dried herbs and rub into the skin. A dry rub helps the skin crisp while the oil assists browning.
Tip: Even coating prevents salty spots and promotes uniform browning. - 4
Cook breast-side down first
Place the chicken on the rack breast-side down to protect the delicate breast meat and start cooking. Cook for 20-25 minutes to begin rendering fat and browning the underside. This early orientation helps ensure the breast stays moist as the legs finish cooking.
Tip: Starting skin-side down reduces the risk of dry breast meat. - 5
Flip to breast-up and finish cooking
Carefully flip the chicken to breast-up and continue cooking for another 25-35 minutes, monitoring for color and doneness. The total cook time will depend on your fryer and the bird’s exact size. Use a thermometer to verify 165°F in the thickest part of the thigh.
Tip: Flipping halfway yields even browning and ensures thigh meat reaches safe temperature. - 6
Rest, carve, and serve
Remove the chicken from the air fryer and let it rest for 5-10 minutes before carving. Resting redistributes juices for a moister result. Carve using a sharp knife, starting at the thigh and working toward the breast, for clean slices.
Tip: Resting is essential for juicy meat; slice against the grain for tenderness.
Got Questions?
What size air fryer can fit a 3 lb chicken?
Many 5-6 quart air fryers can fit a 3 lb chicken, but always check the interior dimensions and allow space around the bird. If unsure, split the chicken or spatchcock it for even cooking.
Most 5 to 6 quart models work, but measure your basket to be safe.
What is the ideal temperature and time for a 3 lb chicken in an air fryer?
Aim for 360-380°F and a total time of about 60-75 minutes, turning halfway. Always verify doneness with a thermometer at 165°F in the thickest part.
Cook at 360-380 degrees for about an hour, checking with a thermometer.
Should I preheat the air fryer before cooking the chicken?
Preheating helps establish a quick sear and even heat. If your model requires it, preheat to 360°F for 3-5 minutes before adding the chicken.
Yes, preheating improves browning and cooks more evenly.
Can I cook a frozen 3 lb chicken in an air fryer?
Cooking from frozen is possible but will significantly increase time and may affect texture. It’s best to thaw completely before air frying for best results.
You can, but thawing is recommended for even cooking and juicier meat.
How can I get extra crispy skin without drying the meat?
Pat skin dry, use a light oil coat, and avoid crowding. Finishing at a higher temp for a few minutes can help crisp the skin. Rest before carving.
Dry skin, a light oil, and space around the bird lead to crispier skin.
Watch Video
Quick Summary
- Cook a 3 lb chicken with proper air flow and space around the bird.
- Preheat and pat dry to promote crispy skin.
- Flip halfway to ensure even browning and safe doneness.
- Target 165°F in the thickest meat and rest before carving.
- Choose a large-capacity air fryer or spatchcock if needed for fit.