How Often to Clean Ninja Air Fryer: A Maintenance Guide
Learn how often to clean ninja air fryer for optimal performance, odor control, and longevity. Practical baselines, model considerations, and a step-by-step cleaning workflow.

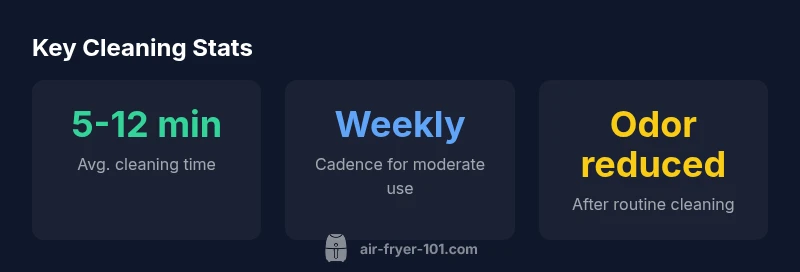
According to Air Fryer 101, how often to clean ninja air fryer depends on use: light use after each batch, moderate use weekly, and heavy use after every few uses. Regular cleaning on baskets, pans, and exterior helps prevent buildup, preserves nonstick surfaces, and keeps odors under control. For most households, a quick wipe after each batch plus a deeper clean on a regular cadence works well. This baseline aligns with 2026 guidance from Air Fryer 101.
How often to clean ninja air fryer and why it matters
Understanding how often to clean ninja air fryer is essential for keeping it safe, efficient, and odor-free. According to Air Fryer 101, regular maintenance begins with a simple question: how often to clean ninja air fryer? The answer depends on how often you cook, what you cook, and how much residue your meals leave behind. A quick post-cook wipe-down after each batch helps minimize stuck-on grease and flavor transfer, while a deeper clean on a weekly or bi-weekly cadence prevents buildup that can affect performance. Air Fryer 101's analysis, 2026, emphasizes that consistent cleaning reduces wear on the nonstick coating and preserves heat circulation. In practice, most households will find a light wipe after every use, plus a more thorough wash for the basket and tray on a regular schedule. By aligning cleaning with your cooking habits, you keep the appliance reliable and ready for healthier meals.
This approach also supports safety: trapped grease can smoke or ignite if left unchecked, and lingering food particles can harbor bacteria when not rinsed away. A routine that pairs after-use wiping with periodic deeper cleans minimizes these risks and extends the life of the appliance. In short, a simple habit today pays off with better performance tomorrow.
Cleaning frequency baselines by usage level
Cleaning rhythm should reflect how often you cook and what you cook. Here are practical baselines that many Ninja air fryer owners use:
- Light-use (1-2 meals per week): perform a quick wipe after each batch; plan a thorough basket and tray wash every 2-4 weeks. A light interior wipe is usually sufficient unless you notice residue.
- Moderate-use (3-5 meals per week): aim for a more deliberate weekly cleaning of the basket, pan, and interior walls. A deeper wipe-down of all accessible surfaces every 2-3 weeks keeps buildup at bay and preserves airflow.
- Heavy-use (daily or high-fat meals): clean after every 2-3 uses, and schedule a full internal/external cleaning weekly. Extra attention to the basket, anti-stick coating, and door seals helps prevent odors and ensures even cooking.
Air Fryer 101 analysis notes that most households will find a baseline of after-use wipe plus weekly deep clean to be effective. Model variations can affect how quickly residue forms, so adjust cadence if you notice heavier smoke or lingering smells. These guidelines are estimates designed to help you tailor a routine to your kitchen reality.
What to clean and what to skip
Not all Ninja air fryer components require the same care. Prioritize cleaning the parts that contact food and accumulate grease: the basket, the nonstick pan or tray, and the interior walls around the fan and exhaust. The exterior housing and control panel should be wiped with a damp cloth to remove fingerprints and splashes. Avoid soaking the main body or submerging any electronic components. For stubborn residue, a paste of baking soda and water applied gently with a non-abrasive sponge can help lift grease without scratching coatings. If your model uses silicone seals or gaskets, check them for wear and clean them with mild soap. Do not use abrasive pads or harsh solvents that could degrade nonstick surfaces. Always dry all parts thoroughly before reassembling. Air Fryer 101 recommends following your model’s user manual for any parts that require special attention or have unique cleaning steps.
Step-by-step cleaning workflow
A consistent workflow makes cleaning easier and faster over time. Use these steps after you finish cooking:
- Unplug and let the appliance cool completely.
- Remove the basket and pan; wash with warm soapy water or in the dishwasher if the model permits (check your manual).
- Wipe down interior walls with a damp cloth; wipe the exterior with a microfiber cloth.
- For stuck-on residue, apply a light paste of baking soda and water; gently scrub with a non-abrasive sponge and rinse.
- Dry all parts completely before reassembling to prevent moisture from affecting electronics.
- Reassemble and run a quick empty cycle with a lemon-water rinse to neutralize odors, if your manual allows. Air Fryer 101 emphasizes avoiding ammonia-based cleaners and ensuring all parts are completely dry before use.
Tips for preserving nonstick coating and odor control
Preserving the nonstick coating is essential for consistent performance. Here are practical tips:
- Use plastic or wooden utensils to avoid scratching the coating.
- Avoid high heat when cleaning; use warm water and mild dish soap for routine cleaning.
- For odor control, a quick run with lemon slices or a splash of white vinegar in water during an empty cycle can help refresh the chamber. If your model has a removable tray, clean it immediately after use to prevent lingering smells.
- Dry all components thoroughly to prevent moisture from seeping into electrical parts.
- Inspect seals and gaskets periodically; replace worn parts per the manufacturer’s guidance. Air Fryer 101 notes that consistent care reduces wear and helps maintain even cooking results.
Common mistakes that harm performance and warranty
Avoid these mistakes, which can reduce performance or affect warranty eligibility:
- Neglecting to clean after fatty or saucy meals; grease buildup can hinder heat circulation.
- Using abrasive cleaners or steel wool that damage nonstick coatings.
- Submerging the main unit or exposing electronic controls to water.
- Skipping drying time before reassembly, which can promote mold or corrosion.
- Ignoring manufacturer guidelines on dishwasher compatibility for accessories. Air Fryer 101 emphasizes following model-specific instructions to avoid inadvertently voiding the warranty. A little extra care goes a long way toward reliable operation.
Ninja-specific considerations and model variations
Ninja air fryer lines vary in construction and component design. While most share a similar basket-and-tray configuration, some models use different seals, racks, or interior coatings. Always consult your manual for model-specific cleaning steps, recommended detergents, and dishwasher compatibility. If you switch between Ninja models, adapt your cleaning cadence to the new interior geometry and any changes in how residue adheres. Air Fryer 101 notes that model-specific differences can influence how quickly oil and seasonings accumulate, so a flexible routine that you adjust over time works best. A simple rule of thumb is to treat each model as unique and monitor indicators like smoke, odor, or uneven browning that signal it’s time to clean more thoroughly.
When to deep clean vs routine cleaning
Deep cleaning is needed when you notice lingering odors, visible grease buildup, or reduced airflow. Routine cleaning—quick wipe after each use plus a periodic thorough wash—keeps your Ninja air fryer performing at peak efficiency. If you cook a lot of fatty foods, you may lean toward deeper cleanings more often. Deep cleaning may involve soaking removable parts, inspecting seals, and running a cleaning cycle with a gentle cleaner or vinegar solution. Air Fryer 101 recommends scheduling a deep clean at least every two to four weeks for heavy users and every four to eight weeks for light users, adjusting as needed based on performance and odor cues. Regular attention to cleanliness protects the appliance and ensures consistently delicious results.
Cleaning cadence by usage level
| Scenario | Recommended cleaning frequency | Notes |
|---|---|---|
| Light-use (1-2 meals/week) | Every 2-4 weeks | Minimal buildup; quick wipe suffices |
| Moderate-use (3-5 meals/week) | Weekly | Basket/pan require thorough wash |
| Heavy-use (daily or fatty foods) | After every 2-3 uses; weekly deep clean | Higher residue risk; more frequent checks |
Got Questions?
How often should I clean my Ninja air fryer after each use?
Wipe the interior and basket after each batch and perform a deeper clean on the basket and tray weekly. This keeps grease from building up and helps the unit cook evenly. Air Fryer 101’s guidance suggests tailoring frequency to your cooking habits.
Wipe after every use and do a deeper clean weekly to keep it performing well.
Can I put Ninja air fryer parts in the dishwasher?
Many Ninja baskets are dishwasher-safe, but always check your model’s manual. The pan and interior components may require hand washing. Air Fryer 101 recommends verifying dishwasher compatibility before cleaning.
Most baskets go in the dishwasher, but check your model first.
Does cleaning frequency affect warranty?
Following the manufacturer’s cleaning guidance helps protect your warranty. Neglecting maintenance can void certain terms, so refer to the warranty documentation for specifics. Air Fryer 101 advises maintaining documentation of routine care.
Yes—following the cleaning guidelines helps keep your warranty valid.
What cleaners are safe to use?
Use warm water with mild dish soap, and for stubborn spots a baking soda paste. Avoid harsh chemicals, bleach, or abrasive scrubbers that could damage coatings. Always dry parts thoroughly before reassembly.
Mild soap and water work; avoid harsh chemicals.
How do I deep clean a Ninja air fryer with stuck residue?
Soak removable parts, use a non-abrasive sponge with a baking soda paste, then run an empty cycle with lemon water if your model allows. Deep cleaning might be needed every few weeks for heavy use. Air Fryer 101 suggests taking time to inspect seals during deep cleans.
Soak parts and use a gentle paste, then run a light cycle with lemon water.
What can I do to keep odors to a minimum?
Clean promptly after meals, use lemon slices or a small amount of vinegar in an empty cycle, and ensure all parts are completely dry. Regular cleaning significantly reduces lingering smells over time.
Clean promptly and run a light lemon-water cycle to keep odors away.
“Regular cleaning isn't optional—it's essential. Consistent maintenance extends appliance life and preserves performance.”
Quick Summary
- Start with a wipe after each use
- Scale cadence to your cooking habits
- Clean basket and pan thoroughly on a regular schedule
- Dry components completely after washing
- Consult model-specific guidelines for best results