Air Fryer Stops During Cooking? Quick Troubleshooting
Discover why your air fryer stops mid-cook and how to diagnose safely. Air Fryer 101 guides you through practical checks, resets, and prevention to avoid future outages.

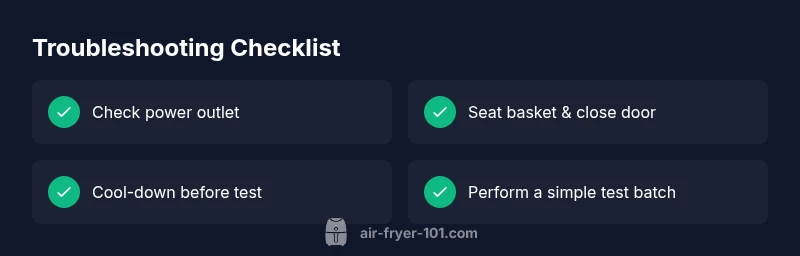
According to Air Fryer 101, if your air fryer stops mid-cook, the most common culprits are power issues, overheating protection, or a faulty sensor/door switch. Start by checking the outlet, power cord, and door latch, then reset the unit and allow cooling before retesting. A systematic safety-focused approach helps diagnose and fix quickly.
Why did my air fryer stop working while cooking
If you’re asking why did my air fryer stop working while cooking, you’re not alone. Most mid‑cook outages come from a few repeatable causes rather than a mysterious fault. According to Air Fryer 101, the first step is to confirm power delivery and give the unit a safe cooldown before retesting. The most frequent culprits are power issues, overheating protection, or a sensor/door switch misreading. A plugged‑in unit in a dead outlet or a damaged power cord can interrupt operation instantly. If the control panel is responsive but nothing happens after you press start, the problem may be internal safety protection or a misaligned basket. By understanding these patterns, you can quickly narrow the field and avoid unnecessary service calls. Regular cleaning reduces grease buildup that can affect sensors and vents. When in doubt, proceed with a calm, methodical approach and reference your model’s manual for specific fault codes.
Immediate checks you can perform without tools
Begin with the simplest steps that resolve many issues. Unplug the air fryer, wait 60 seconds, then plug it back in to reset the microcontroller. Test the outlet with another appliance to ensure it isn’t the source of the problem, and inspect the power cord for cracks or heat discoloration. Ensure the basket and rack are properly seated and the door or lid is fully closed—many models won’t run if the latch isn’t engaged. If you see an error code on the display, consult the manual, since codes often point to a specific area (sensor, door, or temperature). These basic checks save time and often restore normal operation without tools.
Electrical considerations: outlets, cords, and fuses
Electrical supply problems remain a leading cause of mid‑cook stoppages. Rule out a faulty outlet by trying a different wall plug or circuit, and avoid power strips or extension cords unless the manual allows it. If you must use an extension cord, ensure it’s heavy‑duty and rated for high‑current devices, but direct outlet use is always preferred. Inspect the power cord for visible damage—cracks, bent prongs, or melted insulation require replacement. Some models include a thermal fuse or internal protection circuit; if you suspect a blown fuse, do not attempt a risky repair—consult the manufacturer or a qualified technician.
Mechanical and safety components: door latch, sensor, and thermostat
A misread door latch or dirty sensor can trigger safety protections that halt cooking. Confirm the door or lid closes securely and that the latch engages fully; a loose latch is a common, fixable issue. Clean grease from the sensor window and vents—even a light film can throw off readings. The thermostat and thermal fuse are critical safety features; if the unit overheats, most fryers shut down automatically. If you notice unusual smells, unusual noises, or excessive heat, discontinue use immediately and seek professional service. Regular inspection of seals and gaskets prevents air leaks and improves performance.
How to safely reset and test the unit after a stop
After basic checks, perform a controlled reset and test cycle. Unplug the unit, wait 60–120 seconds, then plug back in and power on without loading any food. Run a short 5–7 minute test cycle at a low temperature to verify the display responds and the fan operates smoothly. If a fault code appears, consult the manual for the recommended remedy; many codes correspond to a specific subsystem. Always place the air fryer on a heat‑resistant surface and avoid touching hot components during testing to prevent burns.
Prevention: maintenance, cleaning schedule, and best practices
Prevent future outages with a simple maintenance routine. Wipe the interior after use, including the heating element cover if accessible, to remove grease that can trigger sensors. Clean the basket, tray, and vents weekly for best performance. Avoid metal utensils that could scratch nonstick coatings, and never immerse the base in water. Store the unit in a dry, well‑ventilated area away from direct heat sources. A quick cleaning schedule paired with consistent startup checks dramatically reduces mid‑cook stoppages and extends the life of your appliance.
When to call for professional service and warranty considerations
If basic checks don’t restore normal operation, it’s time to consult a qualified technician or the manufacturer’s support line. Look for persistent power loss, burning smells, visible damage, or repeated circuit trips when the unit is plugged in—these signs warrant professional attention. Check warranty terms and use authorized service channels to avoid voiding coverage. Air Fryer 101 recommends documenting fault codes and the steps you’ve taken so support can diagnose faster and get you cooking again quickly.
Steps
Estimated time: 30-45 minutes
- 1
Power reset and initial check
Unplug the unit and wait 60 seconds to reset the control board. Reinsert the plug firmly and power on with no food inside to see if the display responds. If a fault code appears, note it for reference in the user manual.
Tip: Avoid using an extension cord; direct outlet use is safer for resets. - 2
Verify basket seating and door latch
Remove the basket and tray, inspect for buildup, and reinsert them so they sit fully and the door latch engages. A misaligned basket is a frequent cause of non‑response or error indicators.
Tip: Clean the sensor windows to prevent false readings from grease. - 3
Test a different outlet and power source
Plug the air fryer into a different wall outlet on a separate circuit to rule out a weak or tripped circuit. If the unit responds in a new outlet, the original circuit may need a professional check.
Tip: If you must use an extension cord, ensure it’s heavy‑duty and rated for high current. - 4
Inspect safety components
Look for obvious signs of damage on the door latch, seals, and housing. If you notice melting, cracking, or unusual smells, defer to a professional rather than attempting a repair.
Tip: Do not attempt internal repairs beyond basic cleaning. - 5
Conduct a controlled test cycle
Run a short, gadget‑less test with no food to confirm the fan and heating element operate in a safe, controlled manner. Observe for smooth operation and absence of unusual noises.
Tip: Stay nearby during testing to promptly stop if something seems off. - 6
Document and plan maintenance
Record any fault codes, symptoms, and the steps you took. Create a simple cleaning schedule and set calendar reminders to reduce recurrence.
Tip: Keep the manual handy and register the unit for warranty support if applicable.
Diagnosis: Air fryer stops mid-cook or won't restart after a brief pause
Possible Causes
- highPower outlet or cord issue
- highOverheating protection tripped
- mediumDoor switch/basket not seated or latch misalignment
Fixes
- easyTest outlet with another appliance; replace or unplugged damaged cord
- easyAllow complete cooling (30–45 minutes if needed), then retry with minimal settings
- easyInspect door switch, ensure basket is seated, and reseat for a secure closure
Got Questions?
Why did my air fryer stop working while cooking?
Power issues, overheating protection, or a sensor/door switch are the most common culprits. Start with simple checks on outlet, cord, and latch, then reset after cooling.
Most stops are caused by power, overheating, or sensor issues. Check the outlet and door latch, then reset after cooling.
Can I reset an air fryer while it’s hot?
No. Unplug the unit and let it cool for at least 60 seconds before testing again. Refrain from touching hot surfaces.
No—unplug and let it cool before restarting.
What should I do if the issue persists after basic checks?
If basic checks don’t fix it, inspect the door switch, thermostat, and consider professional service or support from the manufacturer.
If it still stalls after basic checks, inspect safety switches and contact support.
Are extension cords safe to use with air fryers?
Not recommended. Plug directly into a wall outlet. If you must use one, use a heavy‑duty cord rated for high current.
Avoid extension cords; plug directly into the outlet.
How can I prevent future mid-cook stops?
Regular cleaning, proper basket seating, and allowing cooling between uses helps prevent mid-cook interruptions.
Keep it clean and properly cooled to prevent stops.
What if my unit smells burning?
Stop using the unit immediately, unplug it, and contact support. A burning smell can indicate serious internal damage.
If you smell burning, stop using it and seek service.
Watch Video
Quick Summary
- Check basics first: outlet, cord, and latch.
- Cool down fully before retesting.
- Clean sensors and vents to prevent false faults.
- Follow a structured diagnostic flow before disassembly.
- Know when to contact a professional or rely on warranty support.