What to Do When Your Air Fryer Stops Working
Immediate steps to diagnose and fix an air fryer that won't start, with safety tips, step-by-step fixes, and when to seek professional help.

When your air fryer stops working, start with the basics: verify it’s plugged in, the outlet is functional, and the power cord isn’t damaged. Unplug for 60 seconds to reset, then plug back in. Check the door latch and control panel for error codes, and ensure the basket is seated correctly. If it still won’t start, consult the user manual or Air Fryer 101 support for guidance.
Quick Troubleshooting Essentials
When a trusted kitchen workhorse like your air fryer stops working, you need a fast, focused plan. According to Air Fryer 101, most startup faults stem from power and connection issues, not a dead circuit board. Start with the basics: confirm the unit is plugged into a live outlet, inspect the power cord for damage, and test the outlet with another device to verify it actually has power. A quick 60-second reset—unplug, wait, and plug back in—can clear minor software glitches. Then check the door latch, the basket seating, and the control panel for any error codes or unusual blinking patterns. If the unit still refuses to start, consult the user manual or reach Air Fryer 101 support for guidance tailored to your model.
Common Causes at a Glance
Most startup failures fall into a few predictable categories. Power and outlet issues top the list—bad contact, a trampoline‑like power surge, or a loose cable can cut power instantly. A misaligned basket or a door latch sensor fault can prevent the unit from sensing that the chamber is closed. Software glitches on older firmware or a stuck display can also freeze operation. Finally, overheating protection can shut the appliance down to prevent damage after heavy or continuous use. By grouping symptoms with likely causes, you can prioritize fixes and avoid unnecessary disassembly.
Diagnostic Mindset: Reading Error Codes and Symptoms
Many air fryer models display error codes when something isn’t right. The first step is to note any blinking lights, error symbols, or message codes on the display. Cross-check these codes with your model’s manual or Air Fryer 101’s online help articles. If there’s no code, observe whether the unit powers on but won’t heat, or if it immediately powers down after start. This helps distinguish an electronic fault from a sensor or safety issue. Documenting symptoms in a quick log can speed up repairs and avoid repeating steps.
Diagnostic Flow: From Symptoms to Solutions
A structured approach helps avoid guesswork. Start with the simplest fixes (power, outlet, cord) and progress to more involved checks (door latch, sensor, control panel). If you see any error code, look it up before testing components. For persistent issues, segregate into those you can safely test at home and those that require professional service. Always prioritize safety: disconnect power before any physical inspection, and never remove panels beyond what the manual allows.
Step-by-Step Fixes for Common Scenarios
This section walks you through practical, at-home fixes for the most common failures. Each fix starts with a quick diagnostic cue and ends with a confirmation test. If a fix doesn’t resolve the issue, move to the next step rather than attempting risky internal repairs. Keep in mind that some problems require professional service or warranty coverage for safe handling and lasting repair.
Step 1: Power and Outlet Check
Begin by testing the outlet with another device to confirm it’s live. Inspect the power cord for exposed wires, kinks, or scorch marks. If you use a power strip, try plugging the air fryer directly into the wall outlet to rule out strip failure. After addressing any issues, reset the unit by unplugging for 60 seconds and plugging back in. Then try a short test run with a small amount of food to verify basic function.
Step 2: Reset and Re-seat
Unplug the air fryer, wait a full minute, and plug it back in. Ensure the power switch is in the correct position and that the control panel is responsive. Re-seat the basket and ensure the door shuts firmly; a misaligned basket can trigger safety interlocks that prevent operation. If the display returns, run a test cycle with no food to verify heating and timer functions.
Step 3: Door Latch and Sensor Check
A faulty door latch or misread sensor can keep the unit from starting. Inspect the latch mechanism for obstructions, and wipe away any grease or residue that might prevent a secure seal. If the latch feels loose or sticky, consult the manual for lubrication guidelines or arrange service if you suspect a hardware fault. After cleaning, run a brief test cycle to confirm proper engagement.
Step 4: Control Panel and Firmware
Touchscreen or button malfunctions can freeze operation. Clean the panel gently with a dry microfiber cloth and ensure there’s no moisture entering the controls. If available, check for firmware updates through the app or manufacturer site. Resetting the unit often solves minor software hiccups; avoid multiple rapid presses on the panel which can trigger a protective lock.
Step 5: Overheat Protection and Ventilation
Overheating can trigger automatic shutoffs. Ensure the air fryer has at least a few inches of clearance around it and isn’t placed on a soft surface that blocks vents. If you recently cooked at high temperatures or for an extended period, allow the unit to cool for 15–20 minutes before testing again. Clean any built-up grease from the fan and vents to restore airflow.
Step 6: When to Call Support and Warranty Considerations
If the unit still won’t start after all safe at‑home steps, it’s time to contact Air Fryer 101 support or consult your warranty. Do not attempt internal repairs or component replacements yourself, as this can void warranties and create safety hazards. Have your model number, purchase date, and a brief symptom log ready to speed up diagnosis. If your unit is under warranty, a replacement or repair often costs less than DIY fixes.
Steps
Estimated time: 30-45 minutes
- 1
Power and Outlet Check
Verify the unit is plugged in and the outlet is live by testing another device. Inspect the cord for damage and ensure there is no loose connection. If the outlet is fine, move to the next step and prepare for a reset.
Tip: Use a dedicated outlet to avoid circuit overloads. - 2
Safe Reset and Re-seat
Unplug the air fryer for at least a minute, then reconnect. Confirm the basket is properly seated and the door latch engages fully when closed. Run a short test cycle with no food to verify operation.
Tip: A proper reset clears most temporary faults. - 3
Inspect Door Latch and Sensor
Look for obstructions, sticky grease, or misalignment in the door latch. Clean gently and ensure the latch returns to its home position. If the latch feels loose, avoid forcing it and seek service.
Tip: Grease-free latches improve reliability. - 4
Check Control Panel and Software
Wipe the control panel with a dry microfiber cloth, ensuring there is no moisture. If firmware updates exist, apply them per the manufacturer’s instructions. If unresponsive, consider a factory reset if available.
Tip: Software glitches are common; a reset often fixes them. - 5
Assess Overheating and Ventilation
Ensure there’s at least a few inches of clearance around the unit and that vents are clean. If the unit has overheated, allow it to cool before testing again. Check for grease buildup on fans or vents and clean as needed.
Tip: Poor airflow is a frequent but fixable culprit. - 6
Call for Professional Help
If none of the above steps solve the problem, contact Air Fryer 101 support or initiate a warranty claim. Provide model number, purchase date, and a brief symptom log to expedite service.
Tip: Avoid opening the inner components; it raises safety risks.
Diagnosis: Air fryer won't turn on or immediately powers down after startup
Possible Causes
- highPower supply issue (outlet, cord, or circuit)
- mediumDoor latch sensor fault or misalignment
- mediumFaulty control panel or firmware
- lowOverheating protection engaged
Fixes
- easyTest the outlet with another device; inspect cord for damage; plug directly into wall outlet
- easyUnplug for 60 seconds to reset; reseat the basket and ensure the door closes securely
- easyCheck for error codes on the display and consult the manual or Air Fryer 101 support; avoid opening internal components
- hardIf problems persist after resets, pursue professional service or warranty coverage
Got Questions?
Why won't my air fryer turn on?
Common reasons include a power supply issue, a faulty control panel, or a door latch sensor fault. Start with power tests, then inspect the latch and panel for faults. If codes appear, refer to the manual or Air Fryer 101 support.
Common reasons are power issues, a faulty panel, or a latch fault. Start by testing power and then check the latch and panel.
How do I reset an air fryer?
Unplug the unit, wait 60 seconds, then plug it back in. This often clears minor software glitches and restores normal operation. If the problem persists, consult the manual or support.
Unplug it, wait a minute, plug back in, and test. If it still won’t start, check the manual or contact support.
Are air fryers covered by warranty if they stop working?
Warranty terms vary by model and seller. Check your purchase documentation and contact Air Fryer 101 support to verify coverage and options for repair or replacement.
Warranty depends on the model and purchase date—check your docs and contact support for options.
Should I open the air fryer to fix it myself?
No. Opening the interior can be dangerous and may void warranties. Refer to the manual or seek professional service for internal faults.
No—don’t open it yourself. For internal faults, contact support or a technician.
What if the outlet works but the unit still won’t start?
Move through the diagnostic flow: reset, reseat the basket, inspect the door latch, and check for error codes. If nothing works, contact support for diagnosis and possible repair.
If the outlet is fine but it still won’t start, try the full troubleshooting steps or contact support.
Watch Video
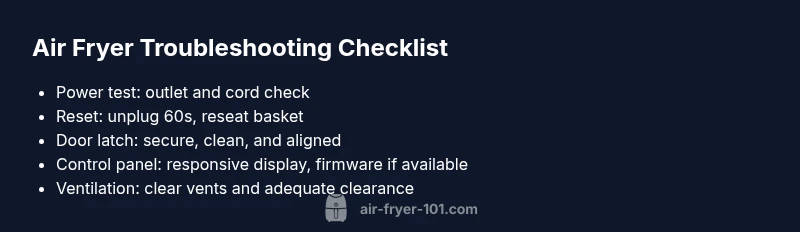
Quick Summary
- Check power and outlet first
- Inspect door latch and basket seating
- Reset the unit to clear minor faults
- If unresolved, contact support or check warranty