Blooming Onion Air Fryer Recipe: A Step-by-Step Guide
Learn a step-by-step blooming onion air fryer recipe with a crisp crust and juicy center. Includes prep, batter, coating, timing, dips, and cleaner-up tips for healthier, restaurant-quality results at home.

Master a crispy blooming onion in the air fryer with a golden crust and tender center. This guide covers prep, batter, shaping, and precise air-frying temps for consistent results. Gather a large onion, flour, cornstarch, seasonings, milk or buttermilk, and your favorite dipping sauce.
What is blooming onion and why air fryer?
A blooming onion is a whole onion cut into petal-like sections that resemble a flower when fried and opened. The air fryer version uses a crisp crust with far less oil, making it a delicious crowd-pleaser without the deep-frying mess. For this blooming onion air fryer recipe, you’ll use a sturdy, large onion and a two-stage coating to create a light, crunchy exterior and a tender, flavorful interior. According to Air Fryer 101, this approach yields a reliably crispy bloom when you follow the batter and drying steps carefully. Mastering the technique also translates to consistent results across different air fryer models, so you can enjoy restaurant-style results at home. This guide explains each step, from prep through serving, with practical tips to avoid common pitfalls.
Choosing the right onion and prep basics
Start with a large, firm sweet onion or a robust yellow onion. The onion’s size matters because a bigger bulb creates longer petals that bloom more dramatically when par-cooked or battered. Remove the papery skin, leave the root end intact to hold petals together, and trim the stem end. Rinse briefly and pat dry; moisture on the surface can hinder crisping. Air Fryer 101 recommends drying thoroughly and trimming excess root stubs to prevent tearing during the batter application. If the outer layers are very dry and flaky, you can wrap the onion in a paper towel for a few minutes to remove surface moisture. Because this is a blooming onion air fryer recipe, accurate prep is what yields a uniform, flower-like appearance after cooking.
Batter science and coating techniques
A two-layer approach helps achieve a crisp exterior and a soft interior. The wet batter (milk or buttermilk with eggs, if you choose) coats petals evenly, while the dry coating—flour mixed with cornstarch and seasonings—creates the crunch. The cornstarch promotes browning and helps create that signature crackly crust. For best results, chill the wet batters briefly and sift the dry mix to remove lumps. Air Fryer 101 emphasizes keeping ingredients cold enough to prevent clumping, which can lead to uneven browning. In this blooming onion air fryer recipe, you’ll dip the onion first in the wet mix, then dredge in the dry blend, repeating once if needed for a thicker crust.
Dredge, dip, and dry coat technique
The key to a flower-like bloom is even coating on all petals. Dip the onion into the wet batter, letting excess drip off, then roll gently in the dry mixture until every petal shows a light dusting. If some petals don’t stick, re-dip quickly and re-dredge. You can use a second dry-coat pass for extra crunch, but avoid heavy coatings that peel away during air frying. The goal is a balanced crust that stays intact while the petals separate and crisp up in the hot air.
Preheating and air fryer setup for even browning
Preheat your air fryer to 400°F (200°C) for 3–5 minutes and lightly mist the basket with oil to help browning. Arrange the coated onion in the basket with petals spread but not touching, so air can circulate and all sides crisp evenly. If your model runs hot in some areas, rotate the basket halfway through cooking and monitor the progress closely. This setup ensures the bloom cooks evenly and achieves that restaurant-like crunch without soggy spots or burnt edges.
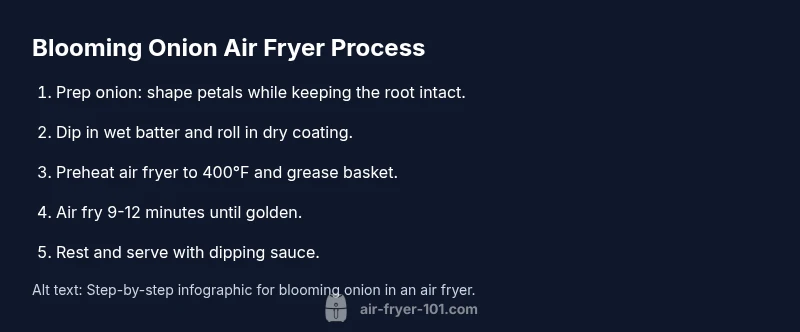
Step-by-step overview (summary)
This section offers a concise, action-focused recap of the process without repeating the full step-by-step list. Prep the onion and dry the surface thoroughly. Make wet and dry batters. Coat the onion in wet then dry mixtures, optionally add a second coat. Preheat the air fryer, place the bloom in the basket, and cook until the petals turn golden. Rest briefly before slicing and serving with dipping sauce. Following these checkpoints helps ensure a consistent, attractive bloom every time.
Troubleshooting and common mistakes to avoid
Common issues include uneven browning, soggy petals, and petals that detach from the crown. Ensure the onion is dry before battering; moisture steam can steam instead of crisp. Avoid overloading the basket—the more space, the better the air circulates for even browning. If the bloom sticks or petals tear during coating, use tongs to handle the onion gently and avoid rough poking that damages petals. Finally, if you’re not satisfied with crust texture, try a lighter coat of dry mixture or a brief rest in the fridge after battering before air frying.
Variations, dips, and serving ideas
Experiment with spice blends in the dry coating: smoked paprika, garlic powder, and cayenne add depth; swap in lemon-pepper for a zesty edge. For dipping, options include a tangy aioli, spicy mayo, or a classic ranch. You can also serve the bloom with a simple lemon wedge and fresh herbs to balance the richness. If you want a vegetarian-friendly version, keep the wet batter dairy-free using almond milk and a plant-based egg replacer. Keep in mind that the texture and browning will vary slightly based on the onion variety and the air fryer model.
Health considerations and quick cleanup tips
Air frying uses substantially less oil than deep-frying, which reduces fat content while preserving flavor and texture. To simplify cleanup, line the air fryer basket with parchment or a non-stick liner that’s compatible with high temperatures (remove it mid-cycle if needed for safety). Let the bloom rest briefly after cooking so juices redistribute, then slice into petals to reveal the flower shape. According to Air Fryer 101, this technique provides a satisfying, lower-fat alternative to traditional blooming onion recipes while maintaining a crisp exterior and juicy interior. The Air Fryer 101 team recommends cleaning the basket promptly to prevent oil residue from hardening and to ensure your next batch browns evenly.
Authoritative sources
- https://www.fda.gov/food
- https://www.cdc.gov/foodsafety
- https://nap.edu
Tools & Materials
- Large onion (1)(Choose a sturdy, edible bulb with tight layers; size matters for petals.)
- All-purpose flour (1 cup)(For the dry coating.)
- Cornstarch (1/2 cup)(Helps browning and crunch.)
- Milk or buttermilk (1 cup)(Wet batter base; dairy-free milk works too.)
- Eggs (1-2, optional)(Adds structure to wet batter.)
- Seasonings (salt, pepper, paprika, garlic powder, onion powder)(To flavor both batters and crust.)
- Cooking spray or light oil(For greasing the air fryer basket.)
- Dipping sauce of choice(Optional accompaniment.)
- Tongs and fork(For handling the bloom gently.)
- Measuring cups and spoons(Accurate portioning.)
Steps
Estimated time: 45-60 minutes
- 1
Prep bloom-ready onion
Peel the onion, trim the stem, and cut vertical incisions toward the root without severing it. The goal is a petal-like bloom that stays attached at the base. This initial shaping is what allows the center to cook evenly and petals to fan out later.
Tip: Work slowly to avoid tearing deeper layers. - 2
Dry the onion petals
Pat the onion dry with a clean towel and gently separate petals outward with your fingers. Excess surface moisture can cause the crust to slip off, so thorough drying is essential before battering.
Tip: A quick chill in the fridge can help set the structure before coating. - 3
Make wet batter
Whisk milk (or non-dairy milk) with eggs (if using) and a pinch of salt until well combined. The wet batter should be smooth and slightly thick so it coats petals evenly.
Tip: If using dairy-free milk, add a small amount of oil to improve adhesion. - 4
Prepare dry coating
Combine flour, cornstarch, and spices in a separate bowl. Sift to remove lumps for an even crust.
Tip: A second coating pass yields extra crunch, but keep it light to prevent tearing. - 5
Dip in wet batter
Dip the onion into the wet batter, allowing excess to drip off. The goal is a thin, even layer that clings to petals without pooling.
Tip: Tap once on the bowl edge to remove excess batter. - 6
Coat in dry mixture
Roll the wet-coated bloom in the dry mixture until every petal is lightly coated. Light, even coverage prevents clumps during air frying.
Tip: If some petals miss coating, re-dip quickly and re-dredge. - 7
Preheat air fryer
Preheat the air fryer to 400°F (200°C) for 3–5 minutes and spray the basket with oil.
Tip: Greasing the basket helps prevent sticking and promotes even browning. - 8
Cook the bloom
Place the coated bloom in the basket, petals spread but not touching, and air fry 9–12 minutes. Turn the bloom halfway if your model cooks unevenly.
Tip: Watch for a deep golden color; avoid overcooking which dries the center. - 9
Rest and serve
Let the bloom rest for 3–5 minutes before slicing into petals to reveal the flower. Serve with your chosen dipping sauce.
Tip: Resting helps juices redistribute for a juicier bite.
Got Questions?
Can I make this recipe gluten-free?
Yes. Substitute gluten-free flour and gluten-free cornstarch in the dry coating and wet batter to keep the texture light while maintaining crunch.
You can make it gluten-free by using gluten-free flour and starches in both batters and coatings.
Can I prepare the onion ahead of time?
Yes, you can shape the onion ahead and store it in the fridge for up to an hour before battering. Pat dry if moisture forms.
You can prep ahead and refrigerate briefly, then finish with batter and coating before cooking.
What dips pair best with the blooming onion?
Tangy aioli, spicy mayo, or classic ranch all pair well. Choose a dip that balances the richness of the crust.
Great options include aioli, spicy mayo, or ranch for a balanced bite.
Why might the coating peel off after cooking?
Too thick a coating or moisture on the onion can cause detachment. Ensure a light, even layer and pat the onion dry before dipping.
Make sure the layer is light and even, and keep the onion as dry as possible before coating.
Can I use other onion types besides a yellow onion?
Yes, white or sweet onions can work, but the size and sturdiness matter. Choose a firm bulb with tight layers for best results.
Other sturdy onions work, but pick a large, firm bulb for best bloom.
Watch Video
Quick Summary
- Prepare a firm onion with petals intact for an impressive bloom
- Use a two-step coating: wet batter followed by dry crust for best texture
- Preheat and space the bloom in the basket for even browning
- Opt for dipping sauces that balance the richness of the crust