Air Fryer Onion Rings Recipe: Crisp, Safe & Quick
Master a healthier take on onion rings with this air fryer onion rings recipe. Learn ingredients, step-by-step methods, tips, and variations to get crispy results with less oil and cleanup.

With this air fryer onion rings recipe, you’ll turn onions into crisp, golden rings without deep frying. Gather simple ingredients, pat the onions dry, coat them in a seasoned breadcrumb mixture, and air fry until fragrant and crisp. The result is a healthier, quick-to-prepare snack or side with minimal cleanup.
What makes this air fryer onion rings recipe smart for home cooks
There is a method to getting onion rings that are crisp on the outside and tender inside without deep frying. This air fryer onion rings recipe focuses on balancing moisture, coating adhesion, and air flow to produce consistent results. The approach is adaptable for different pantry staples and dietary needs, which makes it especially valuable for busy weeknights. According to Air Fryer 101, using a three-step coating—flour dredge, egg wash, and seasoned breadcrumbs—improves crunch without oil saturation. The key is to work with onions that are uniformly sliced and thoroughly patted dry, because moisture on the surface can steam rather than crisp. The pan is your ally here: avoid overcrowding, use parchment or a silicone mat, and space each ring so hot air can circulate. For many households, the realization that you can achieve restaurant-style texture in a quick 15- to 20-minute cook cycle is a turning point. With the right ingredients and technique, you can adjust the level of spice, heat, or savoriness to fit family preferences, from mild and kid-friendly to bold and adventurous.
Air Fryer 101's team emphasizes that small changes in the coating composition—such as substituting a portion of breadcrumbs with cornmeal or crushed cornflakes—can boost crunch and create a more resilient crust. If you’re avoiding gluten, swap in gluten-free flour and gluten-free breadcrumbs and still expect browning that rivals traditional frying. The method is forgiving for retries: if a batch comes out pale, a quick shake, an extra minute, and a light spray can turn the next round golden and irresistible. By understanding these fundamentals, you’ll feel confident experimenting with textures, temperatures, and dipping sauces to tailor this air fryer onion rings recipe to your kitchen.
Key ingredients and substitutions
The base recipe uses onion rings with a triple-coat that locks in moisture and creates a crisp exterior. Core ingredients include: one large onion cut into 1/4-inch rings, all-purpose flour (or gluten-free flour), eggs or a plant-based binder, and breadcrumbs (panko for extra crunch). Seasonings such as paprika, garlic powder, onion powder, salt, and black pepper bring warmth and aroma. For dairy-free versions, replace milk with a plant-based alternative and use an egg substitute if needed. To speed prep, you can pre-mix the breadcrumb coating with your favorite herbs. If you want a milder taste, reduce the paprika; for a spicier crust, add cayenne or chili powder. Optional add-ins like grated parmesan, nutritional yeast, or grated garlic can boost savoriness, while lemon zest can brighten the profile.
Quantity notes: adjust the onion count to meet appetite; a typical batch uses 1–2 large onions. For a gluten-free plan, use gluten-free breadcrumbs and rice flour as a light dredge. If you don’t have panko, standard breadcrumbs will still crisp but with a slightly denser crust. The goal is a light, even crust with minimal bundling to keep air from being blocked.
Smart prep tips: chill the egg wash briefly, and keep the breadcrumb mix dry. These small steps help coatings adhere when rings are placed in the air fryer and prevent soggy results.
Equipment and setup
Before you begin, assemble a simple workstation: a dredge bowl with flour, a shallow bowl with the egg wash, and a third bowl with seasoned breadcrumbs. You’ll also need your air fryer, a parchment sheet or silicone mat, tongs, and a spray bottle with neutral oil. Preheat the air fryer to 400°F (200°C) if your model requires it. Cut onions into consistent rings and pat them dry with a clean towel to remove surface moisture. Set up a tray to hold the finished rings in a single layer. If possible, create bed space for air to circulate around each ring; overcrowding is the enemy of crispiness. For dairy-free recipes, ensure the egg substitute and breadcrumbs align with your dietary needs. Finally, choose dipping sauces ahead of time so you can serve rings hot.
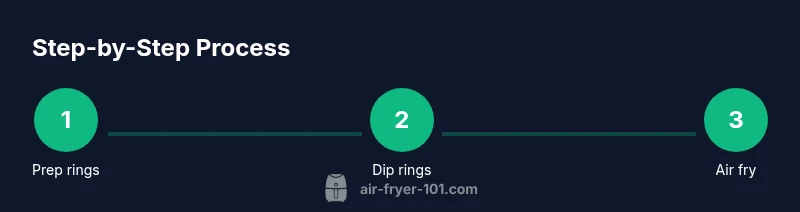
Step-by-step method (overview)
Here’s a quick mental map of the core actions you will perform: slice the onions into even rings, set up dredging stations, coat each ring with flour, egg wash, and breadcrumbs, arrange the rings in a single layer on the air fryer basket, spray lightly with oil, and air fry until crisp and tender. The exact timing depends on ring thickness and your air fryer model, but you’ll typically aim for a light golden crust in 8–12 minutes per batch, flipping once. Always check the center of the ring—the onion should be tender when pierced with a fork. This approach yields satisfying texture without deep frying, and it scales well for crowds. If you want extra crisp, you can finish with a second light spray of oil and a shorter final pass in the air fryer. Use warm dips to maximize the sensation.
Common mistakes and troubleshooting
A common mistake is overcrowding the basket. When rings are too close, air cannot circulate, resulting in pale, soggy crusts. Another frequent issue is moisture on the surface of the onion rings; pat dry thoroughly and avoid washing until you’re ready to cook. Too much breading can trap moisture and slow browning, while too little leads to a weak crust. If the coating doesn’t stick, re-dip in egg wash and re-coat before returning to the basket. Uneven slices also cause uneven cooking: measure thickness and keep rings consistently sized. Finally, if browning is uneven, pause mid-cycle and rearrange the rings for more even exposure to heat. For best results, store prepped rings in a single layer on a tray and cook in batches.
Flavor variations, dips, and serving ideas
There are many ways to customize air fryer onion rings. Classic dips such as ranch, ketchup, honey mustard, or aioli pair beautifully with the rings. For a tangy twist, add a pinch of lemon zest to the breadcrumb mixture or finish with a drizzle of hot honey. Try different coatings: swap part of the breadcrumbs for crushed cornflakes or cornmeal for extra crunch, or mix in grated parmesan or nutritional yeast for a savory note. If you like heat, a little cayenne or chili powder in the coating adds a kick. Garnish with chopped parsley or chives for color and freshness. Serve immediately with a light salad or fries for a complete meal.
Leftovers can be reheated in the air fryer for a few minutes to restore crispness; simply warm through and avoid stacking too many rings. To scale up for a party, prepare batches in advance and keep them warm in a low-temperature oven, then finish in the air fryer right before serving.
Tools & Materials
- Air fryer(Preheat to 400°F (200°C) if needed)
- Large onion(Slice into 1/4-inch rings)
- All-purpose flour (or gluten-free flour)(Dredge for adhesion)
- Eggs or plant-based binder(Whisk for coating layer)
- Breadcrumbs (panko preferred)(Seasoned or plain)
- Paprika, garlic powder, onion powder, salt, pepper(Flavor base for coating)
- Neutral oil spray(Light mist to improve crisp)
- Parchment paper or silicone mat(Prevents sticking and helps airflow)
- Milk (optional) or dairy-free alternative(Use for egg wash if needed)
Steps
Estimated time: 25-35 minutes
- 1
Prepare onions and station setup
Slice onions into even 1/4-inch rings. Pat rings dry with a towel to remove surface moisture. Arrange three stations: flour dredge, egg wash, breadcrumb coating, plus a resting tray.
Tip: Keep each ring dry and uniform in size for even cooking. - 2
Make the dredge and wash
Whisk flour with a pinch of salt in one bowl. In another, beat eggs with a splash of milk (or use plant-based binder). Ensure the wash is smooth for a thorough coat.
Tip: Chill the wash briefly to help coatings cling. - 3
Prepare the breadcrumb coating
Mix breadcrumbs with paprika, garlic powder, onion powder, and pepper. For extra crunch, add a tablespoon of cornmeal or crushed crackers.
Tip: Lightly toast breadcrumbs if you have time to boost flavor. - 4
Dip and coat each ring
Dredge rings in flour, dip in egg wash, then coat with breadcrumbs. Gently tap off excess coating so it adheres without clumping.
Tip: For thicker crust, repeat the dipping steps once more. - 5
Arrange and spray
Place coated rings in a single layer on the air fryer basket or a parchment-lined tray. Lightly spray with neutral oil for browning.
Tip: Avoid stacking; air needs space for even crisping. - 6
Air fry and flip
Cook at 400°F (200°C) for 8–12 minutes per batch, flipping halfway. Check for golden crust and tender onion inside.
Tip: If rings browning unevenly, rotate the tray or baskets between batches. - 7
Serve and adjust
Serve immediately with dips such as ranch, ketchup, or aioli. If you prefer softer interiors, shorten cook time slightly; for extra crunch, finish with 2 additional minutes.
Tip: Pair with a light salad to balance richness.
Got Questions?
Can I bake onion rings instead of using an air fryer?
Yes, you can bake onion rings in a preheated oven at a similar temperature, but the air fryer typically yields a crisper crust with less fat. You may need to extend the cook time by a few minutes and monitor closely to prevent burning.
Yes, you can bake them, but expect a crisper result from the air fryer and be ready to adjust time.
Do I need to preheat the air fryer for this recipe?
Preheating helps ensure consistent browning and a faster cook. If your model requires it, preheat to 400°F (200°C) for 3–5 minutes before adding the rings.
Preheating helps the crust brown evenly and reduces cook time.
Can I make this dairy-free or gluten-free?
Absolutely. Use dairy-free milk in the wash, plant-based binders, and gluten-free flour or breadcrumbs. This keeps the texture light while preserving crunch.
Yes, dairy-free and gluten-free versions work well with the same technique.
How should I store and reheat leftovers?
Store cooled rings in an airtight container in the fridge for up to two days. Reheat in the air fryer for a few minutes to restore crispness without drying the onion.
Keep leftovers in the fridge and reheat in the air fryer for best texture.
Why aren’t my onion rings crispy enough?
Common causes are overcrowding, moisture on the rings, or too thick a coating. Ensure rings are dry, space them apart, and consider a light second coating for extra crunch.
Overcrowding or too much moisture causes limp crusts; fix by spacing and drying.
Watch Video
Quick Summary
- Coat in three steps for best adhesion and crunch.
- Work in batches to avoid soggy results.
- Preheat and space rings for even browning.
- Customize coatings with spices for variation.
- Serve rings immediately for peak crispness.