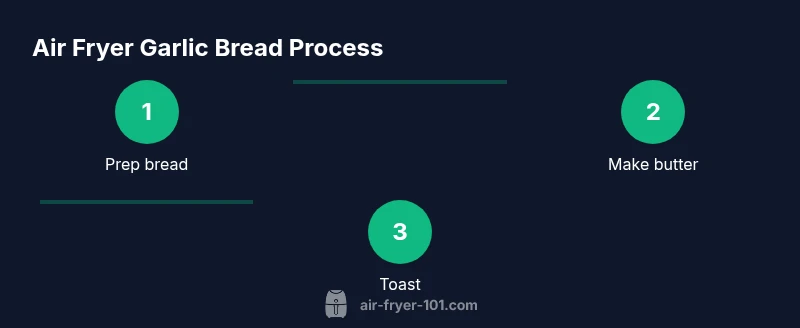
Air Fryer Garlic Bread: The Quick, Crispy Guide
Master a fast, flavorful air fryer garlic bread with garlic butter and herbs. This step-by-step guide covers quick and gourmet variations, tips, and troubleshooting for perfect crunch every time.

You can make crisp, garlicky air fryer garlic bread in about 6–10 minutes. Start with baguette or bread slices, butter, minced garlic, and optional parsley; preheat the air fryer to 350°F (175°C). Butter evenly, add garlic, toast until golden, then brush with melted butter and serve.
Why Air Fryer Garlic Bread Beats Traditional Toasting
Air fryer garlic bread offers crisp edges and a juicy interior in far less time than traditional toaster-oven methods. The circulating hot air in compact baskets yields a light, golden crust with minimal oil. According to Air Fryer 101, the key is crusty bread sliced evenly and evenly coated with garlic butter to prevent soggy pockets. This method shaves minutes off prep and reduces the risk of uneven browning, making it ideal for weeknight meals or a quick antipasto. If you want extra richness, a touch of grated parmesan or mozzarella can finish the top in the last minute, but keep an eye on it to avoid burning. For health-minded cooks, using light butter or olive oil-based garlic butter preserves flavor with less saturated fat. The result is a satisfyingly crisp exterior and tender crumb—texture that pairs beautifully with pasta, soup, or salads.
Essential Ingredients and Variations
Choosing the right bread and garlic butter ratio is the foundation. Crusty baguette, Italian loaf, ciabatta, or thick-sliced rustic sandwich bread all work well. Aim for slices about 1/2 inch (1.2 cm) thick for even toasting. For garlic butter, combine softened unsalted butter with freshly minced garlic (or garlic paste) and a pinch of salt. Fresh parsley adds color and brightness; optional cheeses like grated parmesan or shredded mozzarella melt for a more indulgent version. If you’re dairy-free, swap in olive oil-based garlic butter or a dairy-free alternative. A light drizzle of olive oil can help with browning. For those watching sodium, control salt carefully and taste before serving. Finally, pre-measure ingredients to ensure quick assembly when the bread is ready to toast.
Timing and Temperature Guide
General rule: 350°F (175°C) is a safe starting point. Toast slices for 6–8 minutes, flipping halfway if your air fryer requires it. If your bread is thicker or you want extra browning, add 1–2 minutes in 30-second increments, watching closely to avoid burning. If using cheese, add in the last minute to melt without scorching. Preheating improves consistency, but if your model skips preheat, start from cold and monitor closely. For a crisper crust without over-drying, remove any excess butter from the surface before toasting.
Prep Techniques to Ensure Even Toasting
Slice bread evenly, pat dry any surface moisture, and spread garlic butter in a uniform layer. Avoid pooling butter at the edges to prevent soggy spots. Use parchment paper or a silicone liner to prevent sticking, and arrange slices in a single layer with space between pieces. If your bread is very fresh, pat the cut sides lightly to remove excess moisture before buttering. A light brush of olive oil on the bread crust can aid browning while keeping the crumb tender.
Troubleshooting Common Issues
If edges burn quickly, lower the temperature by 25°F (about 15°C) or reduce time by 1–2 minutes and check early. Soggy centers usually mean too much butter or bread slices that are too thick; switch to thinner slices or blot moisture first. Crowding the basket leads to uneven browning—always toast in a single layer and in batches if needed. If cheese turns stringy but doesn’t melt evenly, add cheese in the last 60 seconds and watch carefully. For dairy-free versions, ensure the oil or butter substitute has a similar fat content to achieve a crisp finish.
Serving Suggestions and Pairings
Serve air fryer garlic bread warm with marinara for dipping, or alongside pasta, soup, or a hearty salad. Garnish with chopped fresh parsley for color and brightness. Leftovers can be stored in an airtight container for a day or two; reheat in the air fryer for 1–2 minutes to restore crispness. For a gourmet touch, finish with a light sprinkle of grated parmesan and a drizzle of olive oil before serving.
Equipment and Kitchen Setup for Consistent Results
Quality, not quantity, is key here. Use a parchment-lined basket or a silicone liner to prevent sticking and make cleanup easy. Keep slices uniform in thickness to ensure even browning. Preheat your air fryer if your model supports it, and resist the urge to overcrowd the basket—air must circulate freely for a crisp crust. A silicone brush helps you apply garlic butter evenly, without soggy blobs. Consider a small timer and a rack or tongs to rotate pieces during cooking for uniform results.
Cleanup and Maintenance after Garlic Bread
Let the basket cool before washing. Wipe away any butter residue with a damp cloth, then wash with warm, soapy water. A quick wipe down of the air fryer exterior prevents oil buildup on controls. Regularly check the basket’s nonstick coating and replace it if it's scratched. Keeping tools like a silicone brush and parchment liners clean reduces sticking and preserves flavor for the next batch.
AUTHORITY SOURCES
- https://www.fda.gov
- https://www.hsph.harvard.edu/nutritionsource/
- https://www.cdc.gov/healthyweight/healthy_eating/eating-tats.html
Tools & Materials
- Bread (crusty baguette, ciabatta, or rustic loaf)(Slices 1/2 inch (1.2 cm) thick for best results)
- softened unsalted butter(Room temperature for easy mixing)
- Fresh garlic, minced or garlic paste(About 1–2 cloves per cup of butter)
- Salt(To taste)
- Fresh parsley (optional)(Chopped for garnish)
- Grated parmesan or mozzarella (optional)(For a cheesy top)
- Parchment paper or silicone liner(Keeps bread from sticking)
- Silicone brush(For even butter application)
- Cutting board and knife(Slice and prep toppings)
- Measuring spoons (optional)(For garlic quantity)
Steps
Estimated time: Total time: 8-12 minutes
- 1
Gather and prep ingredients
Measure and prepare all ingredients: bread slices, butter, garlic, salt, and optional parsley and cheese. Set up your station with parchment and a brush within easy reach so you can work quickly when the bread is toasted.
Tip: Pre-measure everything to ensure a smooth, fast assembly. - 2
Preheat the air fryer
Preheating helps achieve even browning across slices. If your model doesn’t have a preheat setting, run a 1–2 minute warm-up at 350°F (175°C) with empty basket.
Tip: Preheating reduces cold spots and keeps edges from under-toasted. - 3
Make garlic butter
Soften butter and mix in minced garlic with a pinch of salt. For extra flavor, add chopped parsley and a touch of olive oil to lighten the mixture.
Tip: Use fresh garlic for a brighter flavor; avoid overheating butter before mixing. - 4
Prepare bread slices
Spread a thin, even layer of garlic butter on each slice. If you like cheese, sprinkle a light dusting on top. Arrange slices in a single layer on parchment in the air fryer basket.
Tip: Avoid pooling butter on the surface to prevent soggy spots. - 5
Toast in the air fryer
Toast at 350°F (175°C) for 6–8 minutes, checking halfway. If you prefer extra browning, continue in 30-second increments until the edges are golden.
Tip: Keep an eye on the last minute to prevent burning. - 6
Finish and serve
Remove from heat, optionally brush with a little melted butter, and sprinkle parsley or cheese while hot. Serve immediately with pasta, soup, or salad for best texture.
Tip: If you added cheese, let it melt fully before serving.
Got Questions?
What is the best bread for air fryer garlic bread?
Crusty bread like baguette or ciabatta provides the best texture and browning in the air fryer. Thick-sliced rustic bread can work, but thinner slices toast more evenly. Aim for uniform thickness to avoid uneven results.
Crusty baguette or ciabatta gives the best crust and browning; use uniform slices for even results.
Can I add cheese on garlic bread in the air fryer?
Yes. Sprinkle grated parmesan or shredded mozzarella on top during the last minute of toasting for a melty, bubbly finish. Don’t overload the slices or they may slide off the bread.
Cheese can be added for a melty topping in the last minute.
Can I freeze leftovers?
Leftovers can be stored in the fridge for a day or two and reheated in the air fryer for a crisp finish. Freezing is best if you plan to toast again soon; reheat until warmed through without burning.
Leftovers can be reheated in the air fryer to regain crispness.
Is there a dairy-free option?
Yes. Use dairy-free butter or olive oil-based garlic butter. You can still achieve great flavor with garlic, parsley, and a touch of salt.
Yes—use dairy-free butter or olive oil-based butter for dairy-free garlic bread.
What temperature is best to avoid soggy bread?
Keep to a moderate 350°F (175°C) and avoid excess butter. If soggy edges occur, reduce time slightly and ensure slices aren’t overcrowded.
Stick to 350°F and avoid overcrowding to prevent soggy spots.
Can I use garlic powder instead of fresh garlic?
Garlic powder can substitute; mix with butter, but expect a milder, less aromatic flavor. Fresh garlic delivers a stronger punch and aroma.
Garlic powder works, but fresh garlic gives a stronger flavor.
Watch Video
Quick Summary
- Choose crusty bread for best texture
- Control garlic butter ratio to avoid sogginess
- Preheat for even browning
- Monitor in final minutes to prevent burning
- Toast in batches for consistent results