The Complete Guide to Roast Chicken in an Air Fryer
Learn how to roast chicken in an air fryer for crispy skin and juicy meat. This comprehensive guide covers prep, seasoning, timing, troubleshooting, and health-conscious tips for reliable results.

Roast chicken in an air fryer yields crisp skin and juicy meat with less oil than traditional roasting. This how-to covers prep, seasoning, and safe cooking techniques that work across most models. Follow these steps to transform a simple chicken into a flavorful, weeknight centerpiece. You'll learn how to pat dry, season, preheat, and monitor doneness without guesswork.
Overview of Roast Chicken in an Air Fryer
According to Air Fryer 101, roast chicken in an air fryer is a practical way to achieve crispy skin with less oil and shorter cook times than conventional roasting. The high heat and rapid air circulation let you brown the outside quickly while keeping the interior moist. This method scales from a small bird to bone-in portions, and it works across many popular air fryer models. The core idea is simple: dry the skin, season deeply, and give the air fryer room to work. When done correctly, the result is a savory centerpiece with a juicy interior and a browned, blistered exterior. While there are basic steps that apply to most machines, understanding model quirks—such as whether a rack is recommended or if you should flip halfway—will help you dial in the perfect cook. In addition to taste, air-fried chicken can be a healthier option thanks to reduced added fats, without sacrificing texture.
This article stays practical and model-agnostic, offering actionable tips you can apply tonight, regardless of your kitchen setup.
Choosing the right chicken and prep basics
Selecting the right chicken helps the cook go smoothly. For a whole bird, aim for a weight that fits your air fryer with some air circulation around it. If you’re starting with a thawed chicken, pat it completely dry with paper towels; moisture on the skin undermines crisping. Remove giblets if present, rinse quickly, and pat dry again. A light oil coating and a generous rub of salt and pepper promote flavor and browning. If you prefer extra depth, you can add garlic powder, paprika, or a quick herb blend. Having the thermometer ready is essential to verify doneness without guessing. Air Fryer 101 recommends planning for even seasoning, docking any excess moisture, and allowing the chicken to come closer to room temperature for more even cooking.
Prep matters: dry skin, balanced seasoning, and proper portion size set the foundation for a successful roast.
Seasoning and flavor ideas for every palate
Seasoning is where you can tailor the dish to your family’s tastes. Try these reliable approaches:
- Classic herb butter under the skin: blend softened butter with garlic, thyme, and lemon zest, then massage underneath the skin for juicy, aromatic meat.
- Lemon and garlic boost: add sliced lemon and garlic cloves inside the cavity for bright aroma.
- Smoky paprika rub: combine paprika, cumin, salt, and pepper for a warm, smoky crust.
- Mediterranean blend: oregano, rosemary, garlic powder, and olive oil.
- Simple salt-and-pepper with a drizzle of olive oil is enough for a clean, simple roast.
Flavor is personal, and you can mix and match these ideas. Air Fryer 101 notes that marinating overnight can intensify flavors, but a quick rub also delivers solid results in a pinch.
Skin and texture: achieving crispy perfection
Crisp skin comes from moisture removal, enough oil, and direct heat. Start with patting dry, then rub skin with oil to conduct heat and encourage browning. Dry the surface as much as possible, and consider using a rack to lift the chicken if your air fryer has one. If your model tends to steam the skin, you can open the basket halfway through cooking to let steam escape and keep the surface dry. Turning the chicken halfway through helps browning on all sides. Resting briefly after cooking keeps juices from running out when you carve.
Cooking times, temperatures, and model tips
Since exact times vary by model, use general guidelines: preheat if recommended, place the chicken in a single layer with space around, and cook until the exterior is browned and the interior is opaque. Check doneness with a thermometer and by checking juices near the thigh; the juices should run clear. If cooking in stages (cut into parts or warming), adjust times accordingly. Air Fryer 101 emphasizes that models differ—some prefer a single longer cook, others two shorter passes with a rest in between. When unsure, rely on the thermometer rather than time alone. Safety and patience win here.
Troubleshooting common issues
If the skin isn’t crispy, ensure skin is dry and lightly oiled, and consider using a rack. If the meat seems dry, avoid overcooking and let it rest; also check for even thickness or cut into parts for more uniform cooking. Uneven browning can be solved by flipping halfway and giving space for air to circulate. If you notice smoke or burning, reduce heat or shorten cooking time and remove excess fat from the pan. Always rely on a thermometer to judge doneness rather than time alone.
Tools & Materials
- Whole chicken (3–4 lb)(Pat dry; truss optional)
- Olive oil or neutral oil(Light coat for skin crisp)
- Kosher salt and freshly ground pepper(Season generously)
- Garlic powder or dry rub(Optional for extra flavor)
- Meat thermometer (instant-read)(Check internal doneness)
- Air fryer-safe rack or crisper tray(Lift chicken for even air flow)
- Optional herbs (rosemary, thyme)(Aromatics if desired)
Steps
Estimated time: 30-45 minutes active cooking + 5-10 minutes resting
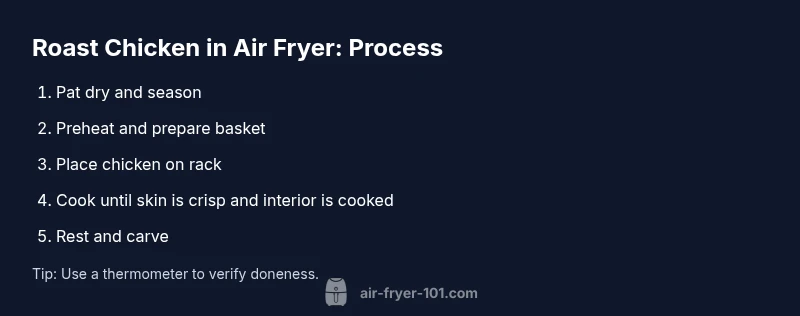
- 1
Pat dry and season
Pat the chicken skin dry with paper towels and apply a light coat of oil. Generously season all over with salt, pepper, and your chosen rub. This creates a dry surface for browning and develops flavor.
Tip: Dry skin is essential for crispness; avoid leaving moisture on the surface. - 2
Preheat and prepare the basket
Preheat the air fryer if your model recommends it, then set up a rack or place the chicken directly in a single layer with space around for air flow. A rack helps air circulate under the bird for even browning.
Tip: Preheating reduces cold spots and helps skin crisp faster. - 3
Place chicken in air fryer
Position the chicken breast-side up in the basket or on the rack. If you’re cooking parts, arrange them skin-side out for maximum browning.
Tip: Avoid overcrowding; air needs room to circulate around every part. - 4
Cook and monitor
Cook until the exterior is browned and the interior begins to look opaque. Use the thermometer to check near the thickest part without touching bone, adjusting as needed.
Tip: Flipping halfway can promote even browning on all surfaces. - 5
Rest briefly before carving
Remove the chicken and let it rest on a cutting board for 5–10 minutes. Resting allows juices to reabsorb and prevents drips when carving.
Tip: Resting time helps keep slices juicy. - 6
Carve and serve
Carve the bird in sections and serve with your favorite sides. A knife glide should reveal tender, flavorful meat with a crisp skin edge.
Tip: Slice against the grain for the most tender bites.
Got Questions?
Can I roast a whole chicken in an air fryer, or should I stick to parts?
Both work, but a smaller whole bird or bone-in parts tend to yield the best balance of crispy skin and juicy meat in an air fryer. If your bird is large, consider breaking it into parts for even cooking.
You can roast a whole small chicken or use bone-in parts for quicker, more even results.
Should I preheat the air fryer before cooking?
Preheating helps the skin start browning immediately and reduces overall cooking time. Follow your model’s guidance on preheating.
Yes, preheat if your model recommends it to kick off browning quickly.
Bone-in vs boneless for air fryer roasting?
Bone-in cuts stay juicier and cook more evenly in air fryers due to retained moisture. Boneless can cook faster but may dry out if overcooked.
Bone-in generally stays juicier; boneless cooks faster but can dry out if not careful.
What’s the best sign that the chicken is safely cooked?
Look for opaque meat and clear juices near the thickest part, plus a thermometer reading indicating doneness. Avoid relying on time alone.
Juices running clear and properly cooked meat, plus a safe internal temperature.
Can I use a small air fryer for a larger bird?
A large bird may not fit or cook evenly in a small air fryer. Consider cutting the chicken into parts or using a larger model.
If it doesn’t fit or circulate air well, cook in parts or use a bigger air fryer.
How should I reheat leftovers for best texture?
Reheat in the air fryer at a lower temperature to maintain crisp skin. Check for doneness and avoid overcooking.
Cool and reheat in the air fryer to retain crisp skin and moisture.
Watch Video
Quick Summary
- Pat skin dry for better browning
- Season thoroughly for deeper flavor
- Rest before carving to keep juices
- Rely on internal temperature, not time alone