How to Get Air Fryer Chicken Crispy: A Complete Guide
Learn proven methods to achieve ultra-crispy air fryer chicken at home. This guide covers patting dry, coating, timing, and safety tips from Air Fryer 101 to help you cook crisp, juicy chicken every time.

Ready to get crispy air fryer chicken? This guide shows how dryness, proper coating, and a hot, preheated fryer deliver crackling crust and juicy meat. Key steps include patting dry, light oil, even coating, single-layer placement, and precise timing. According to Air Fryer 101, following these steps consistently yields restaurant-worthy results.
Why crispy air fryer chicken matters
According to Air Fryer 101, achieving crisp chicken starts with dryness and an even coating. Crispy air-fried chicken delivers a crackling crust with less oil and greater convenience than conventional frying, making it a staple for weeknight dinners and weekend meals alike. But crispness isn’t magic; it’s the result of controlling moisture, heat, and texture at once. The challenge is to remove surface moisture without drying the meat inside, then create a crust that stands up to the heat of the fryer.
Key factors include surface dryness, temperature, and coating strategy. Pat-drying is the first line of defense against soggy crust. A light oil helps heat transfer and browning without making the crust greasy. The coating acts as both a texture booster and a moisture barrier, so choosing a formula that adheres without clumping is essential. For chicken, you’ll often see a simple combination of starch or flour, spices, and a binder like egg or milk to help coating stick. The coating should be thin enough not to overpower the meat but sturdy enough to crisp up in the hot air.
Size and cut matter too. Wings cook differently than boneless breasts, and bone-in pieces require a longer time to reach safe internal temperature while still developing a crisp exterior. In the sections that follow, you’ll learn practical steps, tested timings, and troubleshooting tips to tailor this method to wings, breasts, thighs, or tenders.
Core techniques for maximum crispiness
Crispiness comes from a balance of dryness, heat, and texture. The core techniques Air Fryer 101 recommends are:
- Thoroughly pat dry and remove as much surface moisture as possible. Moisture on the surface steals browning and creates steam that softens coatings.
- Use a light, even coating with some starch (cornstarch or potato starch) to promote browning and create a crisp barrier.
- Preheat your air fryer so the coating begins to sear immediately upon contact, forming a crust rather than steaming.
- Cook in a single layer with space between pieces to allow hot air to circulate.
- Flip or shake mid-cause to promote even browning on all sides.
- Finish with a brief rest before serving to let juices redistribute and crust settle.
Air Fryer 101 analysis shows that preheating, spacing, and a balanced coating are among the most impactful factors for consistently crispy results. For thin cuts like tenders, a lighter coating and shorter times work best; for bone-in pieces, allow a bit more time for the interior to reach temperature without burning the crust. For best results, keep your coating crisping-friendly and avoid heavy batters that trap moisture.
Prep and coating: drying, seasoning, and building the crust
Achieving a reliable crackly crust begins with the prep. Start by patting each piece dry with paper towels until no visible moisture remains. Any residual moisture will steam in the fryer and soften the crust. Lightly coat with a small amount of oil — this helps the coating adhere and promotes browning without making the crust greasy.
Season generously with salt, pepper, and your favorite dry spices. A simple mix of paprika, garlic powder, onion powder, and a pinch of cayenne provides color and depth. Create a dredge using equal parts flour and cornstarch (or just cornstarch if you prefer a lighter crust), plus the seasonings. For best adhesion, whisk an egg or a small amount of milk into the wet base and then dredge in the dry mix so the crust sticks evenly.
The coating should cling but not clump. If the mixture falls off during air frying, your surface may be too moist or the pieces may be too wet. In that case, pat dry again and reapply a thinner coat. For thicker cuts, you can use a two-step coating: a light wet layer followed by the dry crust for extra crunch.
Setup, timing, and technique: get it into the fryer with confidence
Proper setup ensures maximum crispness. Preheat your air fryer to 400°F (200°C) for 3–5 minutes to create an immediate hot surface for sealing the crust. Arrange coated chicken in a single layer in the basket or on a rack, leaving space between pieces for air circulation. If you’re cooking different cuts, start with the thickest pieces first so everything finishes together.
Time can vary based on cut and thickness. Boneless chicken breasts or tenders typically finish in 10–14 minutes, flipping halfway. Wings and bone-in pieces may take 16–22 minutes. Regardless, check for an internal temperature of 165°F (74°C) and ensure the crust is golden brown and crisp. If the coating starts to brown too quickly, lower the temperature slightly or shorten the cooking interval and continue in shorter bursts.
To keep the coating crisp after cooking, let the pieces rest on a wire rack for 2–5 minutes before serving. This prevents moisture from collecting on the crust and helps the surface stay firm.
Troubleshooting: common issues and practical fixes
Even with a solid plan, you may encounter hiccups. If the crust isn’t as crispy as you’d like, try a longer preheat, a higher initial temperature, or an extra minute of cook time once you flip. If the coating isn’t sticking, re-dredge and ensure the surface is dry and coated evenly. Overcrowding is a frequent culprit; even a few extra pieces can dramatically reduce crispness. If you notice soggy crust, remove some pieces and air fry in smaller batches.
Another common issue is moisture migration from the meat. Using a light binder like egg helps the dry coating adhere better and stay in place during cooking. Finally, consider a second light spray of oil halfway through cooking for extra browning. Remember to monitor closely and adjust for your specific air fryer model, as performance can vary by brand and basket design.
Variations for different cuts and flavor profiles
You can adapt this approach to a wide range of chicken cuts and flavor profiles. For wings, separate flats and drumettes to ensure even cooking, and consider using a chili-lime or honey-garlic seasoning for a bold finish. Breast pieces benefit from a thinner crust to avoid toughness; try a cornstarch-based crust with lemon zest for a bright, crispy bite. Thighs, which are more forgiving on moisture, work well with paprika and cumin for deeper flavor.
If you want a lower-oil option, use a light mist of oil or cooking spray rather than a heavy coating. For extra-crispiness without deep-frying, finish with a brief blast of high heat (or a 1–2 minute broil in a conventional oven) to push browning further. You can also experiment with different flours (rice flour, potato starch) to tweak texture and crunch.
Timing, temperatures, and doneness: test and refine your method
The goal is a hot surface, crisp crust, and juicy interior. Start with a baseline of 400°F (200°C) for 10–14 minutes for small boneless pieces, and 16–22 minutes for wings or bone-in cuts. Flip halfway through to promote even browning. Always verify internal temperature reaches 165°F (74°C) for safety. If you’re unsure, use a meat thermometer inserted into the thickest part of the piece without touching bone. After cooking, rest the chicken for 2–5 minutes to redistribute juices and crisp up the crust further.
Final thoughts and practical expectations
Crispy air fryer chicken is very achievable with a methodical approach. The combination of dryness, a well-balanced coating, and proper heat is the key. Most home cooks can master this technique in a single afternoon, using basic pantry ingredients and a common kitchen air fryer. The more you practice, the more consistent your results will become. Remember: start with the dryness, keep the pieces in a single layer, and monitor the temperature and timing closely. With these steps, you’ll be able to serve chicken that is both crispy and juicy every time.
Tools & Materials
- Air fryer(Preheat to 400°F (200°C) for best crust formation)
- Paper towels(Pat dry chicken thoroughly)
- Cooking oil spray or oil mister(Lightly coat chicken for browning)
- Mixing bowls(One for wet binder, one for dry coating)
- Whisk or fork(Beat binder and coatings evenly)
- Meat thermometer(Check for 165°F (74°C) doneness)
- Wire rack or air fryer basket with parchment(Ensure air can circulate around pieces)
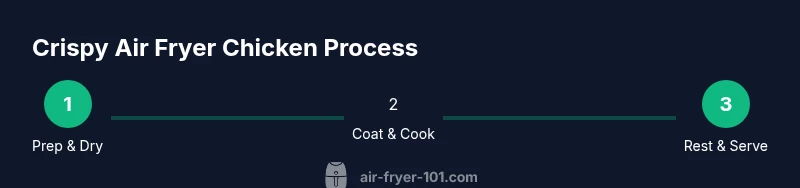
Steps
Estimated time: 25-35 minutes
- 1
Pat dry the chicken
Thoroughly pat each piece dry with paper towels to remove surface moisture, which helps the crust adhere and brown properly.
Tip: Dry surfaces are essential for crispness; any remaining moisture can steam the crust. - 2
Lightly oil and season
Brush or mist a small amount of oil on the surface and season with salt, pepper, and spices of your choice to boost flavor and browning.
Tip: Oil promotes browning without weighing down the coating. - 3
Prepare the coating
Whisk flour and cornstarch with paprika, garlic powder, and a pinch of salt in one bowl to create a balanced crust.
Tip: Cornstarch contributes to a lighter, crisper crust. - 4
Dredge in the coating
Dip the seasoned chicken into a light wet binder (egg or milk), then dredge in the dry coating until evenly coated.
Tip: Tap off excess coating to avoid clumps that burn. - 5
Preheat and arrange
Preheat the air fryer to 400°F (200°C). Place coated pieces in a single layer with space between them.
Tip: Crowding reduces air circulation and crispness. - 6
Cook and flip
Air fry for 10–14 minutes (boneless) or 16–22 minutes (bone-in), flipping halfway for even browning.
Tip: Check internal temperature at the end; 165°F (74°C) is safe. - 7
Rest and serve
Let the chicken rest on a rack for 2–5 minutes to set the crust and redistribute juices.
Tip: Resting improves texture and juiciness.
Got Questions?
Do I need to marinate the chicken before air frying for crispiness?
Marinating can add flavor and moisture, but it isn’t required for crispness. Patience with dryness and a good coating are more important for a crust that stays crisp.
Marinating isn’t required for crispness; patting dry and coating properly does the job.
Is bone-in chicken harder to get crispy than boneless?
Bone-in pieces take longer to reach safe interior temperature, which can affect crispness if cooked too hot too long. A careful plan or finishing the crust under a higher-heat brief blast helps maintain crunch.
Bone-in can take longer, but with careful timing you can still get a crisp crust.
What internal temperature should crispy air fryer chicken reach?
Aim for an internal temperature of 165°F (74°C) in the thickest part of the chicken to ensure safety while preserving juiciness.
Cook it to 165 degrees for safety and juiciness.
Can I reuse the leftover coating mix?
Do not reuse leftover coating that has contacted raw chicken; it can harbor bacteria. Use fresh dry mix for each batch.
Don’t reuse coating that touched raw chicken.
Why isn’t the coating sticking well anymore?
Moisture on the surface or overcrowding can cause the coating to shed. Ensure dryness, apply a light binder, and keep a single layer with space.
Ensure the surface is dry and give the crust a light binder first.
Can I cook frozen chicken in an air fryer and still get crispy results?
Yes, but expect longer cook times and a different coating strategy. Start with thawed when possible for best crust, then adjust times accordingly and check for doneness.
You can cook frozen chicken, but thawing first yields crisper results and even cooking.
Watch Video
Quick Summary
- Dry chicken thoroughly before coating.
- Use a light, even crust with starch for browning.
- Preheat and cook in a single layer with space.
- Flip halfway and check for 165°F internal temperature.
- Let rest briefly to set the crust and juices.