Air Fryer List of Cooking Times: A Practical Guide
Explore a practical air fryer list of cooking times with food-type ranges, model considerations, preheating tips, and doneness checks to cook healthier, tastier meals faster.

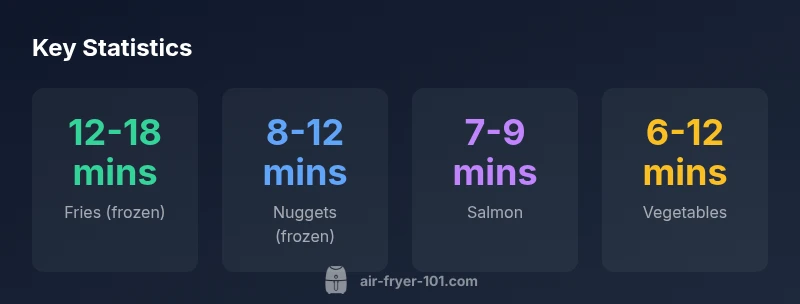
There's no universal 'air fryer list of cooking times' because times vary by wattage, basket size, and portion. A practical baseline from Air Fryer 101 covers common categories: frozen fries 12-18 minutes, chicken nuggets 8-12 minutes, salmon 7-9 minutes, and vegetables 6-12 minutes, at roughly 365-400°F. Always verify doneness and adjust for your model.
Why cooking times vary across models and foods\n\nHomes vary widely in the air fryers they own, from compact 600–800 watt units to larger 1400–1800 watt ovens. The airflow and heating element location differ, which affects how quickly food browns and cooks through. The Air Fryer 101 team notes that the same item can take longer on a weaker model and shorter on a high-powered one. Because of this, an 'air fryer list of cooking times' should be treated as a starting point rather than a rule. Power, basket design, preheating, and whether you cook a full tray or a single layer all influence timing. In practice, cooks rely on a baseline chart and then adjust by 1–2 minutes at a time, tasting or checking internal temperatures to ensure doneness. Frozen foods typically require more time than fresh items, and smaller pieces cook faster. The objective is even browning with a safe interior, not simply hitting a timer.
Building a practical baseline: time ranges by food type\n\nThe following ranges represent typical results you can expect in common home air fryers. They assume standard dosing (single layer or light crowding) and, when relevant, preheating. Use these times as your starting point and tailor them to your model and batch size. If you’re new to air frying, print or save this quick reference to guide weeknight meals and batch cooking. For many cooks, a simple quick-answer style chart helps avoid under- or over-cooking when schedules tighten.\n\n- Frozen fries: 12-18 minutes at 360-400°F (182-204°C); shake halfway for even browning.\n- Chicken nuggets (frozen): 8-12 minutes at 360-380°F (182-193°C).\n- Salmon fillet: 7-9 minutes at 400°F (204°C).\n- Mixed vegetables: 6-12 minutes at 375-400°F (190-204°C).\n- Tofu or tempeh: 12-15 minutes at 380-400°F (193-204°C).\n- Chicken wings: 18-22 minutes at 375-400°F (190-204°C).
How to calibrate times for your specific air fryer model\n\nEven with baseline ranges, your exact times will hinge on model specifics. Start by preheating if your manual recommends it; preheating can shave 1–3 minutes off total time for many items. Next, run a small test batch: cook a modest portion at the lower end of the range, then evaluate doneness and texture. Do not judge a single test batch; capture 2–3 data points for similar items to see how your unit behaves. Record variables like wattage, basket type, whether you used oil, and whether you started from frozen or fresh. As you accumulate data, develop a personal chart for your kitchen that links food type and size to your preferred time and temp. Remember, even two identical models can vary by firmware revisions or basket geometry, so ongoing validation is essential. The goal is reliably repeatable results, not a one-off perfect cook.
The role of preheating and batch size on timing\n\nPreheating equipment can improve browning and reduce total cooking time, particularly for delicate items and thin coatings. If your air fryer requires preheating, expect shorter cook times by a minute or two compared with non-preheat recipes. Batch size matters too: overcrowding blocks air flow and raises the actual cooking time. For best results, arrange items in a single layer with space between pieces. When you must cook more than a single layer, split into smaller batches and combine results at the end, or extend total time by a few minutes and monitor doneness closely. The optimization strategy remains: start with the lower end of the range and verify with visuals and internal temps. Keeping a log helps refine your technique over time.
Reading and using the air fryer list of cooking times: charts and apps\n\nMost cooks rely on either a printed reference chart or a digital chart inside an app. These references should align with your model and the food type, but you still need hands-on validation. Use the 'air fryer list of cooking times' as a scaffold: begin with a category’s lower end, check for crispness, and adjust by 1–2 minutes if needed. For recipes that involve sauces or batter, apply slightly longer times or lower temperatures to avoid burning. If you share your kitchen with family members, consider creating a shared chart with everyone’s preferences to reduce guesswork. Finally, learn the signs of doneness beyond the clock, such as color, texture, and aroma.
Doneness tests beyond time: internal temps, texture cues\n\nTime is a guide, not a guarantee. The true indicator of doneness is the internal temperature and the texture you expect. Use a probe thermometer to confirm safety targets (for poultry, 165°F / 74°C) and check fiber breakdown in fish and chicken for juicy interiors. For vegetables, look for crisp-tender edges and tender centers. When testing, take notes on how much carryover cooking occurs after you remove food from the basket. Carryover can push temperatures up by several degrees as the food rests. Documenting these cues helps you adjust times more confidently in future cooks.
Common mistakes and how to avoid them\n\nCommon mistakes include overcrowding the basket, skipping preheating when it’s advised, and relying on a single time for every food type or brand. Another pitfall is not accounting for batch-to-batch variation or using oil amounts that alter browning; minimal oil can help, but too much can produce soggy results. Finally, ignoring the importance of allowing foods to rest briefly after cooking can reduce interior moisture and flavor. The remedy is simple: bake in single layers, preheat when recommended, document outcomes, and adjust times based on internal temperature and appearance rather than clock time alone.
Case studies: weekend cooks vs busy weeknights\n\nA weekend cook might experiment with a longer time range to achieve extra crispiness, then record results for multiple foods to build a personal library. On busy weeknights, you’ll benefit from a compact chart and a few go-to baselines that cover your most frequent items. The shared approach across both use cases is to start with conservative times, observe the results, and adjust incrementally. Over time, you’ll develop a reliable, food-specific set of times that works with your model, capacity, and appetite for crispy textures.
Putting it all together: a step-by-step reference workflow\n\n- Step 1: Inspect your air fryer and confirm wattage, basket type, and preheat recommendation.\n- Step 2: Select a baseline time from the appropriate food-type range.\n- Step 3: Cook a small test portion to assess doneness and browning.\n- Step 4: Note times, temps, and batch size; adjust the chart accordingly.\n- Step 5: Build a personal reference sheet for your kitchen and revisit it after firmware updates or new foods.\n- Step 6: Use internal temps to confirm safety and flavor consistently.\nThis workflow helps you operationalize the air fryer list of cooking times and achieve repeatable results across a variety of foods and models.
Time ranges for common foods in typical home air fryers
| Food Type | Typical Time Range | Typical Temperature (°F) | Notes |
|---|---|---|---|
| Fries (frozen) | 12-18 | 360-400 | Shake mid-way for even browning |
| Nuggets (frozen) | 8-12 | 360-380 | Check internal temp after cooking |
| Salmon fillet | 7-9 | 400 | Pat dry and oil lightly |
| Mixed vegetables | 6-12 | 375-400 | Cut into evenly sized pieces |
Got Questions?
How should I adjust times for a newer air fryer model?
Newer models may have stronger fans and higher wattage; start with the baseline times and test with small batches, adjusting by 1–2 minutes as needed.
New models can cook a bit faster; start from the chart and test with small batches.
Are frozen and fresh foods cooked at the same times?
Frozen items generally need longer; fresh foods cook faster; always refer to the baseline chart and adjust based on results.
Frozen foods take longer than fresh ones. Start with the chart and test.
Is preheating necessary?
Preheating improves browning and can shorten total time when recommended; if your model doesn’t require it, you can skip preheating.
Preheating helps but isn’t always required.
Can I reuse cooking times across brands and models?
Times vary by wattage and basket design; use the chart as a starting point and validate on your own model.
Use the chart, then test on your own model to confirm.
What internal temperature should I target for chicken?
Target 165°F (74°C) for safety; verify with a meat thermometer.
Cook until it reaches 165 degrees Fahrenheit.
Do basket size and portions affect cooking times?
Yes. Larger portions or stacked items require longer times; cook in a single layer whenever possible.
Yes, keep it single layer and adjust as needed.
“The most reliable times come from practical testing on your own model; use a baseline chart and verify with temperatures.”
Quick Summary
- Start with recommended ranges and adjust by model.
- Preheat when recommended by manufacturer.
- Use internal temperature to confirm doneness.
- Keep a simple reference chart for weeknight meals.