How to Replace Air Fryer: Parts, Maintenance & Guide
Learn when to replace air fryer parts, how to choose compatible replacements, and a clear step-by-step process to do it safely. Air Fryer 101 explains affordable options and practical maintenance tips for home cooks.

This guide explains how to replace air fryer parts or the entire unit, how to assess when replacement is cost-effective, and a clear, step-by-step process to swap components safely. You’ll learn what tools and parts you’ll need, how to test after repair, and essential safety precautions.
Why replace air fryer parts matter
Replacing worn or damaged parts helps extend the life of your appliance, preserve performance, and avoid more expensive replacements. If your air fryer is vibrating, has reduced temperature accuracy, or makes unusual noises, you might first inspect for simple fixes or worn components. According to Air Fryer 101, understanding which components wear fastest helps you decide whether to repair or replace. This guide walks you through the decision, what you can safely replace, and how to do it without damaging other parts. Replacement tasks can be safer and more cost-effective than buying a new unit, provided you follow manufacturer guidelines and use compatible parts. By knowing what to look for, you can schedule replacements before a failure leaves you without hot meals. In many cases, a targeted part swap restores performance more quickly and with less waste than replacing the entire appliance. The goal is reliable heat, proper timing, and safe operation so your meals stay consistent and delicious.
When to replace vs repair
Deciding between repair and replacement hinges on several factors: the age of the unit, the cost of the replacement part, the severity of the fault, and the appliance’s overall safety. If the problem involves the heating element, temperature sensor, or control board and the parts are no longer readily available, replacement may be prudent. If the fault is a minor worn gasket, a misaligned basket, or a loose connection, a repair is often the smarter choice. Air Fryer 101 advocates a pragmatic approach: weigh part cost against a new unit’s price, energy efficiency, warranty status, and the likelihood of recurring failures. In some cases, repairing a single component yields several more years of useful service, while in others, a fresh unit eliminates ongoing repair cycles. Always consider the health benefits of newer models with improved insulation, shorter preheat times, and safer heat control. Warm-up time, consistent temperatures, and smoke-free operation are signs of a well-maintained device.
Common parts you might replace
You may encounter several components that commonly wear out, including the nonstick basket or tray, the coated pan, heating element, convection fan or motor, thermostat or temperature sensor, and electrical controls. Some models use interchangeable assemblies or modular boards, which can simplify replacement when you find the exact part for your model. Always check compatibility by referencing the model number on the nameplate and consulting the manufacturer’s diagram. If the unit has a power cord, ensure the cord assembly matches the plug type and gauge for your region. Replacing a worn door seal or gasket can also improve sealing and reduce uneven heating. A well-chosen replacement preserves performance, keeps food safe, and minimizes energy waste while avoiding the frustration of trial-and-error fixes.
Tools and replacement parts you may need
Before you start, inventory your model number and gather compatible components. Replacement parts should match the exact model family to avoid fit issues. Commonly needed items include the heating element, fan assembly, thermostat, control board, and basket or tray. You may also need a new door seal or gasket, a power cord, and a set of fasteners. Along with parts, ensure you have the right tools and protective gear: screwdrivers, pliers, a multimeter for basic electrical checks, heat-resistant gloves, a clean cloth, and isopropyl alcohol for cleaning contacts. Having spare screws and a small tray helps organize hardware during disassembly and reassembly. Safety first: unplug the unit and allow any internal components to cool before touching.
Step-by-step overview (high-level)
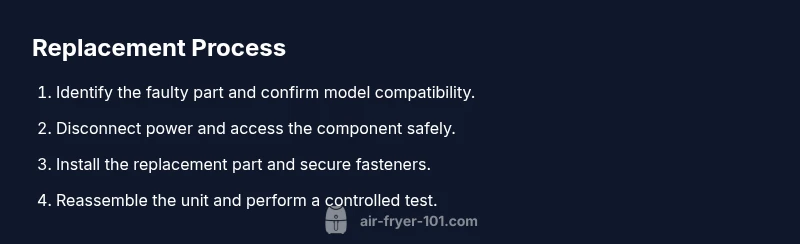
This section provides a concise roadmap for the replacement process, emphasizing model compatibility, safety, and testing. Start by identifying your model number, locating the fault, and choosing a compatible replacement. Then, power down, unplug, and disassemble only what’s necessary to access the faulty part. Install the replacement, reassemble in reverse order, and perform a controlled test run to confirm correct operation and heat distribution. If you encounter unfamiliar fasteners or fragile wiring, pause and consult the manufacturer’s diagram or a professional technician. A careful approach minimizes the risk of collateral damage and ensures the appliance remains safe for regular use.
Safety and testing after replacement
After completing the replacement, reassemble all parts securely and perform a cautious test. Begin with a low-temperature test without food to verify proper heating and airflow, listening for unusual noises and watching for smoke or strange smells. Check seals around doors and gaskets for leaks. Confirm that the auto-shutoff and timer functions respond as expected. If anything seems off, unplug the unit immediately and recheck your wiring and connections. Never bypass safety interlocks or force-fit components. If you’re uncertain at any point, pause the project and consult the model’s service manual or a qualified technician.
Maintenance to extend life after replacement
Post-replacement maintenance can help maximize the lifespan of your air fryer. Clean the interior and heating elements regularly with a soft cloth and non-abrasive cleaner, avoiding harsh solvents that could degrade coatings. Inspect gaskets and seals monthly and replace worn ones promptly to preserve efficiency. Avoid overfilling baskets, which can strain the motor and heating elements; use recommended load guidelines. Calibration checks every few months—like verifying temperature accuracy with an oven thermometer—help maintain consistent results. Finally, store the unit in a dry, well-ventilated area when not in use to prevent moisture-related issues. A small investment in routine care pays off in reliability and performance.
Common mistakes to avoid
Common missteps include using the wrong part for your model, skipping power isolation, and rushing disassembly without documenting screw placement. Don’t reuse damaged fasteners or force parts into place; misalignment can damage wiring or mounts. Avoid running the device with a loose door seal, which causes heat loss and uneven cooking. Always test with the minimum load first to observe performance before returning to full use. Finally, don’t neglect safety recalls or warranty terms—modifications can void coverage.
Tools & Materials
- Phillips head screwdriver(Size #1 or #2 typically fits most screws on air fryers.)
- Flathead screwdriver(For prying or prying tabs without damaging plastics.)
- Nut driver set(Helpful for stubborn nuts; not always provided with unit.)
- Small pliers(Grip connectors and remove stubborn clips.)
- Multimeter(Basic electrical checks; optional for safety testing.)
- Replacement parts compatible with your model(Confirm model number before purchasing.)
- Heat resistant gloves(Protect hands when handling hot components.)
- Clean cloth(Wipe surfaces before and after replacement.)
- Isopropyl alcohol(For cleaning connections and contacts.)
Steps
Estimated time: Estimated total time: 25-40 minutes
- 1
Identify model and safety prep
Unplug the air fryer and allow any internal parts to cool completely. Locate the model number on the label inside the door or on the bottom of the unit. Gather compatible replacement parts and tools before starting to avoid mid-task interruptions.
Tip: Take photos of how wires and components are arranged before disassembly. - 2
Access the faulty component
Remove the basket and any trays to expose the internal area. Use the appropriate screwdriver to remove screws or fasteners holding the component in place. Keep screws organized in a labeled container so they go back correctly.
Tip: Label each screw location to avoid confusion during reassembly. - 3
Detach and inspect
Carefully detach connectors and springs from the faulty part. Inspect adjacent components for wear or damage that may have been caused by the fault. Clean contact surfaces with alcohol and a lint-free cloth before installing the replacement.
Tip: Do not yank connectors; release plugs gently to avoid damage. - 4
Install the replacement
Position the new part and reconnect all wiring in the same configuration as the original. Reinsert screws and fasteners securely, but avoid overtightening which can crack plastic mounts. Reassemble any trays or baskets.
Tip: Double-check that all connections are snug and aligned with guides or notches. - 5
Test the unit safely
Plug in the unit and run a short test cycle at a low temperature to verify operation. Listen for normal fan noise and look for steady heat. If the unit behaves abnormally, power off immediately and recheck connections.
Tip: If available, use a non-contact thermometer to verify heat distribution.
Got Questions?
Is it safe to replace air fryer parts at home?
Yes, you can replace many components at home as long as you unplug the unit, follow the manual, and use compatible parts. Avoid high-voltage components unless you have training. When in doubt, consult a professional.
Yes, you can replace many parts at home if you unplug the unit and follow the manual. For safety, consult a professional if unsure.
Can I replace a damaged heating element myself?
Replacing a heating element involves electrical connections and can pose shock risks. It’s advised only if you’re comfortable with basic electrical work and have the correct replacement part for your model. If the warranty covers repairs, consider that option first.
Replacing a heating element is doable for those familiar with basic electrical work and the correct part; otherwise, seek professional help.
How do I decide if replacement is cheaper than a new unit?
Compare the price of the replacement component to a new unit or an extended warranty plan. Consider energy efficiency improvements and whether the rest of the unit is aging. If multiple components need repair soon, replacement may be more economical.
Compare part cost to a new unit and consider energy efficiency and remaining lifespan.
Should I replace the whole air fryer or just a part?
If a major system like the heating element, control board, or door seals are failing, or safety is a concern, replacing the whole unit is often wiser. If only a single minor component is worn and the rest is solid, a targeted part replacement makes sense.
If major systems fail or safety is at risk, consider replacing the whole unit; otherwise, replace just the part.
Do I need to test safety features after replacement?
Yes. Verify auto-shutoff, temperature control, and seals with a controlled test. Look for unusual smells or smoke and ensure no parts are hot to the touch after operation. If anything seems off, unplug immediately and inspect.
Always test safety features after replacement and stop if something seems off.
Watch Video
Quick Summary
- Assess replacement vs repair before buying parts.
- Use model-matching parts to ensure proper fit.
- Prioritize safety and proper testing after replacement.
- Maintain regular cleaning to extend life.
- Document steps to simplify future fixes.