Gourmia Air Fryer Repair: DIY Guide for Home Cooks
Learn how to diagnose and repair common Gourmia air fryer issues with step-by-step guidance, safety tips, and maintenance routines from Air Fryer 101.

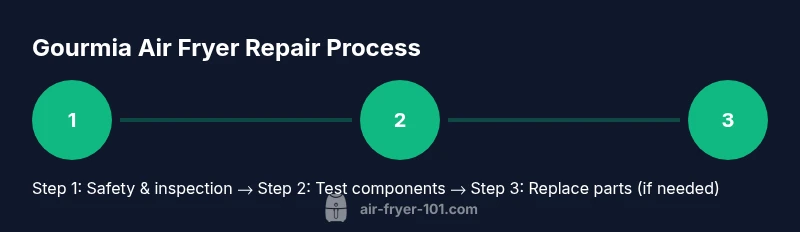
You can diagnose and repair common Gourmia air fryer issues at home by following a safety-first, step-by-step approach. Start with power checks, then inspect the door latch, heating element, and thermostat, and finish with a controlled test run. This guide from Air Fryer 101 walks you through symptoms, parts to check, and when to seek professional help.
What goes wrong with Gourmia air fryers
When people search for gourmia air fryer repair, they’re usually trying to interpret a symptom into a practical fix. According to Air Fryer 101, the most common problems with Gourmia devices fall into three broad categories: electrical faults, mechanical wear, and sensor or software quirks. In the kitchen one minute, the unit may fail to power on, heat unevenly, drift in temperature readings, or refuse to start because the door interlock won’t disengage. Gourmia air fryers share the same core components found in many compact countertop models: a compact control board, a heating element, a small fan, a temperature sensor, and a sturdy latch. Over time, repeated heating cycles, vibrations, and small mechanical stresses loosen connectors, wear out seals, or cause buildup in vents. The upshot is that many issues look scary at first but map to predictable root causes. This guide presents a methodical approach to diagnose, prioritize parts, and decide whether to DIY or call a professional. For gourmia air fryer repair, clear symptom recognition saves time and monetizes peace of mind.
Safety first: power, unplugging, and electrical checks
Safety is non-negotiable when repairing any small kitchen appliance. Before you touch the air fryer, unplug it from the wall outlet and wait until internal heat dissipates. Use non-conductive tools, keep your workspace dry, and avoid touching metal components while the device could still retain charge. If the power cord shows signs of damage, stop and replace the cord or the entire unit rather than attempting a risky repair. A quick safety check with a non-contact voltage tester can confirm there is no live current before you proceed. If you notice exposed wires, a sizzling smell, or scorch marks, do not continue; professional repair or replacement is advised. The goal is to reduce the risk of electric shock, fire, or personal injury while you troubleshoot.
Testing the heating element and thermostat
The heating element and thermostat are common failure points in Gourmia air fryers. With the unit unplugged, use a multimeter to test continuity along the heating coil and across the thermostat terminals. Look for open circuits (no continuity) or obvious signs of damage. If the thermostat doesn’t respond to temperature changes or clicks into a safe-open state, it may need replacement. Remember that intermittent heating problems can also stem from loose connectors, so double-check every wire route and connector housing. Perform any tests carefully and avoid bending fragile board traces during inspection.
Inspecting the control board and electronics
The control board governs timing, temperature, and motor operation. Damaged traces, burnt components, or swollen capacitors are indicators of a failing board. Inspect for discoloration, melted insulation, or unusual smells. If the display behaves erratically or freezes but physically looks intact, you may need a firmware reset or board replacement. When replacing electronics, ensure you source a compatible board for your Gourmia model and avoid mismatched firmware versions that could cause further issues. Document wire colors and connector pinouts before disconnecting anything to aid reassembly.
Door interlock and latch issues
A faulty door interlock can prevent the fryer from heating even when other systems seem functional. Inspect the latch for alignment, wear, or debris that might prevent full engagement. Test the interlock switch with a continuity check when the door is closed but not running; some models require the switch to detect door position before allowing heat. Clean any residue from the latch and switch area and replace damaged switches as needed. A failing interlock is a safety-critical part—avoid shortcut repairs that bypass interlock function.
Fan, airflow, and basket issues
Poor airflow reduces heating efficiency and leads to uneven cooking. Inspect the fan blades for obstruction, dust buildup, or bearing noise, and verify that the air path from the heating element to the basket is clear. Clean vents and the basket housing with a soft brush or microfiber cloth. If the fan motor makes grinding sounds or refuses to spin, it may need replacement or lubrication (where manufacturer-approved). Ensuring clean vents and an unobstructed air path is often the easiest, most visible fix that restores performance.
Replacing parts: which components you can safely swap
Some Gourmia repairs involve straightforward replacements that a confident DIYer can handle. Common swap candidates include the heating element, thermostat, door interlock switch, and fan assembly. Always verify compatibility with your exact model and batch code, and prefer OEM or manufacturer-approved parts when possible. If you’re unsure, start with the simplest component (interlock switch or thermostat) before tackling the heating element or control board. Keep track of parts and screws with labeled containers to simplify reassembly.
DIY repair workflow: a practical plan
Approach repairs with a clear sequence: confirm safety, identify the failing subsystem, test suspected components, replace as needed, and re-test the unit. Maintain a clean, magnet-friendly workspace to prevent lost screws and small components from rolling away. After any repair, run a short test cycle at a low temperature to verify basic operation before attempting a full cook trial. If you notice any unusual behavior during testing, stop and reassess to avoid further damage.
Safety disclaimers and when to stop DIY
Not all Gourmia air fryer issues are safe or economical to fix at home. If you smell burning insulation, hear arcing, see smoke, or notice significant heat leakage, unplug immediately and seek professional repair. If you lack experience with electrical devices or the model uses proprietary firmware, professional service is strongly recommended. Always weigh the cost of parts and tools against the price of a replacement unit, and consider extended warranties or service plans for expensive models.
Maintenance routines to prevent future Gourmia issues
Preventive maintenance reduces the frequency of repairs. Regularly clean vents, inspect the door seal, and keep the interior dry after cooking. Wipe the exterior with a damp cloth and avoid chemical cleaners that could degrade seals. Schedule an annual check to inspect connections, replace worn gaskets, and verify proper calibration. A small maintenance routine now can save larger headaches later and extend the life of your Gourmia air fryer.
Sourcing parts and verifying compatibility
To source parts, use model-specific identifiers (model number and batch code) from the back label of your unit. Prefer parts lists from trusted suppliers or official Gourmia parts pages, and verify compatibility with your exact model revision. When ordering, confirm the part’s electrical ratings and connector types match your fryer, and double-check return policies in case of incompatibility. Keeping a simple parts checklist helps ensure you receive correct, safe replacements.
Tools & Materials
- Multimeter(To test continuity and voltage on heating element and control circuits)
- Screwdriver set (Phillips and flathead)(Magnetic tips recommended for easier component handling)
- Heat-resistant gloves(To protect hands when handling hot components)
- Non-conductive pry tools(Plastic tools to avoid damaging plastic housings)
- Soft brush or microfiber cloth(For cleaning vents, sensors, and fans)
- Replacement parts kit (thermostat, door interlock, fuse, fan if needed)(Only if tests indicate a faulty component)
Steps
Estimated time: 1-2 hours
- 1
Power down and unplug
Ensure the unit is completely disconnected from power. Wait for any residual heat to dissipate and remove any accessories. This prevents electric shock and protects sensitive components during inspection.
Tip: Never work on a plugged-in appliance; use a dry, static-free workspace. - 2
Access the internal components safely
Remove the outer housing screws and gently open the shell to expose the interior. Keep track of screws and small parts, placing them in labeled containers. Photograph wire routing as you go to aid reassembly.
Tip: Lay out fasteners in the same order you remove them. - 3
Check for loose connections and obvious damage
Inspect all visible connectors for corrosion, discoloration, or looseness. reseat any loose connectors firmly but carefully. Look for burnt marks or melted insulation that indicates overheating.
Tip: Power down again before reseating any connectors. - 4
Test heating element and thermostat with a multimeter
With safety precautions in place, test continuity across the heating element and across the thermostat terminals. If there is no continuity where there should be, or if the thermostat does not respond to temperature changes, plan for replacement.
Tip: Document your readings and compare against the model’s specification if available. - 5
Check the door interlock switch and latch
Inspect the interlock mechanism for wear, debris, or misalignment. Test the switch with a multimeter when the door is closed but the unit is not operating. Clean and realign or replace the switch if it fails the test.
Tip: A misaligned latch is a common cause of false heat-off conditions. - 6
Inspect the fan and air path
Clear any obstructions from the fan and ensure vents are clean. Spin the fan by hand to check for smooth operation and listen for unusual noises. Clear any dust or grease buildup that could impede airflow.
Tip: Avoid wiping electrified elements directly; focus on surrounding vents and blades. - 7
Replace identified faulty parts
Install new components only after confirming the fault via testing. Use model-compatible parts and follow the manufacturer’s torque guidelines when reattaching fasteners.
Tip: Double-check part orientation and connector shapes to prevent misalignment. - 8
Reassemble and perform a controlled test
Carefully reassemble the unit and plug it in. Run a short test cycle at a low temperature to verify basic function before a full cooking test. If anything seems abnormal, power down and re-evaluate.
Tip: Start with gentle settings to observe operation without risk of overheating.
Got Questions?
What are the most common Gourmia air fryer issues that require repair?
Typical problems include no power, uneven heating, erratic temperature readings, and a door interlock that won’t disengage. Start by ruling out power and wiring issues before moving to heating elements and sensors.
Most Gourmia repairs involve power, heating elements, and door interlock issues, usually diagnosed with a methodical check of safety, heating, and sensors.
Can I fix a Gourmia air fryer myself?
Basic issues can often be tackled by a capable DIYer with the right tools and model-specific guidance. Avoid high-risk tasks like surging electrical components or bypassing safety interlocks without professional advice.
Yes, many common problems can be fixed at home if you’re careful and follow a proven guide.
Which parts fail most often on Gourmia air fryers?
Heating elements, thermostats, door interlock switches, and control boards are frequent failure points. Inspect these areas first if you notice heating or control issues.
Heater elements and door interlocks are among the most common failures, so check those first.
Where can I buy compatible replacement parts?
Look for model-specific parts from authorized retailers or official Gourmia parts pages. Verify compatibility with your exact model and batch code before purchasing.
Buy parts that match your model’s exact code to ensure proper fit and safety.
Is repairing cheaper than buying a new unit?
It depends on the fault and part costs. If replacement parts plus labor approach or exceed the cost of a new unit, replacement may be the wiser choice.
Sometimes it’s cheaper to replace, especially for older models with multiple failing parts.
How long does a typical Gourmia repair take?
A straightforward DIY repair can take 1-3 hours, depending on the complexity and your familiarity with electronics. More involved fixes may require professional service.
Expect an hour or two for basic fixes; more time for complicated parts or professional help.
Watch Video
Quick Summary
- Power down before inspection to ensure safety
- Test heating, thermostat, and interlock for root causes
- Use model-compatible parts and verify compatibility
- Regular maintenance prevents major repairs