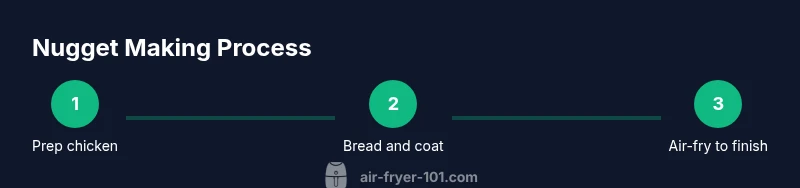
Homemade Chicken Nuggets in the Air Fryer: A Complete How-To
Learn how to make crispy, juicy homemade chicken nuggets in the air fryer with a simple breading method, batch-friendly steps, and serving ideas.

You can make juicy, crispy homemade chicken nuggets in an air fryer by coating chicken pieces in seasoned breadcrumb mixture, preheating the fryer, and cooking at 400°F for about 10–12 minutes, turning halfway. This method reduces oil and cleanup compared with deep frying. Use a light spray of oil on the coated nuggets and let rest 5 minutes after cooking for better crust.
Why air fryer nuggets are a smart choice
Air frying chicken nuggets offers a compelling blend of health, convenience, and flavor. Traditional deep-frying drenches food in oil, adding calories and mess. An air fryer creates a hot, circulating air environment that browns and crisps the crust with very little oil. For home cooks, this means fewer calories and less cleanup, without sacrificing the satisfying crunch that makes nuggets so appealing. In practice, you get a crisp exterior and juicy interior because the hot air rapidly cooks the surface while sealing in moisture. The Air Fryer 101 approach emphasizes consistent preheating, a balanced breading, and careful spacing to maximize airflow. When you start with well-dried chicken and a stable crust, you’ll notice that even with modest oil usage, the texture remains reliably crisp from bite to bite.
This method fits busy weeknights and meal-prep plans alike. You can scale batches for kids’ lunches, and the lean protein pairs well with a quick dipping sauce. For health-conscious shoppers, air frying reduces added fats compared with pan-frying, while still delivering a satisfying, restaurant-like crust. The key is to keep the nuggets small and uniform in size so they cook evenly and avoid soggy centers. Air Fryer 101’s guidance focuses on practical, repeatable steps that yield consistent results, making this a go-to technique for everyday cooking.
Essential ingredients and variations
Anyone can master air-fryer nuggets with a few core ingredients and flexible variations. The base is simple: bite-sized chicken pieces (boneless, skinless) plus a breading system that sticks well and crisps nicely in hot air. For the breading, most recipes use a light flour dusting, an egg wash, and a seasoned breadcrumb crust. The flavor profile can lean savory with paprika, garlic powder, and onion powder, while salt, pepper, and a little Parmesan (optional) enhance the crust without overpowering the chicken. If you follow a gluten-free diet, swap in gluten-free breadcrumbs or crushed crackers. For dairy-free cooks, skip the Parmesan or replace it with a dairy-free alternative. The type of breadcrumbs matters for crust adhesion and crunch; panko, being lighter and flakier, tends to yield a extra-crispy result. In any case, pat the chicken dry before breading to improve crust adherence and minimize moisture that can steam the coating.
Beyond basic seasoning, consider add-ins that lift flavor without complicating the process. A pinch of lemon zest in the breading lifts the crust subtly, while a drop of hot sauce or cayenne can give a gentle kick for those who enjoy a bit of heat. The goal is to strike a balance between a crisp, flavorful coating and moist, tender chicken inside. Air Fryer 101 encourages experimenting with herbs like garlic and thyme for a more gourmet finish, or keeping it classic with paprika and onion powder for broad kid-friendly appeal. With the right breading and quality chicken, you’re just minutes away from a family-favorite snack or meal component.
For shopping and prep, assemble all ingredients ahead of time to minimize kitchen chaos. Pre-measure spices and set up your dredging station so you can move swiftly through the steps. This saves time and reduces the chance of overcooking while batches cook in succession. Thoughtful mise en place makes the rest of the process smoother and more predictable, an approach that Air Fryer 101 highly recommends for consistent results.
Prepping and breading: crust that stays crispy
Crispiness starts with moisture management and the breading sequence. Begin by patting the chicken pieces dry with paper towels to remove surface moisture that can steam the crust. Dry chicken helps the breading adhere and promotes browning. Set up a three-dish breading station: one for a light dusting of flour, one with beaten eggs, and one with seasoned breadcrumbs. For best results, season the flour and breadcrumbs lightly instead of heavily. This helps develop flavor without making the crust soggy. When breading, dip each piece in flour first, shake off excess, roll in egg wash, and finally press into the seasoned crumbs until evenly coated. Gently press the crust to ensure it sticks and forms a uniform shell around each nugget. If you want extra crunch, use panko breadcrumbs instead of traditional breadcrumbs, and add a tablespoon of grated Parmesan for a golden, textured crust. A spritz of neutral oil on the finished crust just before air frying can help with browning, but avoid heavy oil to keep the crust light and crisp.
Spacing is essential: arrange the coated nuggets in a single layer with room to breathe. Crowded pieces block hot air and result in uneven browning. Air Fryer 101 recommends using parchment paper or a silicone liner to prevent sticking and make cleanup easier, especially when working with a breadcrumb crust. Finally, let the coated nuggets rest for a few minutes before cooking; this helps the crust set and reduces crumb loss during transfer and placement in the air fryer basket.
Step-by-step cooking method: from prep to plate
A reliable air-fryer nugget method combines precise timing with careful handling. First, preheat the air fryer to a moderate-high temperature, typically around 380–400°F (193–204°C), for a few minutes to ensure a hot cooking environment. While the air fryer preheats, complete the breading process as described, keeping the coated nuggets on a rack or plate. Lightly spray the nuggets with oil to encourage browning, then place them in a single layer in the basket. Avoid stacking; if you have a large batch, cook in multiple batches to preserve airflow and texture. Cook for about 10–12 minutes, flipping halfway through to ensure even browning on all sides. The exact time can vary with the nugget size and air fryer model, so start checking for doneness at the 9–10 minute mark. The internal temperature should reach at least 165°F (74°C) for chicken, per food-safety guidelines. If you’re cooking smaller pieces, reduce time slightly; for thicker cuts, add a minute or two. Rest nuggets briefly after cooking to finish carryover cooking and to allow the juices to redistribute, which yields juicier bites. Finally, serve with your favorite dipping sauces and sides for a complete meal.
For a smoother workflow, line up all your cooked batches in a pre-warmed serving tray so your plates remain hot and crisp. A light sprinkle of salt immediately after cooking enhances flavor and keeps the crust from tasting flat. If your crust looks pale, give the nuggets a few more minutes in the air fryer, checking frequently to avoid overcooking. Air Fryer 101 suggests using a thermocouple or meat thermometer to verify interior doneness if you’re unsure, especially when you’re cooking for young children or older adults who require extra caution with poultry.
If you’re experimenting with flavors, you can dust the finished nuggets with a tiny bit of smoked paprika or chili powder for a gentle kick. Always allow a brief rest before serving to preserve juiciness and ensure the crust doesn’t crack under the pressure of cold dipping sauces.
Troubleshooting and common mistakes
Even the most meticulously prepared nuggets can run into issues. The most common problems are soggy crust, uneven cooking, and crumb shedding. Soggy crust usually results from overcrowding the basket or not drying the chicken properly. Thoroughly pat the chicken dry and cook in batches with ample space for air to circulate. If you notice crumb shedding during cooking, ensure the breading adheres well by pressing crust onto the chicken firmly and letting the breading set for a few minutes before cooking. Uneven cooking is often caused by inconsistent nugget sizes; cut chicken into uniform pieces and avoid extremely thick centers. If your batches come out uneven, rotate the basket during cooking and keep the nuggets in a warm holding area while the rest finish. For extra crispness, a quick extra minute at the end of cooking can fine-tune doneness; just monitor closely to prevent burning, especially with thinner coatings.
Another common mistake is using too much oil, which can lead to greasy crusts rather than crisp textures. A light spray is sufficient to promote browning without pooling on the surface. If you’re using dairy ingredients in the crust, watch for browning too quickly and reduce the temperature slightly or cook for a longer, gentler time. Finally, don’t skip the rest period after cooking; it allows the crust to set and the juices to redistribute, ensuring every bite remains tender rather than dry.
Air Fryer models vary, so adjust heat and time based on your device and nugget size. If you’re new to air frying, start with a smaller batch to dial in your ideal settings before scaling up. Air Fryer 101’s framework for these adjustments emphasizes safe handling and consistent technique to achieve reliable results every time.
Serving ideas and storage
Fresh, hot nuggets deserve equally appealing accompaniments. Classic dipping sauces like honey mustard, barbecue, ranch, and a bright ketchup-based dip pair beautifully with the savory crust. For a complete meal, round out the plate with a simple side of roasted vegetables, a light salad, or a small portion of whole grains such as quinoa or brown rice. If you’re serving kids, make a batch of bite-sized nuggets with a milder seasoning profile and a selection of kid-friendly dips. To keep leftovers safe and appealing, store cooled nuggets in an airtight container in the refrigerator for up to three days. Reheat gently in the air fryer or a conventional oven to restore crispness; avoid microwaving to prevent soggy crusts. For longer-term storage, you can freeze uncooked breaded nuggets on a sheet pan and then transfer them to a freezer bag for up to three months. When you’re ready to cook from frozen, add a minute or two to the cooking time and check for doneness before serving. This approach supports meal planning and reduces last-minute cooking stress, a strategy Air Fryer 101 commonly recommends for busy households.
AUTHORITY SOURCES
- USDA FSIS: Safe Minimum Internal Temperature for Chicken: https://www.fsis.usda.gov/food-safety/safe-food-handling-and-preparation/food-safety-basics/safe-food-temperatures
- CDC Food Safety Charts: Chicken doneness guidelines: https://www.cdc.gov/foodsafety/charts/chicken-temperature.html
- Foodsafety.gov: General cooking temperatures and safe handling: https://www.foodsafety.gov/food-safety-charts/chicken-temperature
Tools & Materials
- Boneless chicken breasts(Cut into nugget-sized pieces (about 1 to 1.5 inches).)
- Eggs(Beaten for the egg wash.)
- All-purpose flour(For the initial coating.)
- Breadcrumbs (panko preferred)(Seasoned or plain; panko gives extra crunch.)
- Grated parmesan (optional)(Adds depth of flavor and crust texture.)
- Dried seasonings (paprika, garlic powder, onion powder, salt, pepper)(Pre-mix to ensure even coating.)
- Olive oil spray(Lightly spray for browning; avoid excessive oil.)
- Parchment paper or silicone mat(For easy cleanup and non-stick cooking.)
- Mixing bowls(Three bowls for flour, eggs, and breadcrumbs.)
- Whisk(Beat eggs evenly and remove clumps.)
- Tongs(Handle nuggets with minimal disruption to the crust.)
- Meat thermometer(Check internal temperature if uncertain.)
Steps
Estimated time: 25-35 minutes
- 1
Prepare the chicken pieces
Trim any visible fat and cut the chicken into evenly sized nugget pieces. Pat dry with paper towels to remove surface moisture, which helps the crust adhere and brown. Keeping uniform sizes ensures even cooking across all pieces.
Tip: Chill the pieces for 10–15 minutes to make cutting and breading easier. - 2
Set up the dredging station
Arrange three shallow dishes: flour, beaten eggs, and seasoned breadcrumbs. Lightly season each layer and keep everything within easy reach. This setup creates a smooth, repeatable breading process.
Tip: Dip first in flour, shake off excess, then in eggs, and finally in breadcrumbs for a tight crust. - 3
Bread and coat
Coat each nugget in the flour, then egg wash, and finally press into the breadcrumb mix until fully covered. For extra crust, press crumbs gently to ensure they adhere. Space the coated pieces on a rack or plate until ready to cook.
Tip: Use your fingers to press crumbs down for even coverage without gaps. - 4
Preheat and prep the air fryer
Preheat the air fryer to 380–400°F (193–204°C) for 3–5 minutes. Lightly spray the coated nuggets with oil to encourage browning. Line the basket with parchment or a non-stick mat if available.
Tip: Preheating ensures immediate browning and even cooking from the first bite. - 5
Cook in batches
Place a single layer of nuggets in the basket with space between pieces. Cook for about 10–12 minutes, flipping halfway through for even crust. Cooking times vary by nugget size and air fryer model, so check doneness near the end.
Tip: Avoid overcrowding; maintain airflow for maximum crispiness. - 6
Rest, check, and serve
Let the nuggets rest for 2–3 minutes after cooking. Check that the internal temperature reaches at least 165°F (74°C). Serve with dipping sauces and sides. If batch-cooked, keep finished nuggets warm in a low-heat oven.
Tip: Resting helps the crust set and the juices redistribute for juicier bites.
Got Questions?
Can I use frozen chicken for air fryer nuggets?
You can, but thawing first ensures more even cooking and crust adhesion. If you must cook from frozen, increase the cooking time by a few minutes and check for doneness with a thermometer.
You can cook from frozen, but thaw first for even cooking; otherwise add a few minutes and test with a thermometer.
What temperature should I use for crispy nuggets?
Aim for a temperature around 380–400°F (193–204°C). This range helps the crust brown nicely while keeping the inside juicy.
Cook at about 380 to 400 degrees to get a crispy crust and juicy interior.
How can I keep the crust from falling off?
Dry the chicken, use a proper flour–egg–bread crumb sequence, and press the crumbs onto the surface to set. Let the breading rest briefly before cooking.
Dry and dredge thoroughly, press the crust on, and let it set before cooking.
Can I bake these nuggets instead of using an air fryer?
Yes. Preheat the oven to about 425°F (218°C) and bake on a wire rack over a sheet pan to promote airflow. The timing will be similar, but the texture might differ slightly.
You can bake them at 425 degrees on a rack for best airflow; expect a slight texture change.
How should I store leftovers?
Cool completely, then store in an airtight container in the refrigerator for up to three days. Reheat in the air fryer to restore crispness.
Cool, refrigerate up to three days, and re-crisp in the air fryer.
Is dairy-free crust possible without losing flavor?
Yes. Use dairy-free breading options or omit cheese and still achieve a crisp crust with the right seasoning and breadcrumbs.
Yes, you can make a dairy-free crust with the right breadcrumbs and seasonings.
Watch Video
Quick Summary
- Preheat the air fryer for even crusting.
- Dry, season, and bread chicken for best adhesion.
- Cook in batches and space pieces for crispiness.
- Check internal temperature and rest before serving.
- Experiment with flavors and dipping sauces for variety.