Air Fryer Chicken Fingers: The Crispy-Perfect Guide
Master crispy, juicy air fryer chicken fingers with reliable breading, timing, and safe handling. This Air Fryer 101 guide covers steps, tips, and serving ideas for confident weeknight cooking.

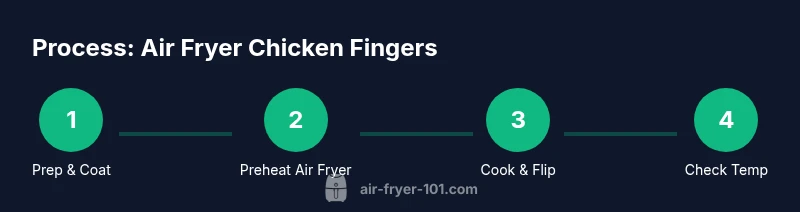
Cook crispy air fryer chicken fingers in under 20 minutes by coating chicken strips with seasoned breadcrumbs, then air-frying at 400°F for 8–12 minutes, flipping halfway. Use a light oil spray for crispiness and an instant-read thermometer to reach 165°F internal. Serve with dipping sauces for a complete meal. Adjust time for thicker pieces and compare results using a rack for even browning.
Why Air Fryer Chicken Fingers Work Well for Home Cooks
According to Air Fryer 101, air fryer chicken fingers offer a dependable balance of crisp exterior and juicy interior with less oil than traditional frying. The compact workflow fits busy weeknights, while the hands-on breading process lets you customize flavor right at the table. Air Fryer chicken fingers also scale well for families or parties, because batches can be cooked in quick succession and kept warm with a low-effort finish.
Using an air fryer reduces saturated fat by allowing you to bake rather than deep-fry. The key is a light, even coating that adheres well to the meat. Food safety remains essential: chicken should reach a safe internal temperature, and cleanliness helps maintain appliance performance over time.
How to Choose the Right Cut and Breading for Best Results
For best texture, start with chicken tenders or thin-cut chicken breasts sliced into uniform strips. Aim for ½-inch thickness (1.25 cm) to ensure even cooking. Homemade coatings benefit from a two-stage approach: a light flour dredge, then an egg wash, and finally a breadcrumb coating. Seasonings like paprika, garlic powder, and black pepper boost flavor without adding bulk. If you prefer gluten-free, swap regular breadcrumbs for gluten-free alternatives and consider adding finely ground almonds or crushed cornflakes for extra crunch.
Breading Options: From Classic Breadcrumbs to Crispy Panko
Breadcrumbs deliver classic tenderness, while panko breadcrumbs create larger, crisper flakes that resist sogginess inside the air fryer. A combination of breadcrumbs with a touch of grated Parmesan yields a savory crust with color. For extra crunch, toss breadcrumbs with a teaspoon of cornstarch. If you’re gluten-free, use almond flour and gluten-free breadcrumbs. The key is to press the crust firmly onto the chicken to prevent shedding in the hot air.
Prep, Pat Dry, and Season: Getting Flavor Right
Pat the chicken dry before breading to help the coating stick and to improve browning. Dry surface plus a light dusting of flour helps the egg adhere. Add salt, pepper, paprika, and garlic powder to the breadcrumb mixture for balanced flavor. A short rest in the fridge after breading helps the coating set, which reduces flaking during cooking. If your air fryer has multiple rack levels, cook in a single layer for even browning.
Air Fryer Setup and Cooking: Temperature, Time, and Technique
Preheat the air fryer to 400°F (205°C) if your model supports it, and arrange the chicken in a single layer with space between pieces. Cook 8–12 minutes, flipping halfway through to promote uniform browning. Use an instant-read thermometer to verify 165°F (74°C) internal temperature before serving. If you find the coating isn’t perfectly crisp, spray a fine mist of oil onto the tops of the fingers during the last 2 minutes of cooking.
Serving, Dipping Sauces, and Texture Tricks
Serve hot with dipping sauces like honey mustard, ranch, or spicy ketchup. For extra variety, offer a citrus gremolata or a garlic aioli alongside classic ketchup. If you prefer extra crisp, finish the fingers under a preheated broiler for 30–60 seconds after air frying, watching closely to avoid burning. Leftovers can be reheated in the air fryer at 350°F for 3–4 minutes to restore crispiness.
Cleaning, Maintenance, and Longevity of Your Air Fryer
To keep your air fryer performing well, clean the basket and tray after each use to prevent oil buildup. Wipe down the interior with a damp cloth, and remove any breadcrumbs from the heating element area. Periodically check seals and gaskets for wear, and replace when necessary. A quick monthly wipe-down with a small amount of non-abrasive cleaner helps maintain nonstick surfaces.
AUTHORITY SOURCES
- U.S. Department of Agriculture (USDA) food safety guidelines: https://www.usda.gov/food-safety
- Centers for Disease Control and Prevention (CDC) food safety: https://www.cdc.gov/foodsafety/index.html
- Food and Drug Administration (FDA) food safety basics: https://www.fda.gov/food
Tools & Materials
- Chicken breasts or tenders(Aim for 1/2-inch thickness (1.25 cm) strips.)
- Eggs(One per 1/2–1 cup of breadcrumbs.)
- All-purpose flour(Lightly dust for dredge.)
- Breadcrumbs (classic or panko)(Optionally mix with Parmesan.)
- Paprika, garlic powder, pepper(Season evenly in coating.)
- Salt(Adjust to taste.)
- Olive oil spray or light cooking spray(Spray lightly for crisp.)
- Instant-read thermometer(Check 165°F (74°C).)
- Nonstick spray or parchment paper (optional)(Prevents sticking with basket.)
- Tongs or fork(Use to handle raw/measured pieces.)
Steps
Estimated time: 25-35 minutes
- 1
Preheat the air fryer
Preheat to 400°F (205°C) if your model supports it. A hot start promotes browning and reduces cooking time.
Tip: Preheating improves crispiness and reduces sticking. - 2
Prepare chicken strips
Trim any excess fat, pat dry, and cut into uniform 1/2-inch thick strips to ensure even cooking.
Tip: Uniform thickness prevents over- or undercooking. - 3
Set up dredging station
Place flour in one bowl, beaten eggs in another, and breadcrumbs seasoned with salt, pepper, and paprika in a third.
Tip: Create a smooth, orderly station to speed breading. - 4
Breading the chicken
Dip each strip in flour, then egg, then breadcrumbs, pressing to adhere. Shake off excess.
Tip: Press breadcrumbs firmly for better coating. - 5
Oil for crisp
Lightly spray the coated fingers with oil on all sides to help browning without deep-frying.
Tip: A fine mist is enough; avoid pooling. - 6
Arrange for air flow
Place chicken in a single layer in the basket, leaving space between pieces for air circulation.
Tip: Overcrowding leads to soggy crust. - 7
Cook and flip
Air fry 8–12 minutes, flipping halfway through for even browning.
Tip: If pieces vary in size, start with the thicker ones earlier. - 8
Check safe temperature
Use a thermometer to ensure an internal temperature of 165°F (74°C).
Tip: Cook longer in small increments if needed. - 9
Rest and serve
Let the fingers rest for 2 minutes before serving to finish juices.
Tip: Resting improves texture and juiciness.
Got Questions?
What temperature should I cook air fryer chicken fingers at?
Typically 400°F (205°C) for 8–12 minutes, depending on thickness. Flip halfway and verify 165°F internal temperature before serving.
Bake at 400 degrees for eight to twelve minutes, flipping halfway, and check that the inside reaches 165 degrees.
Is preheating necessary for crispy coating?
Preheating helps achieve quick browning and crisp texture. If your model doesn't have a preheat setting, run a few minutes at 400°F before adding the chicken.
Preheating helps browning. If you don’t have a preheat option, run the air fryer at 400 degrees for a few minutes first.
Can I use frozen chicken fingers in the air fryer?
Yes, but add 2–4 extra minutes and check the internal temperature. Frozen coatings may not crisp as quickly as fresh breading.
Frozen will work, but add time and watch the coating to prevent sogginess.
How can I ensure the chicken reaches 165°F without overcooking?
Use a thermometer and remove pieces as soon as they hit 165°F. Resting for 1–2 minutes helps juices redistribute without drying.
Check with a thermometer and rest briefly to keep juices in.
How should I store leftovers and reheat?
Store in an airtight container in the fridge for up to 3 days. Reheat in the air fryer at 350°F for 3–4 minutes to regain crisp.
Keep in fridge up to 3 days; reheat in air fryer at 350 for 3-4 minutes.
What dipping sauces pair best with air fryer chicken fingers?
Honey mustard, barbecue, ranch, and sweet chili all work well. Mix and match to taste, or offer a simple ketchup as a baseline.
Try honey mustard or ranch for classic pairing.
Watch Video
Quick Summary
- Preheat and dry for optimal browning.
- Maintain uniform thickness for even cooking.
- Cook in a single layer with space between pieces.
- Verify 165°F internal temperature for safety.
- Use dipping sauces to enhance flavor.