How to Make Toast in an Air Fryer: A Step-by-Step Guide
Learn how to make perfectly crispy air fryer toast with the right temperature, timing, and toppings. Quick, easy, and customizable for busy mornings.

According to Air Fryer 101, you can make toast in minutes with an air fryer using simple bread and a little butter. Preheat to 320–360°F, place slices in the basket, and toast 2–4 minutes until browned. For thicker bread, or if you want more browning, add 1 extra minute and flip halfway.
Why Toast in an Air Fryer Saves Time and Effort
Air fryers deliver fast, consistent browning thanks to rapid hot air circulation. For busy mornings, toasting bread in an air fryer can be quicker than using a toaster or skillet, with less cleanup and fewer dishes. The Air Fryer 101 team notes that the compact footprint fits on small countertops and uses less energy for small batches, making it ideal for single servings. Understanding the browning process helps you dial in the exact color you want. Start with standard sandwich bread, then adapt duration based on slice thickness and personal preference. Basic toast requires just bread, a little butter if you like, and a preheated basket to ensure even heat distribution. For dairy-free toppings or olive oil sprays, keep portions light to avoid soggy edges. The key is a short, controlled bake that concentrates heat in the top layer of bread, creating that crisp exterior while keeping the interior tender. This approach helps home cooks achieve bakery-like toast at home, with more control over browning and texture than a traditional toaster.
Preheating and Heat Dynamics: What Makes Air Fryer Toast Different
In a conventional toaster, you rely on a dry contact surface to brown bread. An air fryer uses hot circulating air to hit all sides quickly, which leads to faster browning on a thinner crust and a more even color across the surface. Thinner slices can achieve a light, crisp bite in about 2 minutes at 320–340°F, while thicker cuts may require up to 4 minutes at 350–360°F. The benefit is a uniform crust with a soft interior, which many home cooks prefer. Air Fryer 101 analyses show that small variations in thickness or bread density can shift the browning timeline, so you’ll want to tailor timing to your loaf. In practice, a light first pass and a quick check can save you from overtoasting, especially when you’re adding toppings that melt or caramelize quickly. This section helps you calibrate expectations before you start cooking.
Bread Selection: The Foundation of Great Air Fryer Toast
The type of bread you choose dramatically affects texture and flavor. White sandwich bread toasts quickly and evenly, while whole-wheat and sourdough offer more complex aromas but may brown a bit slower. For best results, use slices that are about 1/2 inch thick and not overly dense; overly dense bread may remain pale in the middle. If you’re using gluten-free or high-fiber bread, you might notice different browning rates, so adjust the timing accordingly. Toast with a light coating of butter, olive oil, or a sugar-free spread to enhance browning without burning. Pre-sliced bread is convenient, but you can experiment with thicker artisanal slices if you prefer a heartier bite. Toppings after toasting, such as jam, avocado, or cheese, add variety without compromising texture.
Butter, Oils, and Spreads: Getting Flavor without Sogginess
Butter provides flavor and helps achieve a golden crust, but it can smoke or burn if overused. If you’d rather avoid dairy, a thin spray of olive oil or a dairy-free butter substitute works well. Apply spreads sparingly before toasting to prevent soggy edges, especially when using moist toppings. For sweeter toast, consider light cinnamon-sugar applications after toasting rather than before, which helps maintain crispness. If you’re topping with cheese or tomato later, a tiny amount of butter or oil can help with browning, but you’ll want to monitor closely to prevent flare-ups. Experiment with small amounts to find your preferred balance between crispness and flavor. This section guides you through choosing ingredients that maximize texture and taste while staying within 2–4 minutes of cooking time.
Timing and Temperature: A Practical Formula for Consistent Results
A reliable starting point is 320–360°F for 2–4 minutes, depending on bread thickness and desired browning. Preheating for 1–2 minutes helps ensure even browning from the first moment the bread touches the basket. If you’re toasting thinner slices, aim for 2 minutes; thicker slices may need 3–4 minutes. To optimize evenness, consider flipping the slices halfway through the cycle. If you’re using toppings that melt quickly, you may prefer to toast for a shorter initial time and add toppings after toasting. The key is consistency: use the same slice thickness, bread type, and preheat time for repeatable results. Air Fryer 101’s guidance emphasizes adjusting time rather than temperature for most bread types, which keeps results predictable.
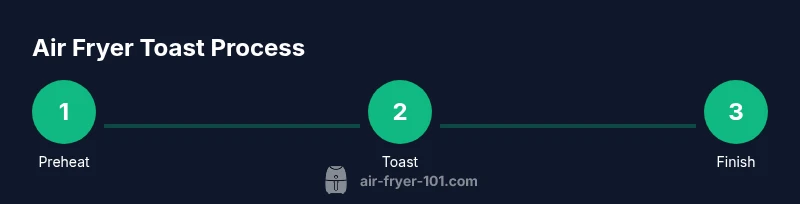
Step-by-Step Quick Plan: A Practical Walkthrough
To help you implement these principles, follow this high-level plan: 1) Preheat the air fryer to 320–360°F for 1–2 minutes. 2) Arrange bread slices in a single layer without overlap. 3) Toast for 2–4 minutes, checking at the 2-minute mark. 4) Flip halfway if browning is uneven. 5) Remove when edges are crisp and centers are tender, then add butter or toppings as desired. 6) Serve immediately and enjoy.
Troubleshooting Common Toast Issues
If your toast browns unevenly, rotate the slices or flip them halfway through. If edges brown too quickly, reduce time by 30 seconds to 1 minute or switch to a lower temperature. When bread feels dry or stiff, you may have toasted too long; reduce time or use a softer variety next time. If you notice smoking, stop cooking immediately and check for residual oil or butter that may have accumulated in the basket. These adjustments ensure consistent browning and texture across different bread types.
Crispiness, Clean-Up, and Next Steps
To maximize crispness and keep crumbs from accumulating, consider using a parchment liner or a perforated silicone sheet designed for air fryers. After toasting, wipe the basket with a damp cloth and give the tray a quick scrub to remove any melted butter or sugar residue. If you like to experiment, try variations like garlic butter, cinnamon sugar, or cheese toast, always starting with shorter times and gradually extending to reach your preferred browning. With practice, you’ll develop a reliable routine that yields restaurant-quality toast right at home. The Air Fryer 101 team encourages you to log your timings and bread types to build a personal quick-reference guide for future breakfasts.
Tools & Materials
- Air fryer(Any compact countertop model works; ensure basket is clean before use)
- Bread slices(About 1/2 inch thick; white or whole grain recommended)
- Butter or spread(Optional, for flavor; apply after toast if desired)
- Tongs or spatula(For safe handling of hot slices)
- Plate(For serving and rest handling)
- Parchment liner or perforated sheet(Optional to aid cleanup and prevent sticking)
Steps
Estimated time: Total: 8-12 minutes
- 1
Prep and preheat
Preheat the air fryer to 320–360°F for 1–2 minutes to ensure even browning from the start. Gather bread slices and any spreads you plan to use. This initial step reduces cold spots and makes the toast crispier overall.
Tip: Preheating minimizes color streaks and ensures consistent browning from edge to center. - 2
Arrange slices
Place slices in a single layer, without overlapping, so hot air can reach every surface. If you’re using thicker slices, consider removing one layer or toasting in batches to avoid overcrowding.
Tip: Single-layer placement is essential for even browning. - 3
Set time and temperature
Choose 2–4 minutes depending on bread thickness and desired browning. For very thin slices, start at 2 minutes; for thicker slices, opt for 3–4 minutes. This step is your baseline for repeatable results.
Tip: Starting with the lower end of the range helps prevent overtoasting. - 4
Check and flip
Open the basket at the halfway point to check browning and flip slices for even color. If the tops aren’t browning evenly, flipping can correct this quickly.
Tip: Use tongs to avoid burns and maintain crispy edges. - 5
Finish and add toppings
Remove bread when browned to your liking. If using butter or toppings, apply after toast to prevent sogginess and allow flavor to bloom.
Tip: Butter melts quickly; add after to preserve crispness. - 6
Serve and clean
Serve immediately for peak texture. Allow the air fryer to cool briefly, then wipe the basket and tray to remove crumbs and melted residue.
Tip: A quick wipe prevents buildup and preserves future performance.
Got Questions?
Can I toast bread without preheating the air fryer?
Preheating helps achieve even browning and a crisper crust, but you can toast without it. Expect slightly slower and less uniform browning, so monitor closely and adjust the time.
You can toast without preheating, but results are less predictable and browning may be uneven.
What temperature is best for air fryer toast?
A good starting point is 320–360°F; adjust within this range based on bread type and thickness. Higher temperatures brown faster but risk burning, especially with sugar or butter.
Try 320–360 degrees, then tweak up or down depending on your bread.
Can I toast bagels or thicker bread in an air fryer?
Yes, bagels and thicker slices work well, but they may require 3–4 minutes and possibly flipping halfway. Monitor closely to avoid burning the outside while the inside remains underdone.
Bagels toast nicely, just give them a bit more time and watch closely.
Is air fryer toast healthier than toaster toast?
Health differences are mostly about portions and toppings. Air fryers can use less added fat, but butter, oils, and sugary toppings still affect nutrition and browning.
It depends on toppings; air frying itself isn’t inherently healthier, but you can control oil use better.
Do I need to flip the bread during toasting?
Flipping isn’t always necessary, but it helps with even browning, especially for thicker slices or uneven bread. If your unit browns evenly, you can skip flipping.
Flipping can help, but it isn’t required if your bread is uniform.
Quick Summary
- Toast in air fryer is fast and repeatable
- Single-layer bread ensures even browning
- Preheat and start with lower times, adjust as needed
- Experiment with toppings after toasting for best texture
- Clean promptly to maintain fryer performance