Air Fryer Settings for French Fries: The Complete Guide
Learn how to optimize air fryer settings for french fries to get crispy exteriors and fluffy interiors. Includes temps, times, potato cuts, preheating, and troubleshooting for perfect results.

You will learn how to set your air fryer for french fries to achieve crisp outsides and fluffy interiors. This guide covers potato varieties, cutting sizes, preheating, oil use, cooking times, and post-cooking tips. You'll need an air fryer, potatoes, a small amount of oil, salt, and a timer to start.
Why proper air fryer settings matter for french fries
According to Air Fryer 101, getting french fries right starts with the basics: the cuts, dryness, and the right heat profile. When you dial in the settings, you influence moisture transfer, starch conversion, and the formation of a crisp exterior with a soft interior. The Air Fryer 101 team found that small changes in thickness or preheating can dramatically alter browning and texture. By aligning potato type, cut, and appliance behavior, home cooks can reproduce cafe-style fries at home. This section sets the stage: why fries can turn out differently across models and kitchens, and how precise settings remove guesswork. You will learn how to tune temperature and time, how to account for different potato types, and why preheating matters even if your model advertises a no-preheat option. Throughout this guide, you’ll see practical examples drawn from common scenarios, plus a simple mental model you can apply to any batch. Focus on consistency: uniform cuts, even coating, and avoiding overcrowding are the core levers for reliable results.
In practice, many home cooks underestimate how much the initial heat and air circulation shape the final fry texture. Air Fryer 101’s research emphasizes that crispness starts from the moment you select a cut and begin drying the starch. Even the slightest thickness variation can push you toward pale outsides or soggy centers. The message is clear: be deliberate with size, dryness, and initial heat, and you’ll eliminate most common disappointments. The approach you take here also translates to different potato varieties, from russets to Yukon Golds, each contributing a distinct balance of starch and moisture. As you read on, you’ll see concrete recommendations tied to fry size and potato type, plus practical tips for timing shifts when your air fryer runs hotter or cooler than the manufacturer’s claim. This is where recipes meet mechanical reality, and your kitchen confidence grows.
If you’re unsure where to begin, start with a small test batch after selecting your potato cut. Use a single layer with a modest amount of oil and salt, then scale up once you’re satisfied with texture and doneness. Air Fryer 101’s approach is to build a reliable baseline you can adapt to future fries—whether you’re aiming for classic thin shoestrings or thick-cut wedges. The result is consistently crispy edges and a creamy interior, not a dry, chalky center. By following the steps outlined later, you’ll be able to reproduce your ideal fry every time.
Finally, note that many models have slightly different heat responses. The key is to treat your air fryer like a programmable oven: establish a baseline setting, monitor closely during the first batch, and make small adjustments for subsequent batches. With patience and the right settings, french fries in an air fryer can rival fried versions from your favorite takeout, with the added health benefits of less oil.
Look for stable browning when you maintain consistent spacing on the rack or basket and avoid crowding. If your fries turn out pale, you likely need a hotter base or a longer cook time; if they brown too quickly on the outside but stay soft inside, your cuts are too thick or you’re starting with too thick of a layer. The core idea is to harmonize cut size, moisture removal, and heat exposure. In the next sections, we’ll map out a practical framework you can apply to almost any air fryer and any fry style, along with troubleshooting steps and tricks to maximize crispiness. The goal is reliable, repeatable results that impress family and guests, every time.
In short, great fries begin with thoughtful settings, not guesswork. As you gain experience, you’ll learn to adapt time and temperature for your specific device and batch size, but the foundational principles remain the same: even cuts, thorough dryness, moderate oil, and steady heat. Air Fryer 101’s recommendations will help you build that foundation quickly and smoothly, so you can focus on perfecting flavor and texture instead of wrestling with your appliance.
Tools & Materials
- Air fryer(Choose capacity matching batch size; larger batches require multiple runs for even air flow.)
- Russet or all-purpose potatoes(Medium-starch varieties yield a crisper exterior and fluffy center.)
- Neutral oil(1–2 teaspoons per batch, optional but helps with browning.)
- Salt(Season after cooking for best adherence and flavor.)
- Chef's knife(For uniform sticks; aim for 1/4 inch thickness.)
- Mixing bowl(Optional for tossing fries with oil and seasoning.)
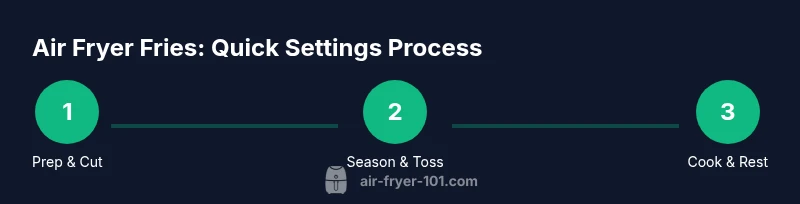
Steps
Estimated time: 25-35 minutes
- 1
Prep potatoes
Wash and peel if desired, then cut potatoes into uniform sticks about 1/4 inch thick. Uniform thickness ensures even cooking and browning. Dry the sticks thoroughly with a clean towel to remove surface moisture that can steam fries.
Tip: Dryness is critical; moisture on the surface creates steam and reduces crispiness. - 2
Optional soak
Soak cut potatoes in cold water for 15–30 minutes to remove surface starch, which helps achieve a crisper exterior. Drain and pat completely dry before seasoning.
Tip: If time is tight, skip soak but ensure thorough drying after washing. - 3
Toss with oil and salt
Toss fries in a bowl with a small amount of neutral oil and salt. The oil helps with browning and the salt enhances flavor. Do not over-oil; a light coat is sufficient.
Tip: Even coating matters more than quantity; aim for a thin, even film. - 4
Preheat the air fryer
Preheating (if your model supports it) helps achieve a consistent initial sear. If your model runs hot, shorten the initial cook slightly to avoid burning.
Tip: Preheating is especially beneficial for chip-like fries; it minimizes the risk of undercooked centers. - 5
Arrange in a single layer
Spread fries in a single layer in the basket or on the tray. Overcrowding blocks airflow and leads to uneven browning. Leave gaps for air to circulate.
Tip: If you’re cooking a large batch, cook in batches rather than stacking. - 6
Set time and temperature
Use a base setting of 375–400°F (190–205°C) depending on thickness. For 1/4 inch sticks, start at 380°F and cook 15–20 minutes, flipping or shaking halfway through.
Tip: Adjust time in 2–3 minute increments if fries are underdone or overdone. - 7
Finish and rest
Remove fries when edges are golden and centers are tender. Let rest 1–2 minutes to re-crisp as steam dissipates. Toss with a touch more salt if needed.
Tip: Resting briefly improves texture and helps the surface regain crispiness.
Got Questions?
Do I need to preheat the air fryer for french fries?
Preheating helps achieve a faster, more even sear on fries and can improve overall texture. If your model does not require preheating, you can still achieve good results by watching closely and adjusting cook time as needed.
Yes, preheating helps fries brown evenly. If your oven doesn't require it, you can still monitor and adjust for best results.
What thickness should I cut the fries?
Aim for uniform sticks about 1/4 inch thick (roughly 6 millimeters). Thinner fries brown faster and crisper; thicker fries may stay soft in the center.
Keep the fries about a quarter inch thick for even cooking.
Should I soak the potatoes before air frying?
Soaking removes surface starch and can improve crispiness, especially for thinner cuts. If you’re short on time, proceed with thorough drying and a light oil coating.
Soaking can help with crispness, but drying well works too if you’re short on time.
Can I air fry frozen french fries?
Yes. Frozen fries typically require less oil but may need a few extra minutes. Shake midway and check for your preferred doneness.
You can air fry frozen fries; adjust time and shake mid-way.
How can I keep fries crispy after cooking?
Let fries rest for a minute or two off the heat to re-crisp, then serve immediately. Avoid stacking hot fries in a bowl, which traps steam.
Rest briefly after cooking to keep them crispy, then serve right away.
What if my fries don’t brown evenly?
Ensure fries are in a single layer with space between pieces. If needed, cook in batches and adjust the time by 1–3 minutes per batch.
If browning is uneven, cook in smaller batches and adjust time slightly.
Watch Video
Quick Summary
- Choose uniform cut thickness for even browning.
- Dry fries thoroughly before cooking.
- Do not overcrowd the basket to maintain airflow.
- Preheat when your model supports it for consistent results.
- Rest briefly after cooking to maximize crispiness.