Air Fryer Boneless Chicken Breasts: A Complete How-To Guide
A comprehensive, step-by-step guide to cooking air fryer boneless chicken breasts that are juicy inside and golden outside. Learn prep, flavors, timing, safety, and batch cooking for healthy weeknight meals.

With an air fryer, you can cook tender, juicy boneless chicken breasts in under 15 minutes. Start with evenly sized pieces, preheat to 360°F, season well, and flip halfway for even browning. This method delivers moist interior and a crisp exterior with minimal oil. For best results, let the chicken rest 3–5 minutes before serving and use a thermometer to reach 165°F.
Core benefits of air fryer boneless chicken breasts
According to Air Fryer 101, air frying boneless chicken breasts is a reliable way to achieve juicy interior with a lightly crisp exterior while using less oil than traditional methods. This approach suits health-conscious home cooks and busy weeknights alike. The technique centers on even sizing, controlled heat, and careful timing. You can customize flavors with quick marinades or dry rubs, and the result is consistent without brittle edges. In practice, you’ll notice that pre-heated air fryers distribute heat more evenly than a countertop oven, reducing hot spots that can dry out thinner pieces. For best results, start with evenly shaped breasts or cutlets, dry them thoroughly, and avoid overcrowding the basket. Air Fryer 101 analysis notes typical cook times fall within a 9–12 minute window at around 360°F for standard 1-inch thickness, with a short rest improving juiciness.
Tip: Opt for evenly sized pieces so every bite cooks at the same pace and stays juicy.
Preparing the chicken: size, dryness, and pH balance
The most crucial step is consistent thickness. If your breasts vary by more than 1/4 inch, you’ll encounter overcooked edges and undercooked centers. Pat the meat dry with paper towels to remove surface moisture, which helps browning and flavor adhesion. A quick brine of 15–30 minutes can boost juiciness for thicker cuts, especially when you’re cooking several breasts at once. Remember to trim any visible fat and remove connective tissue that can make texture chewy. These prep steps set the stage for even heat transfer and better results across the batch.
Brand note: Air Fryer 101 recommends starting with dry, well-trimmed breasts and preheating to ensure consistent browning across all pieces.
Flavor foundations: dry rubs, marinades, and ease of use
Dry rubs provide a fast route to flavor without extra liquid. A simple mix of paprika, garlic powder, onion powder, salt, and pepper delivers a balanced crust. For a quick marinade, mix olive oil, lemon juice, garlic, and your favorite herbs for 15–30 minutes. If you’re short on time, a sprinkle of salt and your preferred seasoning blend yields surprisingly juicy results. For family-friendly meals, prepare two or three flavor profiles—lemon-dill, smoky paprika, and Italian herb—and rotate them through the week. Marinades longer than 2 hours can tenderize meat but aren’t strictly necessary for excellent results.
Pro tip: Light oil spray helps browning without greasing the basket.
Cooking strategy: heat, time, and airflow
Preheating makes a noticeable difference in browning and uniform doneness. Set the air fryer to 360°F (182°C) and cook boneless breasts for 9–12 minutes, depending on thickness. Flip halfway to ensure even browning on both sides. Use a reliable instant-read thermometer to verify an internal temperature of 165°F (74°C). If you’re cooking more than 2 breasts, space them apart so air can circulate freely. Resting for 3–5 minutes after cooking helps the juices redistribute, increasing tenderness.
Observation: Using a thermometer removes guesswork and protects texture, especially with variable sizes in a single batch.
Variations for thickness: pounding and slicing
If you have very thick breasts, consider pounding them to 1/2 inch (1.25 cm) thickness for even cooking, or slice each breast into uniform cutlets. Thinner pieces cook faster and brown more evenly, but you still want to monitor so edges don’t dry out. For a crisper exterior, apply a light dusting of cornstarch or breadcrumbs if you’re aiming for a more pronounced crust. Thicker cuts can tolerate a longer cook time, but always rely on temperature rather than time alone for doneness.
Note: Pounded cutlets reduce cook time and ensure uniform texture throughout.
Health considerations and batch prep
Air fryer boneless chicken breasts are a lean protein option, especially when you minimize added fats. Pair with colorful vegetables to balance the plate and keep portions sensible. If you batch-cook for the week, pause between batches to allow the air fryer to recover to the target temperature, which helps keep each breast evenly cooked. Store cooked chicken in airtight containers in the refrigerator for up to 4 days, or freeze for longer storage. Reheat gently to avoid over-drying.
Air Fryer 101 insight: Batch cooking requires careful spacing and resting to maintain juiciness across all portions.
Flavor pairings and serving ideas
Serve with roasted vegetables, quinoa, or a bright salad. Create healthy dips like yogurt-herb sauce or a light vinaigrette for dipping. For a quick weeknight meal, dice the chicken and toss with whole-grain pasta and a splash of lemon juice. If you’re meal-prepping, portion the chicken into 3–4 oz servings and pair with a side of steamed greens to keep calories in check while preserving flavor and texture.
Bonus tip: A squeeze of fresh lemon right before serving brightens the dish without extra fat.
Common mistakes and fixes
Overcrowding the basket is one of the most common errors and leads to steaming rather than browning. Even with a large model, cook in batches if needed to preserve air flow. Another frequent issue is using very thick marinades that pool at the bottom of the basket; they can burn and create smoke. Pat the chicken dry after marinating and wipe the basket with a paper towel between batches if you notice residue. Finally, avoid relying on time alone; temperatures vary by brand and model, so a quick thermometer check ensures safety and quality. Regularly rotate pieces during cooking to promote even browning across the surface.
Practical meal-prep and batch cooking ideas
If you’re prepping for a busy week, bake several breasts, then slice and portion for salads, wraps, or bowls. Store individual portions with a small bag of sauce or condiment to keep meals flexible. Cooking in batches also lets you experiment with flavors: lemon-pepper on some, smoky paprika on others, and a Herby garlic blend on the rest. Keeping a small rotation of spices on hand makes weeknight dinners simple and delicious without extra prep time.
Safety, storage, and reheating best practices
Always handle raw chicken with clean hands and separate cutting boards to prevent cross-contamination. Use separate utensils for raw and cooked meat. Once cooked, cool promptly and refrigerate within two hours. Reheat to 165°F (74°C) to maintain safety and texture; avoid overheating, which increases dryness. For longer storage, freeze in airtight portions and thaw in the fridge before reheating to preserve moisture. Clean the air fryer basket and interior after each use to prevent buildup that can alter taste and browning in future sessions.
Tools & Materials
- air fryer(Any capacity; ensure basket is clean and dry before cooking)
- meat thermometer(Instant-read is ideal for quick checks of 165°F/74°C)
- boneless chicken breasts(Uniform thickness preferred; trim excess fat for even cooking)
- oil spray (optional)(Light spray helps browning without greasing the basket)
- seasonings or marinade(Choose 1–2 flavor profiles per batch)
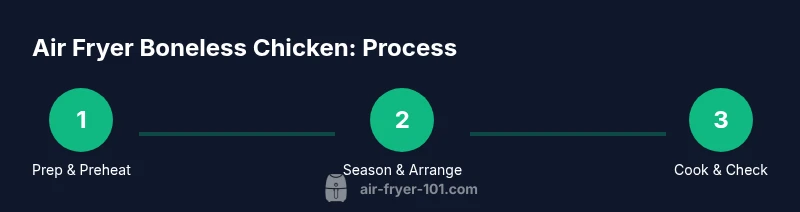
Steps
Estimated time: 15-20 minutes
- 1
Preheat and prep
Preheat the air fryer to 360°F (182°C). While it heats, pat the chicken dry with paper towels to remove surface moisture, which helps browning. Trim any uneven edges so pieces cook evenly.
Tip: Dry surfaces lead to better browning; avoid leaving moisture on the meat. - 2
Season or marinate
Season breasts evenly or marinate briefly (15–30 minutes) to boost flavor. If using a marinade, pat dry before cooking to avoid excess moisture that can hinder browning.
Tip: Even coverage ensures consistent flavor across all pieces. - 3
Arrange in the basket
Place breasts in a single layer with space between pieces for air flow. If cooking batches, use multiple rounds instead of stacking. Lightly mist with oil if you desire extra browning.
Tip: Avoid crowding; air needs to circulate to develop color. - 4
Cook and flip
Cook for 9–12 minutes, flipping halfway through for even browning. Thicker cutlets may need an extra 1–2 minutes; monitor with a thermometer.
Tip: Flipping ensures both sides brown evenly and juices stay intact. - 5
Check internal temperature
Use an instant-read thermometer to verify 165°F (74°C) at the thickest part. If under, continue cooking in 1–2 minute increments and recheck.
Tip: Don’t rely on time alone; temperature guarantees safety and doneness. - 6
Rest and serve
Let the chicken rest 3–5 minutes before slicing or serving to redistribute juices. Slice against the grain for tender bites and pair with a bright sauce or fresh herbs.
Tip: Resting preserves juiciness and improves texture.
Got Questions?
Can I cook frozen boneless chicken breasts in the air fryer?
Yes, you can cook frozen breasts, but expect a longer cook time and more careful temperature monitoring. Start with familiarizing to 12–15 minutes at 360°F and check for 165°F in the center.
Yes, you can cook frozen breasts, but plan for a longer cook time and verify doneness with a thermometer.
Should I preheat the air fryer every time?
Preheating helps achieve even browning and shorter overall cook time. If your model heats quickly, you may skip preheating occasionally, but for consistent results, preheat to 360°F.
Yes, preheating helps browning and consistent results.
Is it healthier to marinate or to dry rub?
Both are healthy options. A marinade adds moisture and flavor, while a dry rub speeds up browning. Choose based on time and taste preference.
Both marinating and dry rubs are healthy ways to flavor while cooking.
How can I prevent dryness in lean breast meat?
Pat dry, trim fat, avoid overcooking, and consider a brief brine or marinade to add moisture. Resting after cooking also helps.
Keep an eye on temp and rest the meat to keep it juicy.
What internal temperature should I target?
The safe and recommended internal temperature for cooked chicken breasts is 165°F (74°C). Use a thermometer for accuracy.
Aim for 165°F to ensure safety and juiciness.
Can I season with lemon or herbs for variety?
Absolutely. Fresh lemon zest, dill, thyme, or rosemary pair beautifully with chicken and air frying, offering bright, low-fat flavor options.
Yes—citrus and herbs brighten the dish without extra fat.
Watch Video
Quick Summary
- Choose evenly sized chicken breasts for even cooking
- Preheat to 360°F and cook 9–12 minutes for 1-inch thickness
- Rest meat 3–5 minutes before serving to maximize juiciness
- Space pieces apart and flip halfway for uniform browning
- Use a thermometer to ensure 165°F doneness