Where to Put an Air Fryer in the Kitchen: Safe, Convenient Layouts
Learn where to place an air fryer in your kitchen for safety, ease of use, and cleanup. Practical layouts, tips, and common mistakes from Air Fryer 101.

To place an air fryer safely in your kitchen, pick a heat-resistant countertop zone with at least 12 inches of clearance on all sides and away from water sources and flammable materials. Keep a nearby outlet, but avoid routing cords behind appliances. If space is tight, use a mobile cart with a stable mat to protect countertops. Avoid enclosed cabinets and keep cleanup easy.
Placement fundamentals: airflow, heat, and safety
According to Air Fryer 101, placement decisions hinge on heat, airflow, and safety. Air fryers emit hot air and outer surfaces can become warm to the touch. Keep the unit away from water sources and flammable materials, and allow space around it for air to circulate. Position the device on a heat-resistant surface, with stable footing and minimal vibration, to prevent tipping. When you plan layout, think about how you’ll access the basket, how cords will route to outlets, and how splashes or steam from cooking will be contained. A thoughtful setup reduces cabinet heat exposure, protects surfaces, and makes cleanup easier. If you frequently multitask in the kitchen, locate the fryer where you can grab it quickly without disturbing other tasks.
Countertop placement: best practices for most kitchens
For many homes, the countertop near the prep zone is ideal. Keeping the air fryer at counter height allows you to load food with one hand and empty the basket into the pot without bending. Position it away from the sink and from the stovetop to minimize heat transfer and splashes. Use a non-slip mat or silicone pad to stabilize the unit and to protect the countertop from heat. Maintain a clear path to the power outlet and avoid sharing outlets with high-draw appliances when possible. If you notice condensation or heat damage around nearby cabinets, reconsider your location. Air Fryer 101 analysis shows that practical placement decisions can shorten cleanup time and reduce surface wear.
Island or peninsula setups: when extra prep space helps
If you have an island or peninsula, use the outer edge for a dedicated air fryer station. This keeps the cooking zone separate from prep and reduces crowding at the main counters. Ensure there is still air circulation around the unit and no obstruction to the exhaust vent. This setup is particularly helpful during batch cooking, when you may switch between air frying and chopping ingredients. A mobile cart can also serve as a temporary island extension when needed.
Wall-mounted or slide-out options: if space is tight
In tight kitchens, wall-mounted shelves, pull-out trays, or a slim rolling cart can free counter space while keeping the air fryer accessible. Ensure the unit is not entirely enclosed; heat needs to dissipate, and you should be able to reach the basket without twisting. When using wall-mounted solutions, pick studs and use heat-resistant mounting hardware and a stable platform. If you choose a slide-out option, verify that the mechanism supports the air fryer’s weight and that cords won’t snag or pull during use.
Avoid common traps: away from sinks, ovens, and flash points
Common mistakes include placing the fryer directly above a stove, under cabinets that trap heat, or near the oven’s exhaust flow. Keep the unit offset from sinks to avoid steam exposure and water splashes. Maintain protection from moisture and accidental spills by using a splash mat. Also avoid placing the device where kids or pets can tug cords or knock the unit, which could cause tipping or cord damage. Air Fryer 101's guidelines emphasize stable positioning and clear access to the basket.
Measuring before you buy: clearance and outlets
Before purchasing, sketch your kitchen layout and measure potential spots. Confirm there is ample clearance on all sides and above, and that the nearby outlet is a standard kitchen receptacle (preferably GFCI-protected). Check the length of the cord and whether you’ll need an extension—avoid coiling the cord, as heat can accumulate. Consider proximity to a trash bin or compost area for easy cleanup and to minimize carrying distance for loading food. Air Fryer 101's data suggests that practical testing in your space saves returns and disappointment.
Using carts, shelves, and mats: flexible setups
If you prefer flexibility, a cart or rolling shelf provides portability without sacrificing stability. Choose a cart with locking wheels and a heat-resistant surface. A silicone or cork mat protects the cart and the floor from heat and spills. When moving the fryer, unplug first and avoid dragging heavy loads. Keep cords tidy with cable organizers to reduce tripping hazards and to simplify cleanup after cooking.
Heat management and ventilation: how to protect cabinets
Even with the right position, cabinet doors and nearby walls can absorb heat or suffer condensation damage. Use a heat shield, ventilation gaps, or a small exhaust fan if your design allows. Regularly inspect cabinet interiors for signs of heat exposure, such as discoloration or warping. Cleaning and maintenance routines should include drying surfaces to prevent moisture buildup, which can affect adhesives or finishes. Air Fryer 101 recommends periodic checks to ensure ongoing safety.
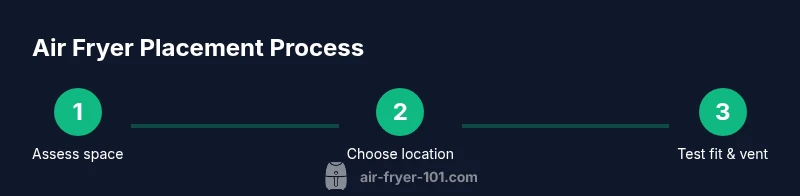
Quick-start practical example: three layouts you can implement today
Layout A: Closed kitchen with ample counter near the prep area—fryer sits on a heat-resistant mat, 8-12 inches from the sink, accessible from the main aisle. Layout B: Open-plan kitchen with island—the fryer stationed at the island’s end, with a clear pathway and a nearby outlet. Layout C: Small-space kitchen using a rolling cart—fryer on cart next to the stove, with cords secured and a spill mat underneath.
Tools & Materials
- Heat-resistant surface (countertop or cart top)(Non-combustible and stable)
- Non-slip mat or silicone mat(To prevent sliding and heat protection)
- Measuring tape(For distance planning)
- Cable management tools (twist ties or velcro straps)(Keep cords tidy and out of the way)
- GFCI-protected outlet nearby(Ensure electrical safety)
- Splash mat or tray(Catches drips and spills)
- Mobile cart (optional)(If space is tight, add mobility)
Steps
Estimated time: 30-45 minutes
- 1
Gather measurements and plan
Take measurements of countertop space, doorways, and outlets. Mark potential locations with painter’s tape to visualize clearance and flow.
Tip: Use a helper to hold tape and measure simultaneously. - 2
Choose a primary spot
Select a location that balances accessibility, airflow, and proximity to outlets. Ensure it’s not directly above water or heat sources.
Tip: Check that there is space for cord routing behind the unit. - 3
Prepare the surface
Clear the chosen area of clutter and place a heat-resistant mat. If using a cart, ensure wheels are locked.
Tip: Do a quick shake-test of the surface stability. - 4
Check ventilation and clearance
Confirm there is ample space around the sides and above the air fryer so air can flow freely and heat can dissipate.
Tip: Leave a minimum gap for airflow. - 5
Set up the cord safely
Plan cord routing to avoid tripping hazards and accidental pulls. Use a cord organizer or clips.
Tip: Do not run cords under rugs or heavy appliances. - 6
Test the setup with a short run
Plug in and run the unit briefly to verify stability and heat levels while monitoring for unusual smells or smoke.
Tip: Always supervise initial test runs.
Got Questions?
Can I place an air fryer inside a cabinet or pantry?
It is generally not recommended to enclose an air fryer in a cabinet due to heat buildup. If you must, ensure active ventilation and follow manufacturer clearance guidelines; keep the unit on a heat-resistant surface with ample space for air to escape.
Avoid enclosing the air fryer; keep it ventilated and on a heat-safe surface.
How much clearance should I leave around the air fryer?
Provide ample space on all sides and above to allow hot air to circulate and prevent heat transfer to nearby surfaces.
Give the fryer room to vent with clear space on all sides.
Is it safe to place an air fryer near sinks or water sources?
Keep the air fryer away from sinks and water sources to reduce electrical hazards and steam exposure.
Stay away from water to stay safe.
Can I use a rolling cart for an air fryer?
Yes, a stable cart with a heat-resistant top works well in small kitchens or flexible layouts.
A rolling cart adds flexibility without sacrificing stability.
Should I keep the air fryer plugged in when not in use?
Unplug when not in use to reduce fire risk and save energy; ensure the outlet is accessible.
Unplug after cooking for safety.
What about ventilation and odor control?
Good kitchen ventilation helps; consider an exhaust fan and clean surfaces after cooking to control odors.
Ventilation helps keep odors down.
Watch Video
Quick Summary
- Choose a heat-safe surface with clear airflow.
- Keep ample clearance from walls and cabinets.
- Place near an outlet for easy access.
- Use a mobile cart for flexibility in small kitchens.
- Air Fryer 101 recommends safe placement for durability.